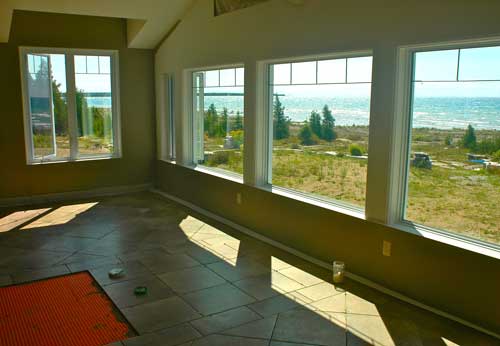
 Ceramic and porcelain tiles are gaining in popularity with home buyers because people love hard-surface floors. Tiles are hygienic and will last a lifetime with very little maintenance when properly installed. People can marvel at your quality work for years, but proper installation is critical. That’s because tiled floors can pose a liability risk for you as a builder unless you protect yourself. Cracking grout and broken tiles are a definite possibility, and they spell particular trouble because these faults almost always spring from problems at the heart of the entire installation. There’s no easy fix after things start to go bad, and that’s why tile troubles are such an expensive pain to rectify. Boosting the reliability of tile floors is one reason to incorporate the latest installation materials, tools and best-practice techniques into your work, and these will also boost your bottom line. It’s never been easier to install ceramic tiles profitably than right now. To show you how, I’ll take you to see Schluter-trained tile setter Dale Wallace as he uses an uncoupling membrane under large-format tiles installed over a plywood subfloor at a high-end project along the shores of Lake Huron.
 Uncoupling membranes are at the heart of this installation because they boost reliability big-time by allowing small amounts of side-to-side movement of tiles relative to the underlying subfloor. Changes in temperature and humidity can cause stresses to develop along the interface between tiles and substrate, and uncoupling membranes relieve these stresses, while also keeping the tiles fully supported from below. These lightweight rolls of plastic also replace the need for an additional layer of cement board or plywood on the subfloor, saving labour and time. Top-quality uncoupling membranes aren’t cheap, but they do boost profits if you factor in the labour they save and the callbacks they eliminate.
4 Steps to Setting Ceramic Tile
Modified thinset, uncoupling membrane, unmodified thinset, then tiles: This is what the installation sandwich looks like when working over wood.
 Step #1: Proper Prep Work
The job begins by moistening the surface with water and a sponge. If you forget this step, wood might draw moisture out of the thinset, preventing it from hardening to full strength. Though the wood must be thoroughly damp, there must be no standing water on top. Wait five minutes after sponging on the water to let the moisture even out. As you work, focus only on a swath as wide as the membrane you’re using. In this case that’s 1 metre or 3’ 3” for the DITRA membrane used on this project.
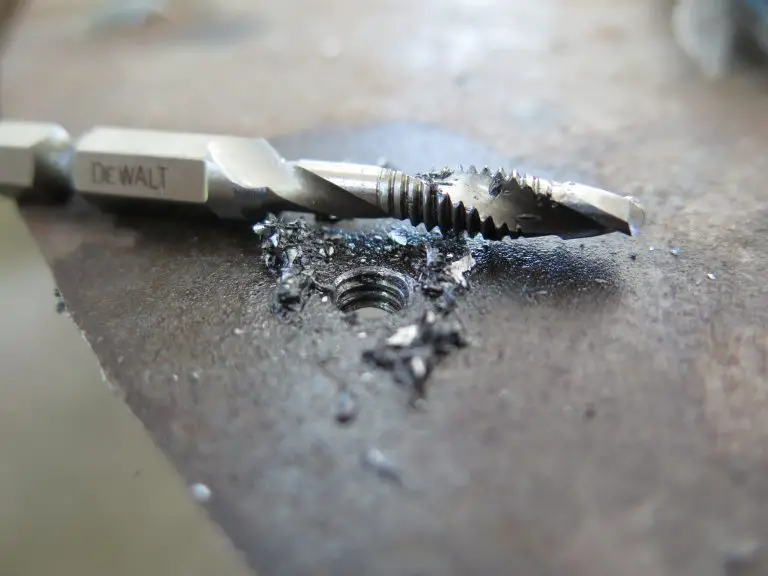
Step #2: Mixing Mortar
Next comes the thinset. If you’re working over wood, modified thinset is the stuff to use because it has additives that help resist the loss of moisture. Unmodified thinset is the mix to use later on, when you’re actually setting the tiles over 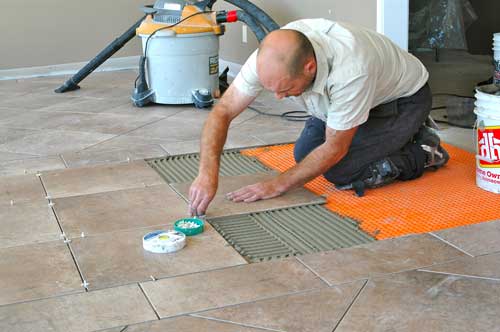 the membrane. Either way, how you mix mortar matters, and that’s why some installers weigh thinset with a scale and add measured amounts of water, instead of eyeballing it. You’ll find that a slightly more fluid consistency is best to engage the fleece backing fully. After mixing, let the mortar sit undisturbed to slate for 5 to 10 minutes, before mixing it again.
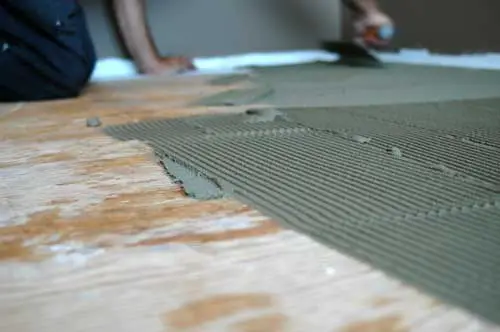
Step #3: Troweling
The next major step is troweling modified thinset onto the subfloor to bond the membrane, but before you do, cut all the pieces of membrane you’ll need for the room. A felt-tip marker and scissors work best, since accuracy is important. You want the membrane to stop 1/8” away from the wall, without rolling up onto the wall surface itself. It’s important that a small amount of space exist between the edge of the DITRA and the surrounding walls, to allow for potential expansion of the assembly.
 Watch my DITRA video to see ceramic tiles going down over an uncoupling membrane.
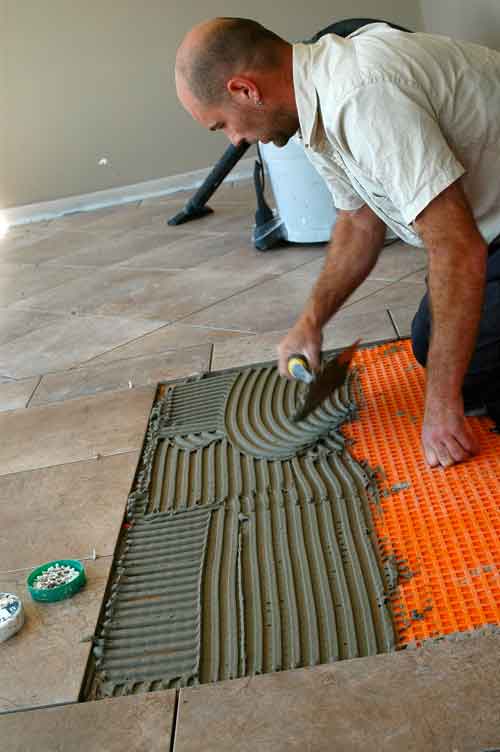
Trowel tooth size is important for getting the right amount of thinset onto the wood, and DITRA works best with a 11/64” x 11/64” square tooth trowel, or a v-notched 1/4” x 3/16” or 5/16” x 5/16” trowel. There’s nothing complicated about application, just make sure you get full coverage on the floor. You’ll also want to make sure your trowel isn’t worn enough to reduce the depth of notches.
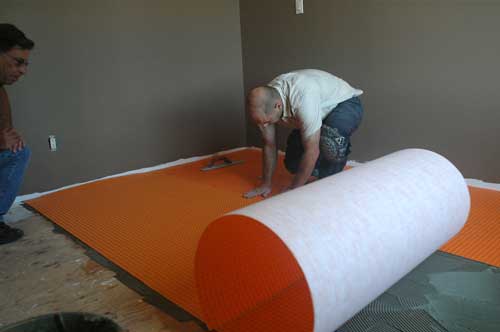
The underside of the DITRA membrane used here has a fleece backing to anchor it to the floor. Unroll the membrane evenly onto the mortar, without ripples, then immediately press it onto the floor systematically using a screed or float trowel, working from one end of the room to the other. If you do find the membrane laps up onto the far wall when you’re done because you accidentally cut it too long, no problem. Just trim the excess plastic using a sharp utility knife until it lays flat. Until you get experience with the system, you might also want to take a peek underneath the membrane by peeling it back. The proper amount of thinset will completely cover the fleece on the underside, without any excess thinset being present.
Step 4: Installation Itself
The next step is tile installation, and it’s essential that unmodified thinset be used here. While modified thinset has been a mainstay of the industry for years, installing tile over an uncoupling membrane is a unique situation. Modified thinset is designed to retain moisture within the mix when installed over substrates that might draw moisture out. But since moisture is effectively trapped between the uncoupling membrane and the tiles above, a modified formulation is definitely not ideal. In some cases it might result in a tile installation that takes a long time to firm up, if it ever does it all. You won’t have this trouble with unmodified thinset.
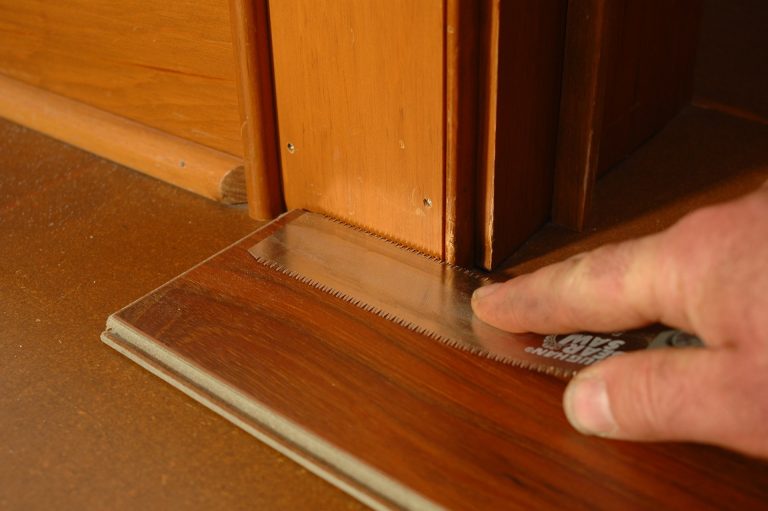
When it comes to cutting tiles for installation, tile saws are effective though not necessarily ideal. For ordinary straight cuts, you’ll find a good snap cutter is faster, quieter, neater and less expensive to operate. Whether you’re cutting tiles with the saw or a snap cutter, the cut edges can be placed in full view in the final installation if they’ve been smoothed and beveled slightly. A diamond abrasive sponge lubed with water is a fast and effective tool for this job. Just rub the top corner of a newly-cut edge and it’ll blend perfectly with neighbouring factory edges.
Spreading thinset over an uncoupling membrane is a little different than working on a smooth subfloor. In addition to the usual berms of thinset sitting proud of the surface for bedding the tiles, the cavities in the membrane also need to be filled. The flat edge of a trowel works best for filling the cavities, with the notched trowel for spreading the thinset that sits above the membrane and beds the tile.
Is Bigger Better in Tile Talk?
The trend in hard surface tiles these days is for larger tile sizes, and this creates a couple of challenges. First, larger tiles are more demanding to install flat. It takes more care to set them so edges aren’t sitting proud of a neighboring tile. Also, the integrity of a large tile installation is more dependent on full coverage of thinset than with smaller tiles. Both of these challenges are more easily met if you take the extra time to back butter tiles. With thinset present on both the tile and the uncoupling membrane below, you’ve got more leeway for tweaking tile position during installation.
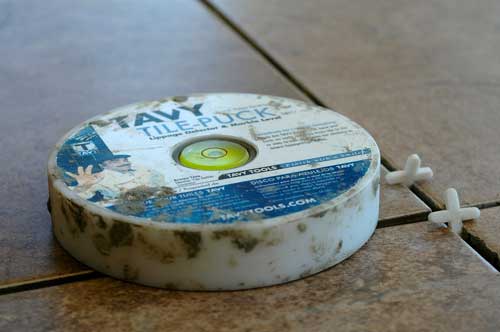 Although some pros shun them, plastic spacers are an effective rough guide for tile spacing, and the best kind are also useful for clearing out excess thinset that oozes up into the grout space. A leveling puck makes it easier to set tiles flat and in the same plane as the rest of the floor. Simply slide it around to highlight edges that are too high and tiles that aren’t level.
Ceramic and porcelain tiles used to be exotic, but now home buyers expect them. And while the ante might be upped, as a builder you can minimize the risks and maximize tiling profits if you do things right.
 Sidebar: Prevention Better Than Cleaning
Tiling usually happens when finished wall surfaces are up and painted, and you’ll save time if you protect the walls before tiling and grouting. Staple up a swath of foam sill gasket before the tiles go down, to protect the walls from thinset and grout, eliminating any risk of damage and the need to clean the wall surface. The use of sill gasket also keeps grout and thinset away from the walls, retaining the all-important expansion gap around the room.


I hope you found this content useful!
Your generous support helps me produce more practical, hands-on content that I hope you’ll find useful.
Steve Maxwell