Concrete, brick and stone play a larger role than ever in today’s home building and renovations, and that’s a good thing. You can’t beat the beauty, durability and high resale value of masonry in all its forms. What’s not so easy to understand is the task of fastening objects to a brick wall, a block basement, a concrete floor or an ICF concrete structure. It’s not as straightforward as working with wood, though with a few key strategies and tools on your side, you can tame the task like a pro. Here are some of the fasteners and approaches I use for anchoring to concrete.
Tapcon Screws – No Anchors Needed
When you’re deciding on an approach, begin by dividing the job of masonry anchoring into light, medium and heavyweight applications. Of these three, middleweight jobs are the most common and the easiest to tackle thanks to an innovation generically called the Tapcon screw. The term comes from the original brand name of the fastener, and they’re biggest advance in masonry anchoring options to hit the building scene in a long time.
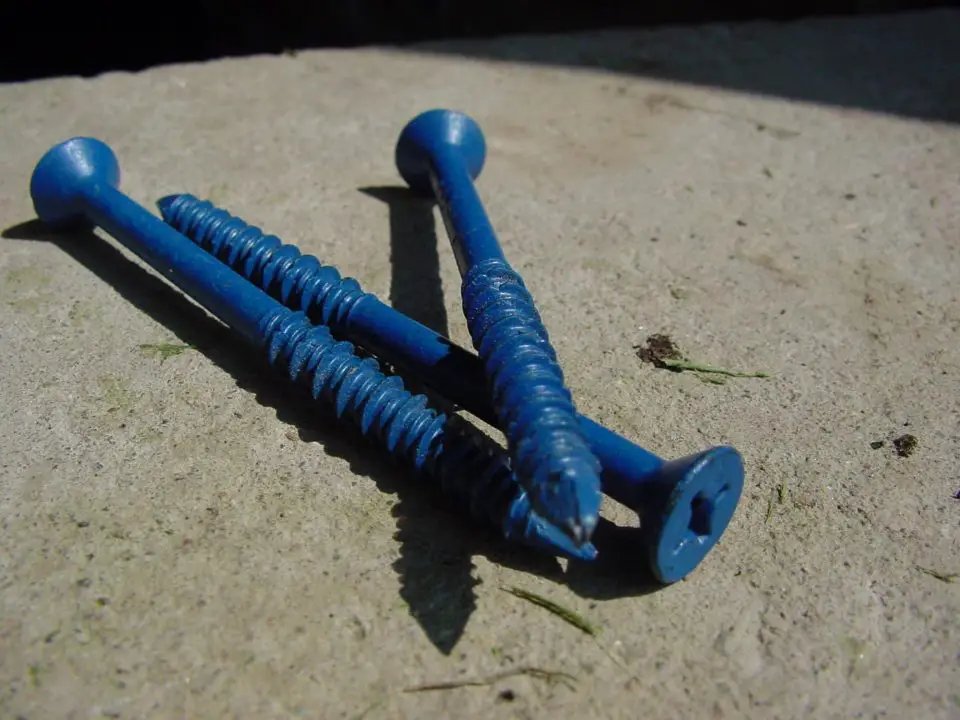
Tapcons are terrific because they can thread directly into predrilled holes in brick, block, concrete and stone. No plastic or metal anchors required, boosting the speed and holding power of the results. You simply pre-drill a hole of the correct size and torque the Tapcon down, preferably with a socket wrench or impact driver. That’s it.
Some packages of tapcons even come with the proper size masonry drill bit included. That’s because the size of the pilot hole is extremely critical for success. Too small and the tapcon won’t thread into the masonry at all. Too large and the two-tiered, hardened steel threads won’t be able to grip the sides of the hole with significant strength. There are two applications where Tapcons shine particularly brightly:
Insulated Concrete Forms: With insulated concrete forms (ICFs) being used for more and more above-ground walls, the need to anchor into concrete that’s a couple of inches below interior wall surfaces is a common challenge. You’ll find similar situations in most high-rise condos, too, though typically without the foam. Ordinary, angled-nail picture hooks are fine for anchoring objects 10 lbs. or less to drywall over an ICF wall, but tapcons are best for shelves and heavier items. Choose a length that puts 1 1/2 to 2 inches of thread into the concrete beneath the foam.
Concrete Slab Floors: Securing 3/4-inch plywood to a concrete slab floor is another option for tapcons. Just lay the ply on the floor, then drill right through into the concrete with a carbide drill bit. Torque the screws down with an impact driver and you’re done. Go ahead and fasten site-finished hardwood, prefinished engineered wood or any other finished flooring that requires glue or nails driven into a wood subfloor.
Plastic Anchors
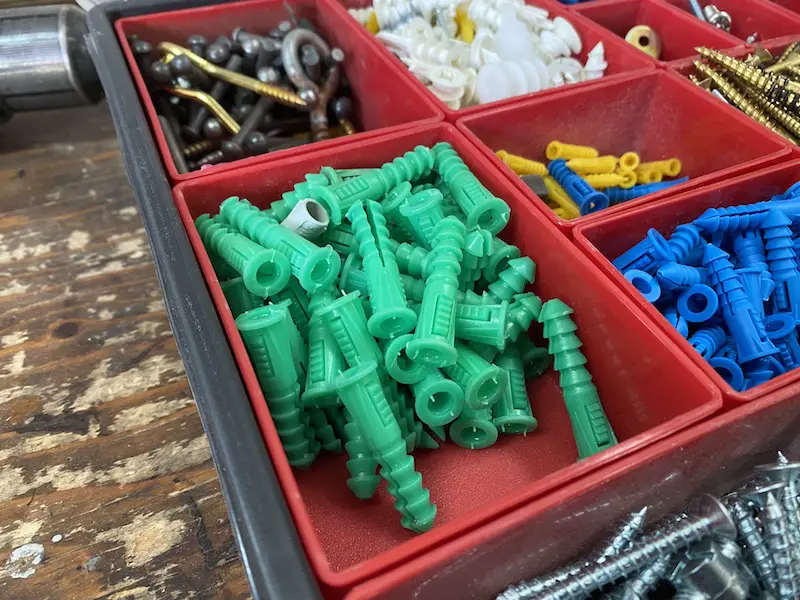
Despite all the tapcon advantages, good-old, non-threaded plastic inserts and ordinary screws still have their place when it comes to anchoring objects to masonry. You can’t beat them for applications where small items like street address numbers and smoke alarms need to be anchored to brick and block. They’re also especially useful for objects that might have to be removed from time to time. Tapcons tend to chew away the masonry from inside the hole when installed and removed more than two or three times, rendering the holes useless for anchoring.
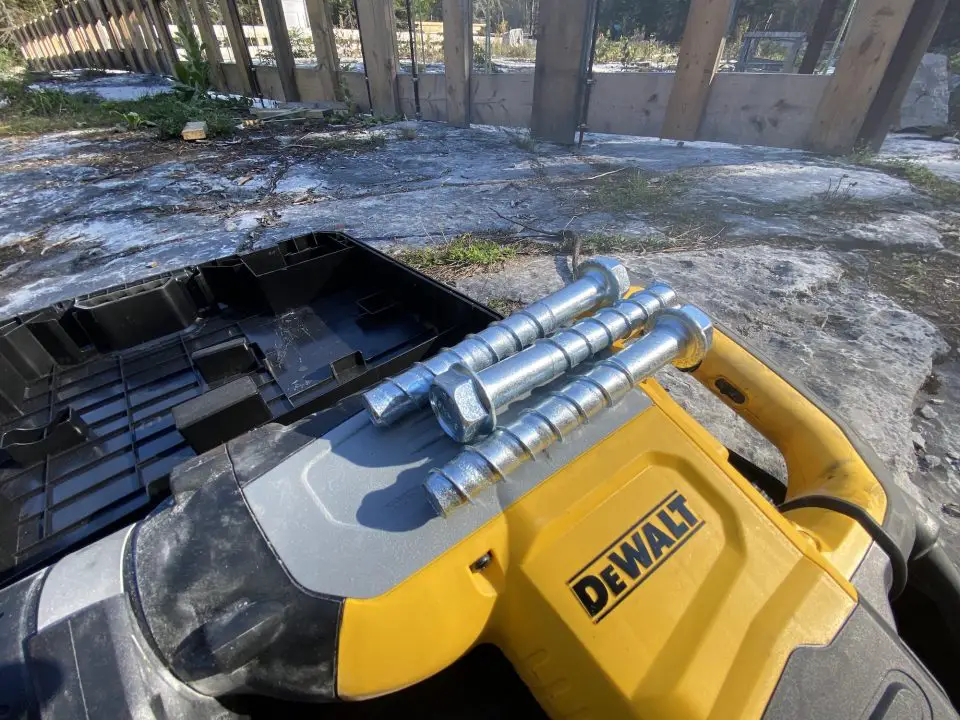
Hilti Bolts
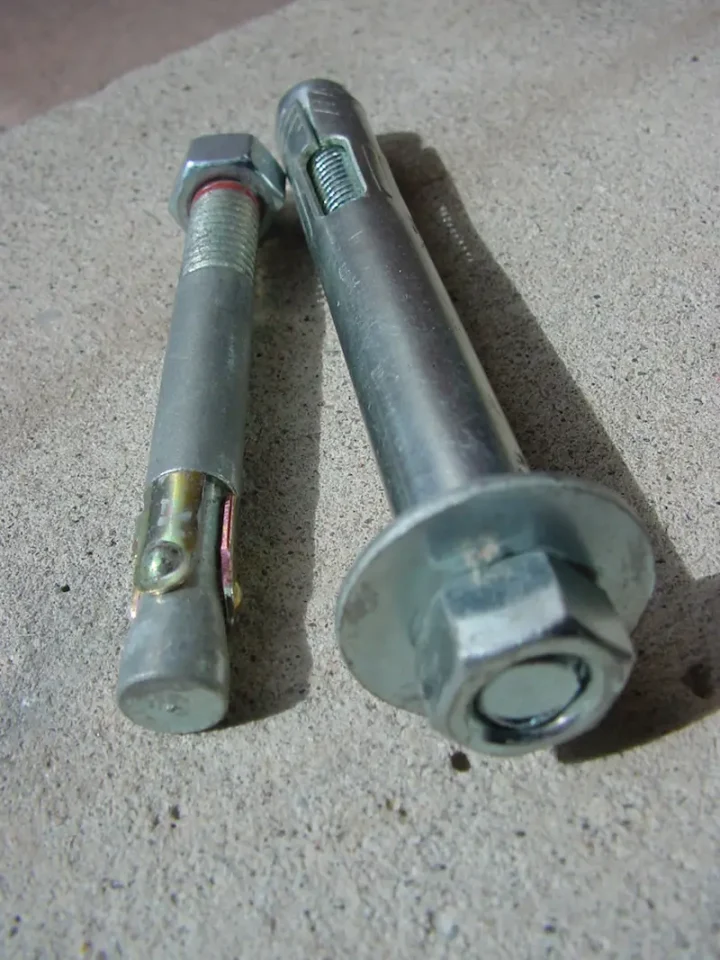
For heavy-duty anchoring jobs in solid masonry, you need something generically called a Hilti bolt. Originally made popular by the company of the same name, these expanding masonry anchors are now offered by a handful of different manufacturers. All look something like a bolt with no head. Start by drilling a hole that matches the diameter and length of the particular anchor you’re using.Sizes typically range from 3/8” to 5/8” in diameter and from 2” to 10” long.
After the holes are drilled, hammer the anchor in place with the nut threaded on the end. As you tighten the nut with a wrench, folded wings that have been lying flat around the shank of the anchor begin to spread out, binding against the sides of the hole. The harder you tighten, the more firmly these wings grip. The result is a very solid metal anchor that’s useful in high-stress applications.
Just be careful where you install them. Any closer to an edge than 2 inches, and you run the risk of splitting the masonry because of the massive side pressure generated by the expanding wedges. Hilti bolts aren’t the best option for hollow concrete blocks, but if you must use them, locate the bolts within a vertical mortar joint. There’s generally more material there to hold the anchor firm.
Few building jobs are difficult when you know the tricks behind success, and anchoring objects to masonry is no different. Choose the right hardware, put it in correctly, and the results will take care of themselves.
Drilling Holes
Almost every masonry-anchoring task begins with boring a hole.
- Small, self-threading fasteners like Tapcon screws might only need a 1/8” pilot hole.
- Larger, expanding-bolt anchors require holes 1/2” diameter and up.
Regardless of the hole-size involved, drilling in masonry can be a slow process unless you use the right tool. That’s where various types of percussion drills can help.
- Small, drill-like tools are called hammer drills.
- Large, faster ones for boring holes 1/2” and up are typically called rotary hammers.
- Regardless of the name, all masonry drills combine two kinds of motion to speed the drilling process.
- In addition to the usual sort of drill bit rotation, percussion drills add a high frequency, back-and-forth pounding action to the bit. It’s kind of like a rotating jackhammer.
- Coupled with a carbide-tipped masonry bit, you can drill dozens of holes between coffee breaks.
VIDEO: Hammer Drill Tour
Click below for a video lesson on rotary hammers for drilling in masonry.
- Video watch time = 4 minutes


I hope you found this content useful!
Your generous support helps me produce more practical, hands-on content that I hope you’ll find useful.
Steve Maxwell