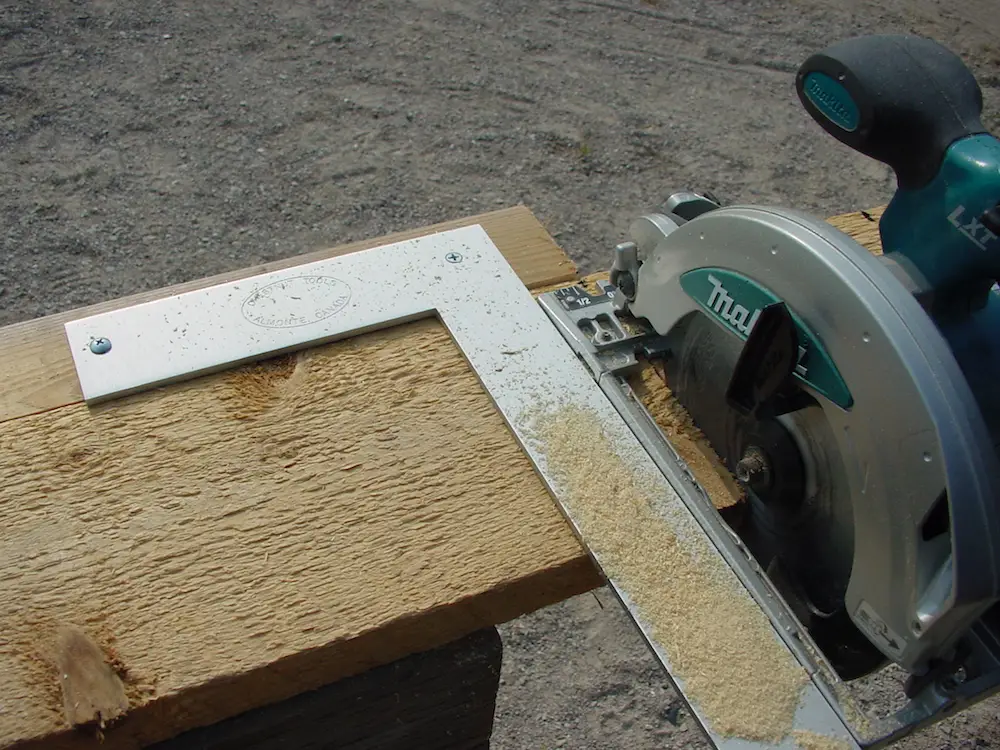
If you’re planning to build a deck, dock or shed, there’s a $20 tool you need to know about. It’s that upside down L-shaped thing you see above next to my circular saw. It’s called the ChopShot, and it guides the travel of your hand-held circular saw so well that cuts almost always turn out remarkably square with no special skill. And as with most great ideas, the story behind the tool is as interesting as what the item can do for you.
How It Came To Be
It all began with a broken-down old bridge over a creek in the eastern Ontario, Canada town of Almonte, near the home of legendary tool designer and retailer Leonard Lee, the founder of Lee Valley Tools. The wooden deck and beams of this bridge were rotting and crumbling, but the stone abutments – built by Scottish masons in the 1800s – were still in perfect shape. During the course of rebuilding this bridge for the elderly couple who owned the property, Mr. Lee needed to cut some lumber with a circular saw, and he needed to make the cuts square. That’s when the idea struck him.
“As I was squaring the plank ends using a framing square as a clumsy guide for my hand-held circular saw, I thought that there had to be a better way. That’s when I suddenly knew what to do. I went into my workshop and immediately built an all-wood prototype of the ChopShot. I made a few more for friends before realizing that anyone who cuts with a hand-held circular saw might like to have one. I had a bunch made at an Ottawa machine shop and they wound up in the Lee Valley tool catalog.”
How It Works
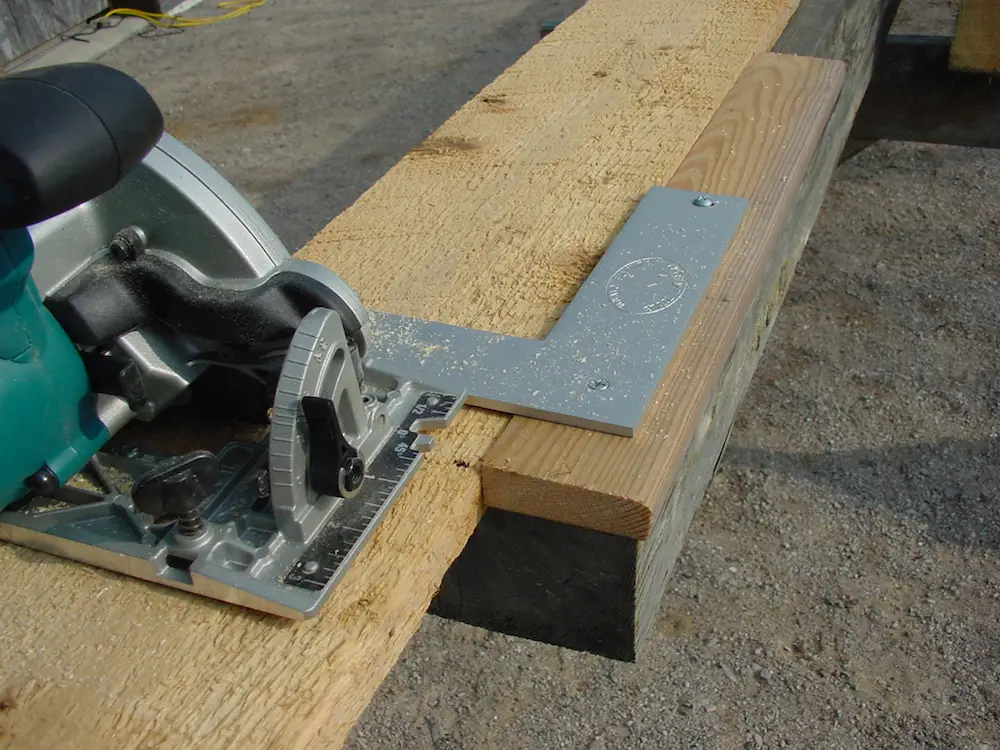
The ChopShot looks like a small aluminum framing square, except that one arm is drilled to accept two screws. These holes are where you fasten a straight piece of 1×3 softwood to the tool, about 18” to 20”-long, before use. This wood strip hooks over the edge of the piece of lumber you’re cutting, while the adjoining arm of the ChopShot sits at 90º across the lumber. This arm is your saw guide. Run the edge of your circular saw against it and you’ll get a nice square cut every time. No measuring nor marking necessary. You don’t even need a good eye. One screw hole in the ChopShot is oval so you can tweak the 1×3 so it’s perfectly square to the rest of the tool.
Besides guiding the saw to create square cuts, the 1×3 also serves a handy secondary role. On your first cut with the ChopShot, make sure you continue pushing your saw far enough along so it cuts not only the work piece but also the 1×3 guide. This way the end of the 1×3 becomes a marker, showing exactly where your saw blade will land during use. All you need to do for subsequent cuts is to align the cut end of the 1×3 on your lumber wherever you want the cut to be. There’s no need to measure how far the base of your saw extends past the blade or to make a square mark across the lumber. The tip of the 1×3 always shows where the blade will cut because the cutting action of the blade is what trimmed the end of the 1×2 in the first place.
Every so often I’m reminded of a fact that I sometimes take for granted. Some of the world’s best tools are designed and built right in our own backyard. The ChopShot is a case in point, and a particularly simple, cheap and elegant one at that.


I hope you found this content useful!
Your generous support helps me produce more practical, hands-on content that I hope you’ll find useful.
Steve Maxwell