If you use a cordless drill (or want to learn how to use one), you’ll find the video below helpful. It’s a detailed tour of what a hammer drill does, and the enormous difference a hammer drill makes compared with a regular drill when boring holes in brick, block, stone and masonry of all kinds.
- Reading Time = 5 minutes
- Video Watch Time = 5 3/4 minutes
In this article I want to give you an understanding of a popular type of full-featured cordless tool called a “drill driver hammer drill”. Different brands are surprisingly similar in terms of controls, features and performance, so what you learn here applies across the board.

When you watch the video above you’ll see an adjustable collar just back from the chuck (the “chuck” is the spinning end of the tool). When the collar is rotated so the drill icon is aligned with an arrow on the tool (as you can see above), you’re in full lockup mode. This means the motor of the tool is connected directly to the chuck in a slip-free way. The chuck is just going to spin, with full power delivered from the motor. For drilling and most applications you’ll have the drill set to the drilling position like this.
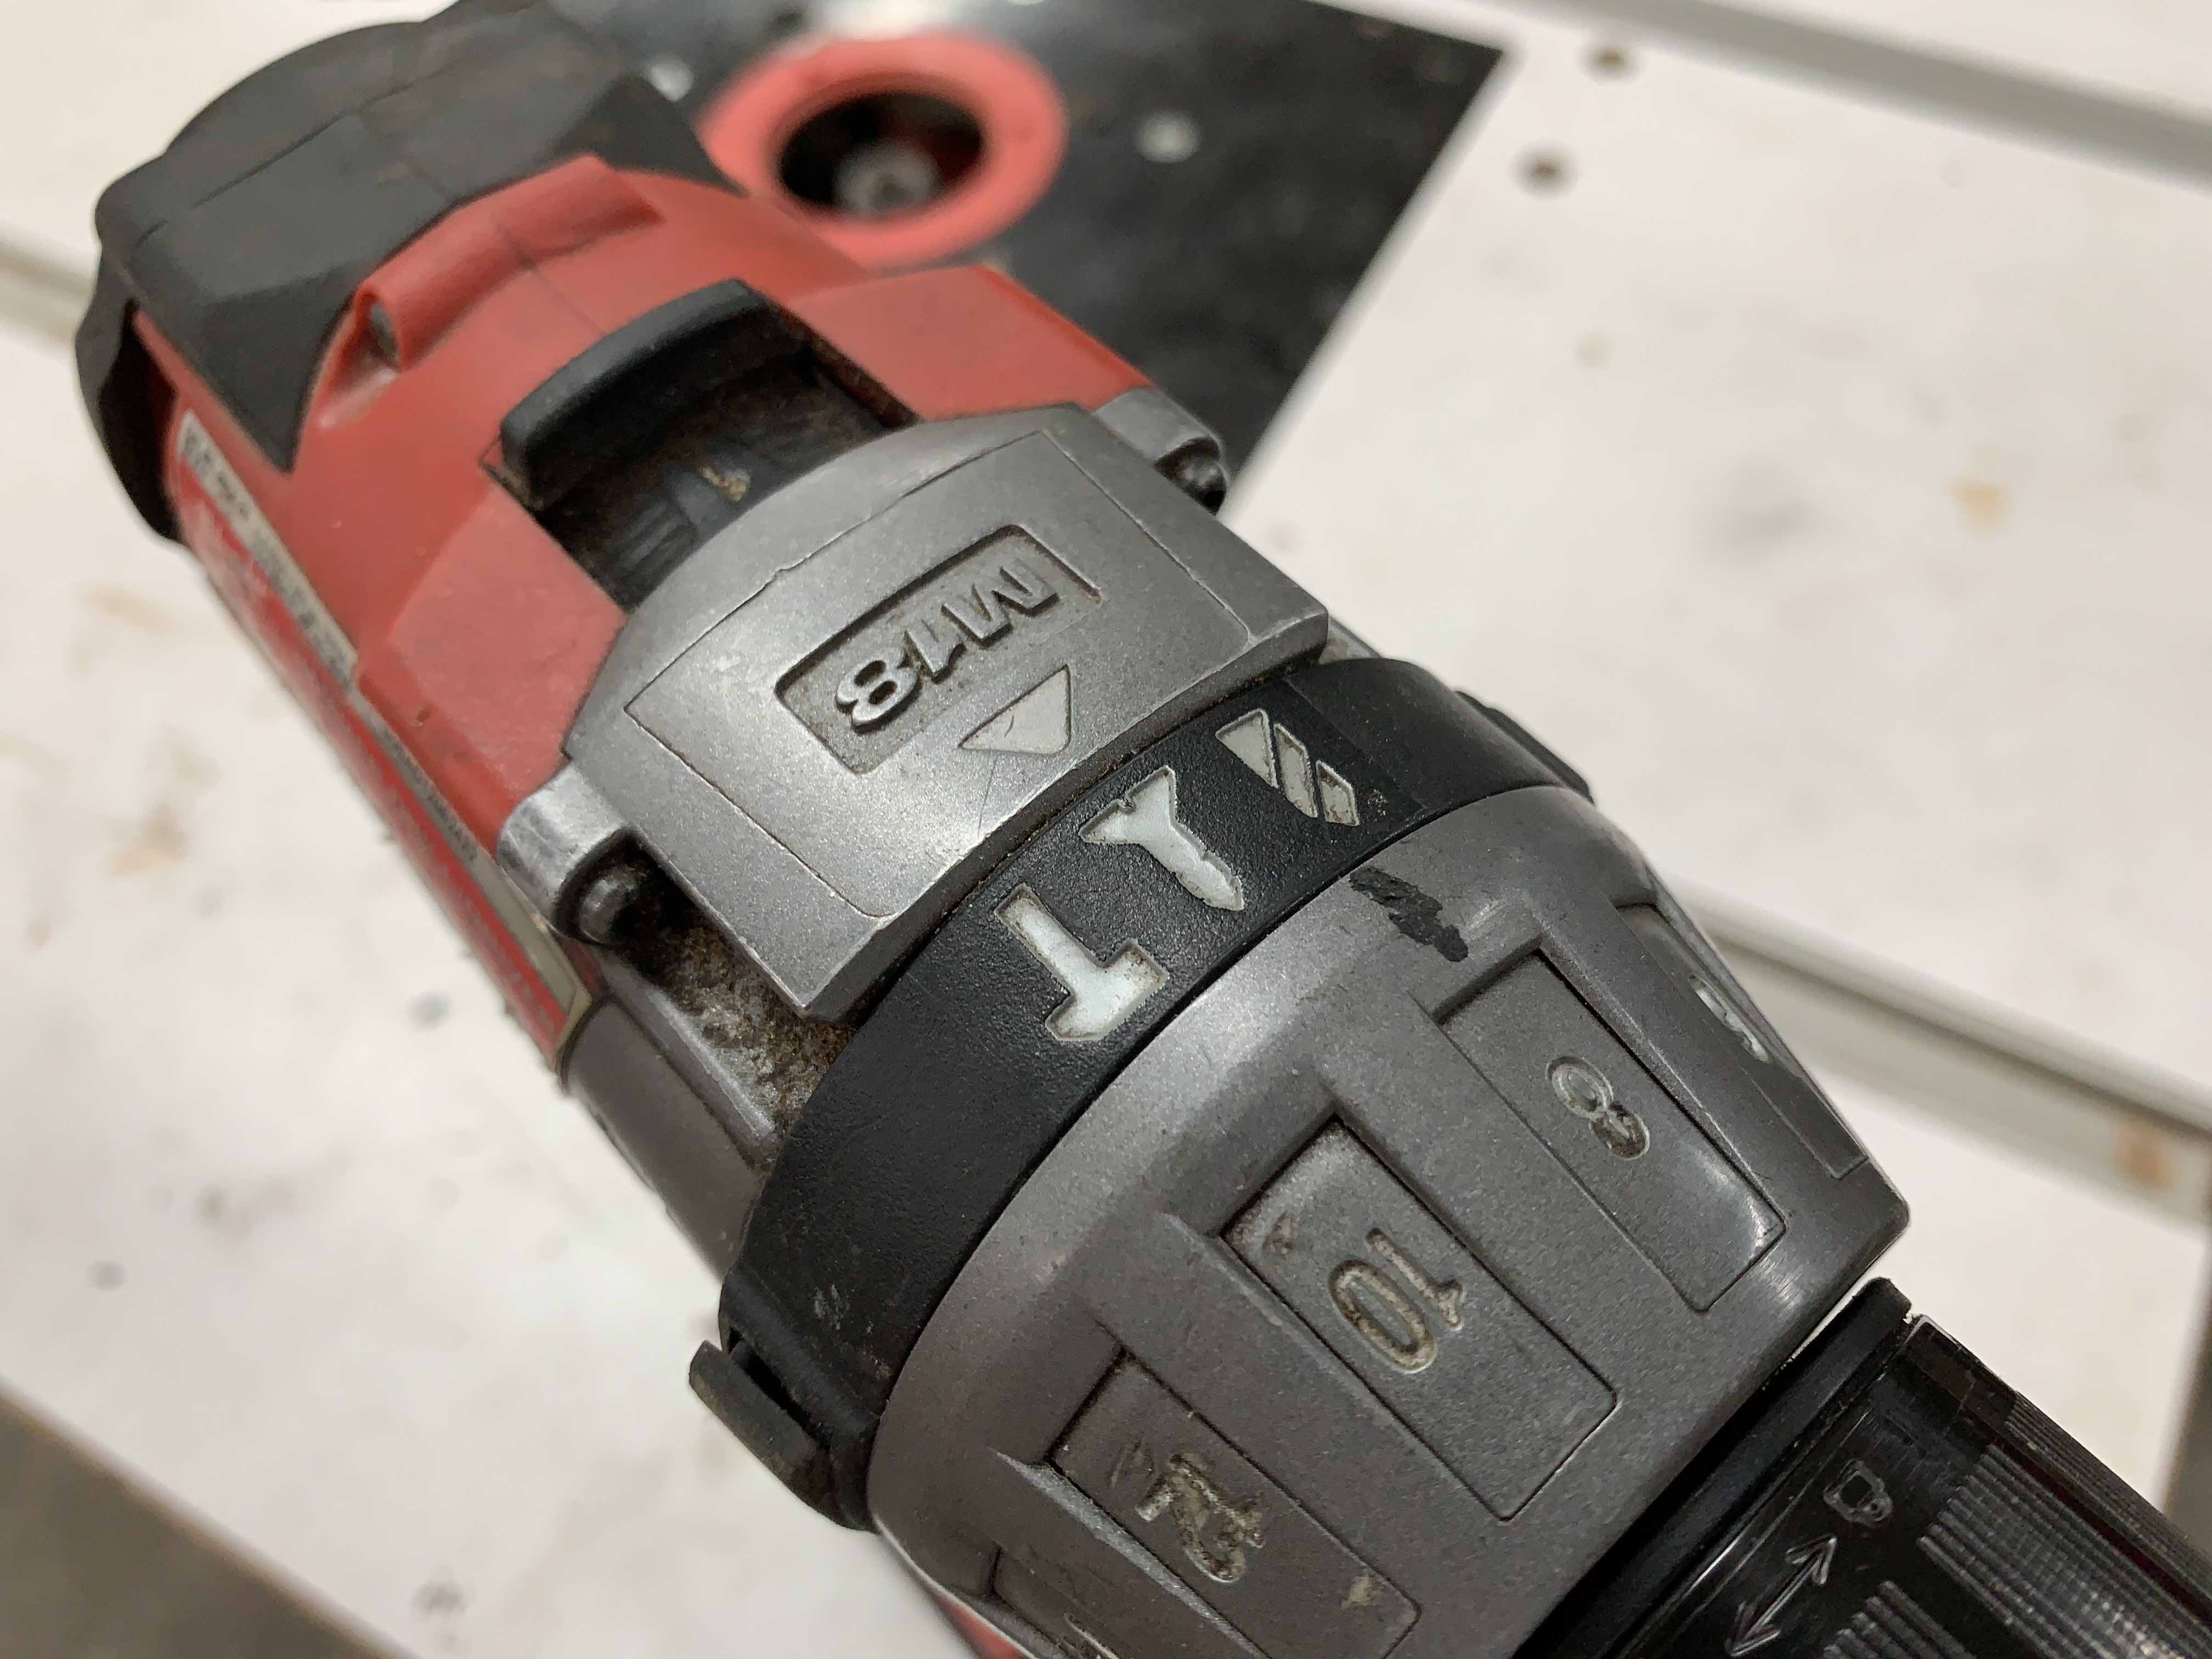
If you rotate the adjustable collar so the “screw” icon is aligned with the arrow, you have the adjustable depth feature activated. In this mode the drill will deliver a certain amount of tightness to a screw that you’re driving, but no more. The motor still spins when you hit the trigger, but the chuck doesn’t turn. It simply slips making a buzzing sound as it does. This mode is for driving screws to a consistent depth all the time. The lower the number on the adjustable clutch ring, the less torque is delivered to the chuck. When they talk about a drill driver, it’s referring to the ability to deliver different amounts of torque like this.

Hammer mode is the third way this drill can operate. When you rotate the ring so the hammer icon is aligned with the arrow, two things happen. First, the chuck is going to get the full torque of the motor. There will be no controlled slipping as happens in drill driver mode. In addition to rotation, there is also a kind of a high-frequency vibrating hammer action that’s very useful when you’re drilling masonry. Without hammer action, this drill makes slow progress in masonry. With the hammer mode engaged, drilling progress is much, much faster. I could literally spend hours trying to drill a hole in masonry without hammer action, while it would take minutes to get the job done with it activated.

Just a few other things . . . Nowadays, cordless power tools all have lithium ion batteries. Previous generations of batteries were mostly nickel cadmium, and they’re not great batteries. They don’t have a long service life. They discharge slowly on the shelf, too. So, after a few months of storage, you go to get your tool, and the battery’s flat.
Lithium ion, by contrast, stores more energy in a smaller space. It doesn’t self-discharge over time, and lithium-ion technology can be protected against the damage caused by overloads or charging a battery that’s too hot. Lithium-ion also has other features that make a difference, too. Most have a button you can press to see the state of charge of the battery. If you’ve had disappointing experiences with cordless tools in the past, the new world of lithium ion tools is really going to surprise and impress you. It’s definitely the way to go.
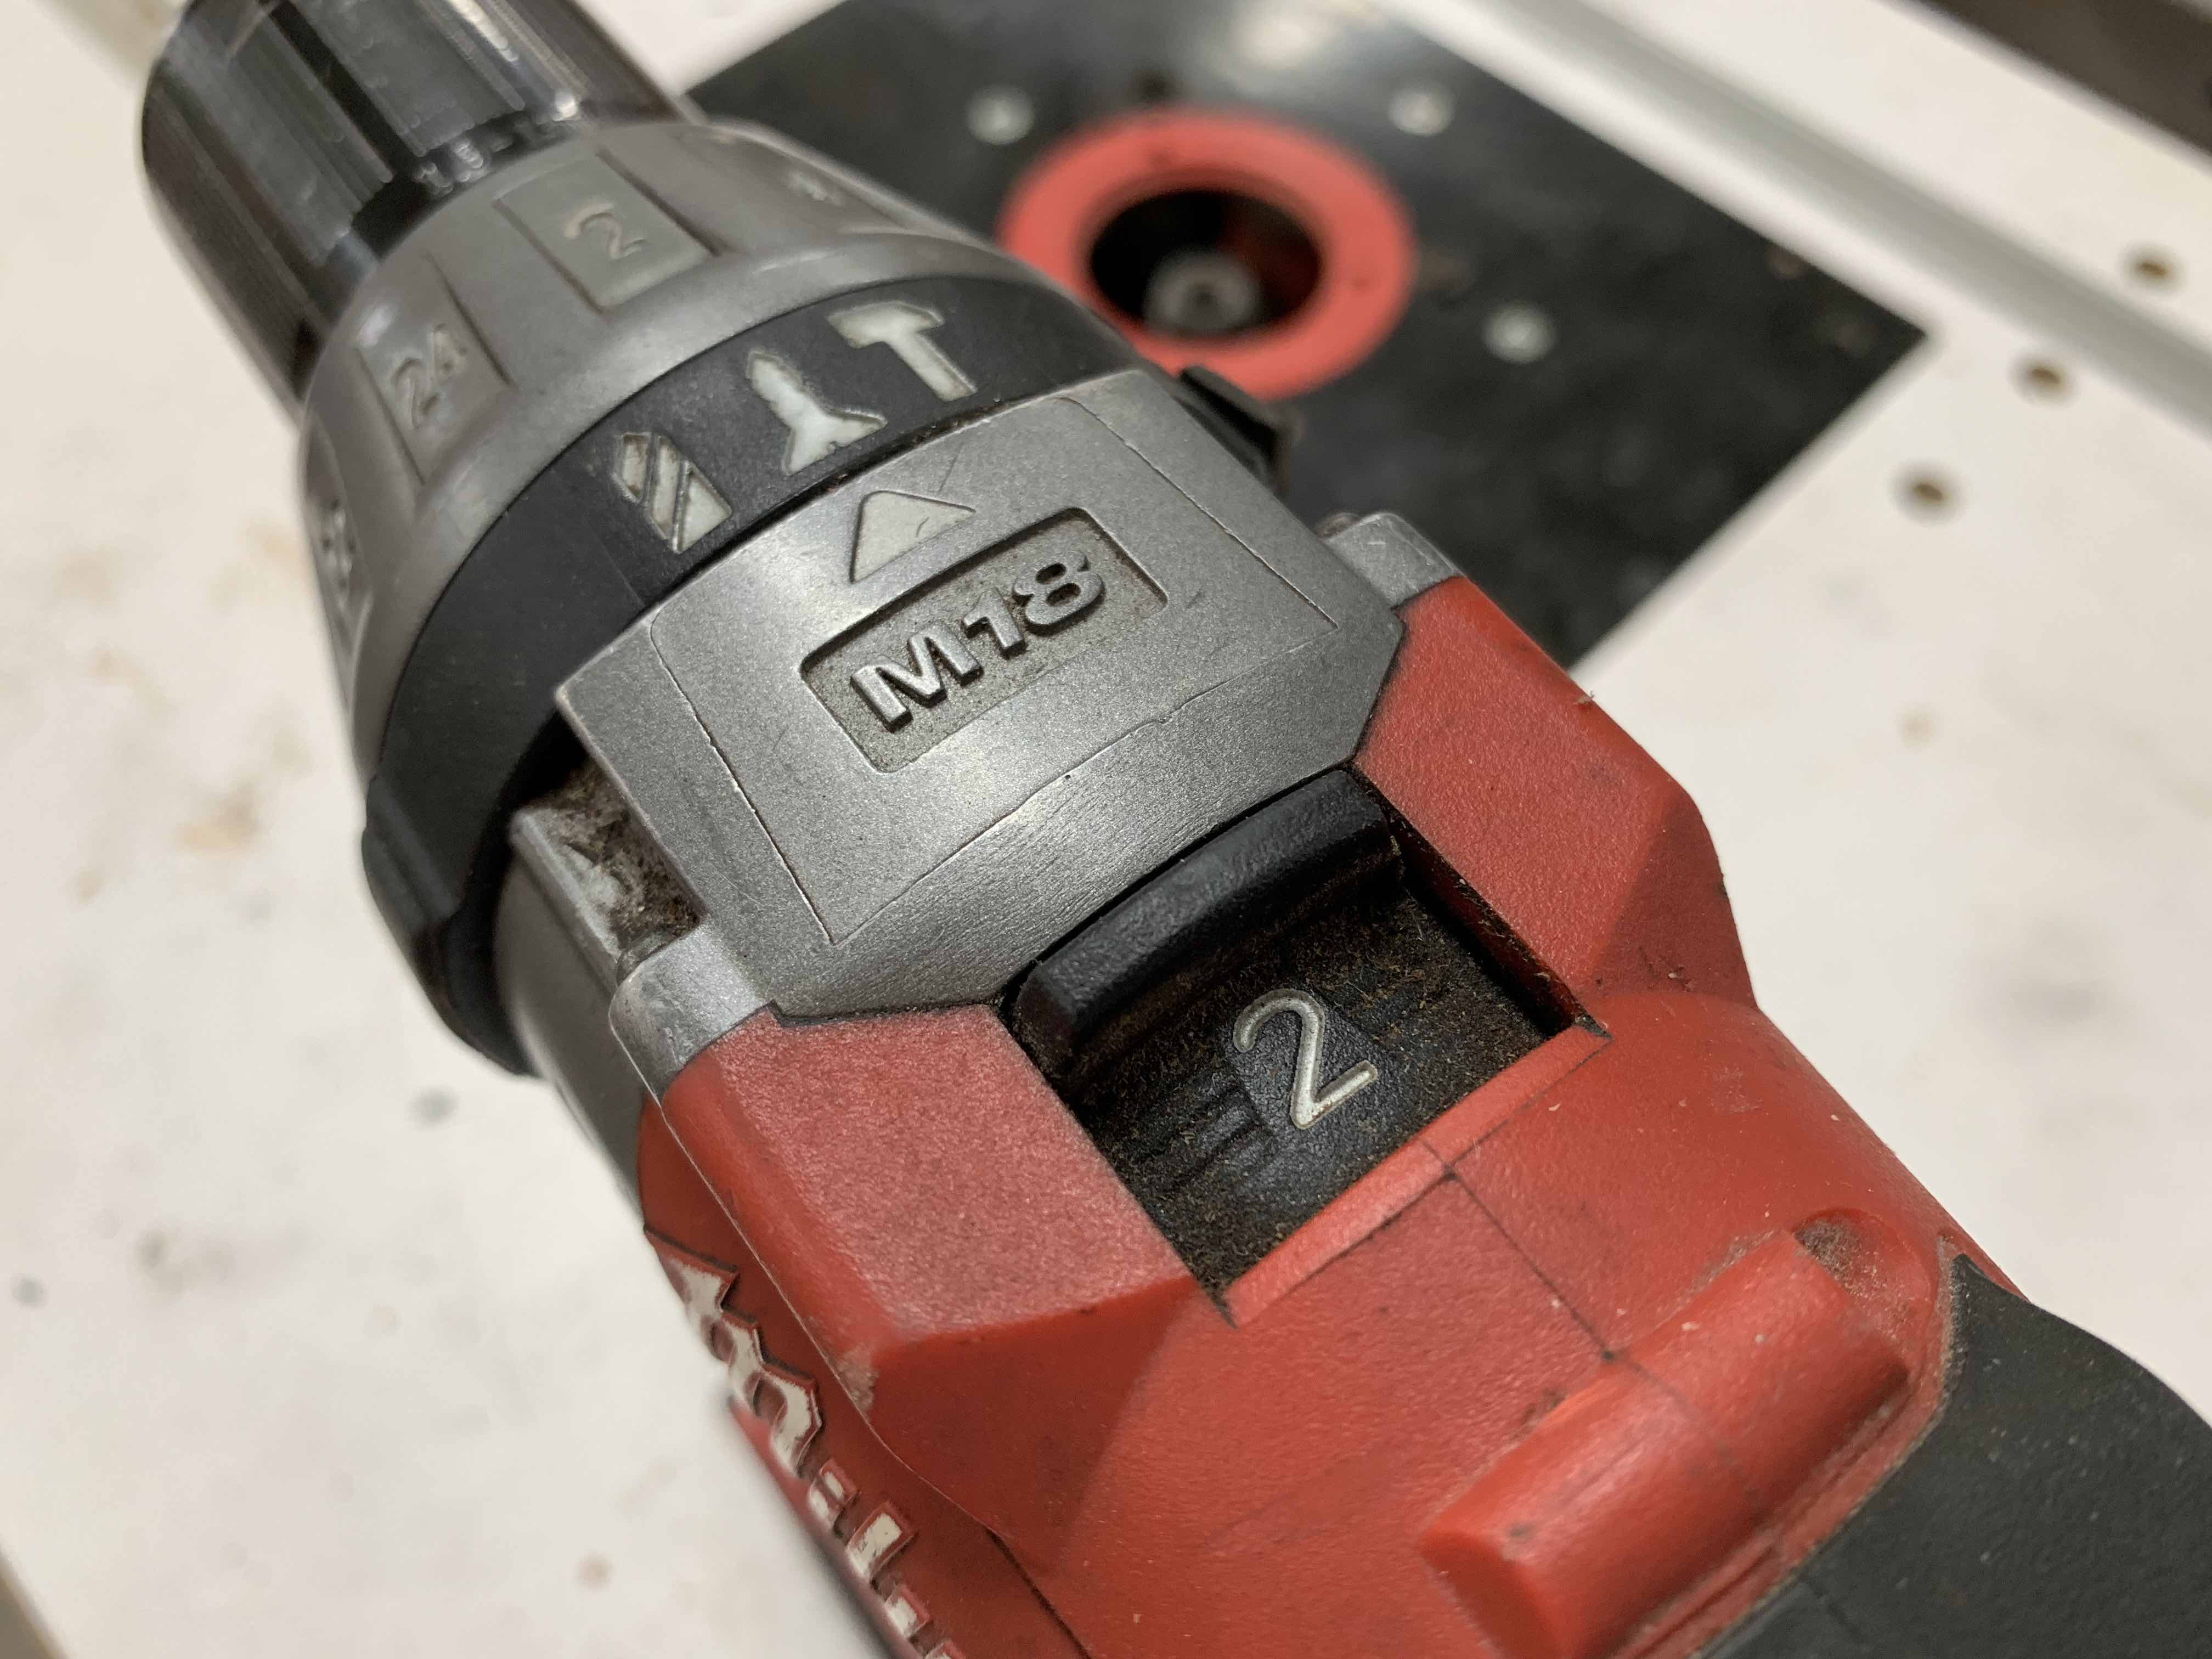
Almost all cordless drills have high and low gear ranges, and that’s vital. If you’re drilling in metal and masonry, you want a slower speed. That’s the number “1” on the gear setting slide. This gives you more power, but slower speed. Move the slide to the number “2” position and you get more speed but less power. This is ideal for drilling in wood and plastic.
The tool in the video is a professional-grade model, and a drill like this with some kind of a battery and a charger might cost $200 or $300. You can get a bargain basement consumer-grade drill for maybe $50 or $60. That said, pay more now and you get a whole lot more tool when you get into the professional-grade stuff. In my experience, it’s always worth it. Really cheap tools are pretty much a waste of money.
 I hope you found this article useful. Please consider helping to keep this website up and running. Click the “buy me a coffee” button below for a safe, simple and fast way to make a contribution. I certainly appreciate your help keeping the website up and running. Thank you.
– Steve Maxwell