- Video Watch Time = 2 1/2 minutes
A detail sander is one of the best tools for wood refinishing when the job involves corners, trim, window frames and other tight spaces. It won’t replace a random orbit sander for large surfaces, but for small nooks and crannies, it works faster and better than hand sanding. I also use mine a lot for cutting in close quarters where no other saw could do the job.
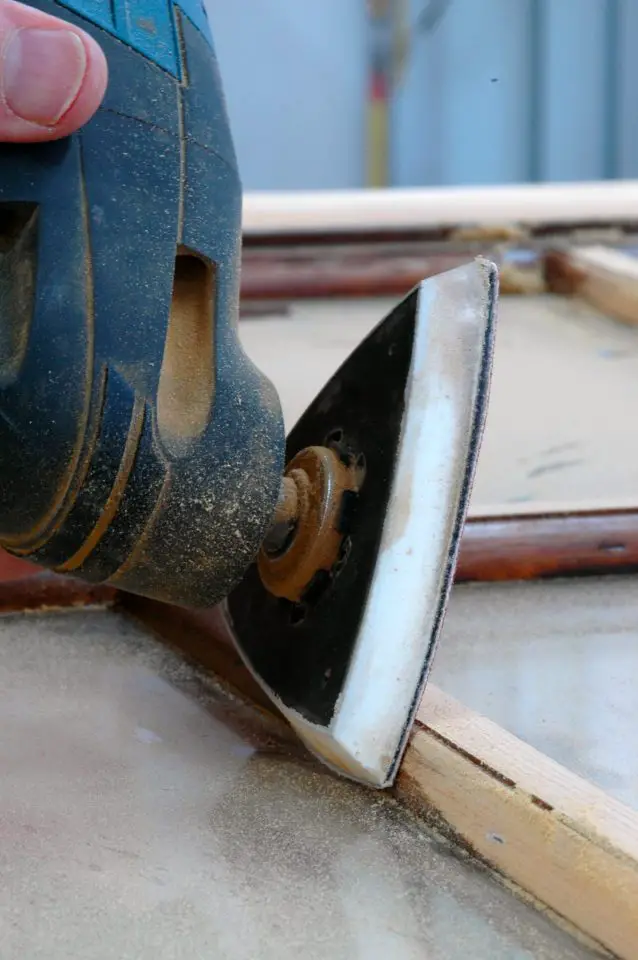
Detail sanders are ideal for refinishing wood in tight, detailed areas where larger sanders can’t reach. For best results, use high-quality sandpaper and replace it often. For exterior wood, sticking to 80–120 grit helps finishes last longer. In the photo above I’m using a Bosch detail sander to remove an old finish from the muntins and mullions of a wooden window frame.
Detail sanders are extremely useful for wood refinishing work, and there’s really nothing else like them on the market. Also called multitools because they can also cut and grind with different attachments, detail sanders are not for large jobs. A 6″ random orbit sander is my tool of choice for that, but not all stripping is about bulk removal of old finishes. When it comes to those small nooks and crannies that are part of most refinishing jobs, detail sanders are king. They’re so much better than fooling around by hand with little pieces of folded sandpaper in tight quarters. Current designs have been refined to the point where they deliver pro-grade results very quickly. That said, there still are tricks you need to apply to get the best possible results.
What Are Detail Sanders Best Used For?
Detail sanders excel in places where larger tools simply can’t reach. Window frames, trim, corners, and detailed woodwork all benefit from the small triangular sanding head these tools use. Anywhere you’d normally struggle with folded sandpaper or awkward hand sanding is where a detail sander really shines.They’re especially useful where control and precision matter more than speed.
When Should You NOT Use a Detail Sander?
Detail sanders are not meant for large surfaces. If you’re stripping broad, flat areas, a random orbit sander will do the job faster and more evenly. Trying to use a detail sander for large areas is slow, inefficient, and unnecessarily hard on both the tool and the sandpaper. Think of detail sanders as a specialty tool—perfect for finishing work, not bulk removal.
Sandpaper Quality Is King for Detail Sanders
Regardless of the detail sander you choose, sandpaper matters.
All power tool companies that make these machines also offer little high-priced triangular pieces of Velcro-backed sandpaper in brand name packages. Trouble is, these are expensive and not always readily available.
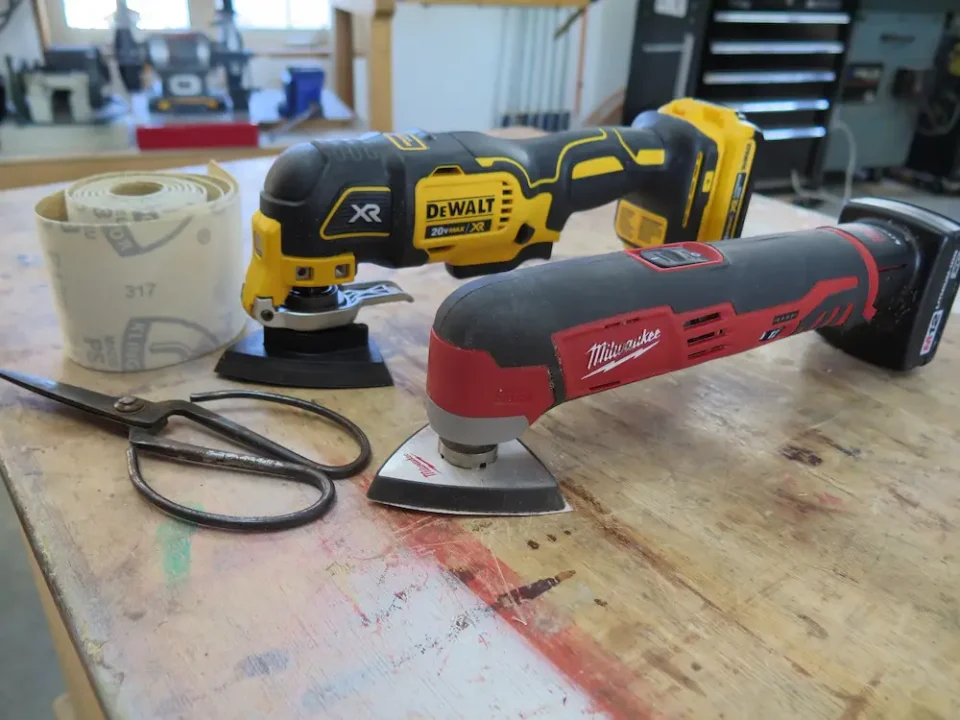
My solution is to buy a roll of Velcro backed sandpaper (80- and 120-grit are all I ever use), then cut the triangles to fit the sanding head. Simply unroll three or four inches of sandpaper, place the tool’s Velcro-backed sanding head on top, then trim around the triangular pad with scissors, and you’re done. You’ll save money and get better abrasives, too.
The abrasive surface on all detail sanders is small, so these triangles clog up quickly, especially when sanding off old paint or varnish. You’ll constantly be putting new paper on, so economy and quality matters. Where I live in Canada, I buy rolls of Velcro-backed sandpaper like the stuff you see here at Stockroom Supply (877-287-5017). You can see this kind of paper below.
What Grit Should You Use for Exterior Wood?
Here are some tips I’ve learned the hard way: If you’re sanding wooden window frames, be careful not to scratch the glass with the edge of the triangular detail sanding pad. Abrasives mark window glass easily and permanently, as I know from my own mistakes.
Another issue is how smooth you sand exterior wood surfaces destined to be finished with paint or varnish. You’ll create the most durable finishes on exterior wood if you don’t sand with anything finer than an 80-grit abrasive. This might seem too rough, but it’s best for exterior surfaces. Tests show this level of smoothness helps finishes soak in better.
Also, you’ll find rounding over sharp edges and corners slightly helps the new finish last longer. This is where a piece of hand-held sandpaper makes the most sense. 120-grit is ideal for this little job. Sharp corners are often the places where coatings spread out more thinly during application, and this thin film layer fails soonest while causing neighbouring areas to peel prematurely. Tear a standard piece of sandpaper in quarters, fold each piece in thirds, then get to work.
Common Mistakes When Using Detail Sanders
One of the biggest mistakes is letting sandpaper wear too long. Because the sanding surface is small, the paper clogs quickly and loses effectiveness. Changing paper often is essential for good results.
Another common issue is sanding with too fine a grit of sandpaper, especially on exterior wood. While smoother might seem better, overly fine sanding reduces how well finishes penetrate and adhere. It’s also easy to accidentally damage nearby surfaces. As mentioned earlier, glass scratches easily if the edge of the sanding pad makes contact, so care is needed when working around windows.
Corded vs Cordless Detail Sanders
Back in the early 2000s, Bosch came out with the first 12-volt cordless detail sander. That’s it at work here in the photo at the top of the article. Other manufacturers have followed suit.
Battery operation boosts convenience, and these tools are still powerful enough for light or medium-duty applications. These days I do most of my detail sanding with cordless models, using corded models only for tougher applications where more material needs to be removed.
At the moment, my favourite detail sander is the 20V DEWALT DCS355D1 multitool. It’s the most powerful and effective cordless I’ve tried to date. I have more than half a dozen detail sanders in my shop left over from the tool testing I do, and the DEWALT is the one I reach for when I need to do sanding in tight quarters.
Click below for a video tour of various multi-tools that I filmed back in 2009, during a test I was running for a magazine story. If you’re new to multi-tools, be sure to check out this video. It explains how things work for both sanding and cutting applications.
Key Takeaways
- Detail sanders are best for tight, detailed areas—not large surfaces
- High-quality sandpaper makes a big difference in results
- Stick to 80–120 grit for exterior wood refinishing
- Replace sandpaper often to maintain performance
- Cordless models offer convenience without sacrificing much power
Bottom line: Detail sanders are ideal for tight refinishing work, but the quality of your sandpaper and how you use it will make or break the results.
Frequently Asked Questions
A detail sander is best for sanding tight corners, narrow trim, window frames, muntins, mullions and other small areas that larger sanders cannot reach well.
Not for large flat surfaces. A random orbit sander is usually better for broad areas, while a detail sander is better for corners, edges and fine refinishing work.
For many exterior wood surfaces, 80 grit is a good target because it leaves enough texture for finishes to bond well. Slightly rounding sharp edges with finer hand sanding can also help finishes last longer.
Yes. The edge of the sanding pad can permanently scratch glass, so extra care is needed when refinishing window frames and sashes.
For light and medium-duty work, yes. Cordless detail sanders are now powerful enough for many common refinishing tasks, though corded tools can still help with heavier removal.
Yes. If you buy hook-and-loop abrasive in rolls, you can place the sanding pad on the abrasive and cut custom triangles to fit. This can save money and give you more control over abrasive quality.
Because the pad is small, the abrasive surface loads up quickly, especially when removing old paint or varnish. Good-quality abrasive and frequent changes make a noticeable difference.
Yes, especially in small areas and tight spaces. It’s not the fastest tool for large-scale stripping, but it works very well for detail work where other sanders cannot reach.
Want more practical home improvement ideas like this?
Join the Bailey Line Road newsletter for weekly DIY tips, building advice and real-world solutions for homeowners.


I hope you found this content useful!
Your generous support helps me produce more practical, hands-on content that I hope you’ll find useful.
Steve Maxwell