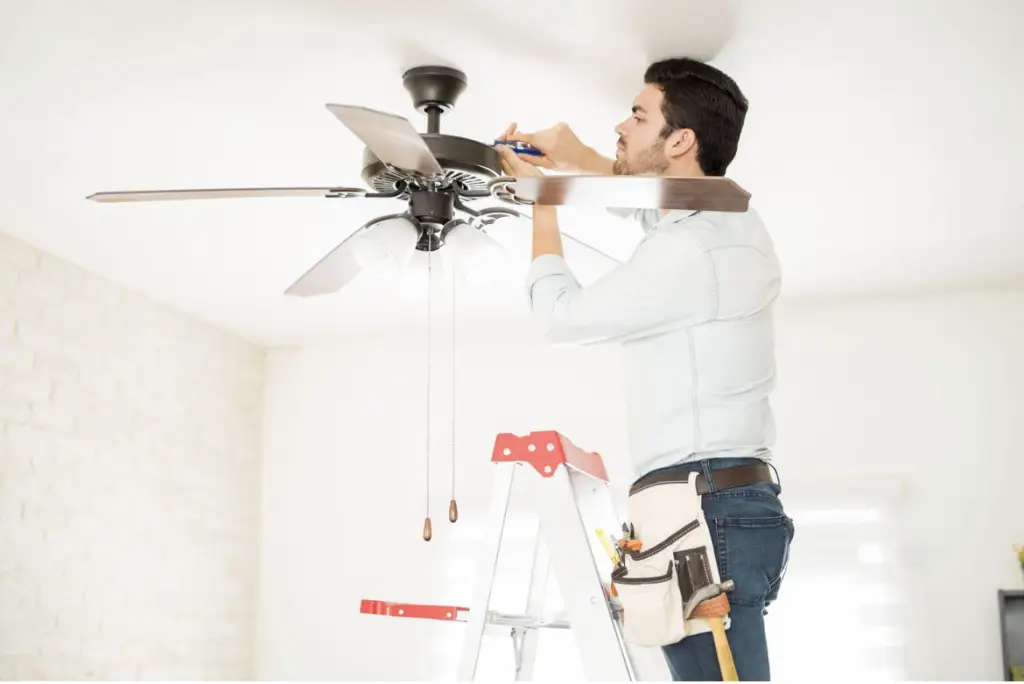
When you need to even out the temperature of a room, ceiling fans are one of the best ways to do it. Whether the room is too hot or too cold, fans can do a bang up job of making it the perfect level of comfort. However, getting a ceiling fan installed properly is not the simplest thing in the world (although by no means is it particularly hard either). If you have trouble wrapping your head around proper installation procedures, you’ve come to the right place. This article explains what’s involved so you can decide whether or not you’re up to the job yourself.
Should You Hire Someone?
Maybe. While ceiling fan installation is not the hardest task, not everyone is going to be able to do it. As such, you should hire a ceiling fan installation specialist if you don’t think you’re up to the task of doing it yourself. It’s always a good idea to avoid overextending yourself beyond what you think you are capable of, even if it would be the cheaper option. Does your fan need new wiring? That’s often the point at which even handy homeowners call in a pro. But before you decide to do that, check out the details coming up in this article.
Choose the Right Ceiling Fan
One of the biggest errors people make when getting their ceiling fan installed happens at the first step. What they do not realize is the fact that not all ceiling fans work for all sizes of rooms. For example, some rooms have lower ceilings, and for rooms that are only eight feet high or shorter, you need to look into a ceiling fan that uses a mounting bracket instead of what’s called a “downrod”. This gives you much more clearance than you would with the standard height of a ceiling fan. Before you start shopping for a fan, be sure to measure your ceiling’s height. This is the best way to get the right ceiling fan.
Shut Off Power, Then Double-Check
Switch OFF the circuit breaker where you hope to put a fan, then make sure this breaker cannot be turned ON accidentally by someone else. Double-check that the power really is OFF before proceeding. If you touch live wires, it might be the last thing you ever do. Here’s another issue: Does the electrical circuit you want to tie into have enough extra capacity for a ceiling fan? Count the number of lights and outlets that went dead when you switched off the circuit breaker that controls the propose fan location. If there are more than 10 lights and outlets already on the circuit, you probably don’t have the necessary power on that circuit. The last thing you would want to do here is find out only once it’s too late. Once you have verified whether the circuit is able to handle it and are ready to begin the process of installing your ceiling fan, double-check that the power really is OFF. This is a hugely important part, as failing to do this could very well put you at serious risk of injury (or worse).
Mount Ceiling Fan Junction box
Since ceiling fans are heavier than regular light fixtures, they usually need beefier junction box hardware to hang from. With a helper on hand, carefully disconnect any wires from the existing light fixture, then mount any hardware the new ceiling fan requires. Details will vary, and the instruction sheet that came with the fan is your only source of detailed guidance. Mount any support bracket that came with the fan.
Deal With the Downrod
The downrod is that part of the fan that the fan-and-motor assembly hang from. Depending on the ceiling height, you may or may not use a downrod. Once again, the instruction sheet that came with your fan will show you details for installing your particular downrod.
Wire the Fan
Hook up the fan’s wires to your house wiring, taking care to refer to the manufacturer’s instructions. You should secure them using the wire nuts included. Wires also match up with their like color. Usually the bare wire from the fan connects to the bare wire in the electrical box. Connect like-coloured wires from the fan to the supply wires in the electrical box.
Finishing Up
With the hardware provided, attach the blade brackets to the fan blades. Put each screw in its place, though do not tighten until you’re ready to screw them into the fan itself. Next, screw the blade assembly into the motor carefully. Some fan blades have simpler installation procedures, and can be installed by clicking them into place. Finally, if it has one, install the globe and bulb, then switch the fan ON. If you’re heating your space, have the fan rotating so it draws air upwards. If you’re cooling your space, activate the opposite rotation, driving air downwards in the room.


I hope you found this content useful!
Your generous support helps me produce more practical, hands-on content that I hope you’ll find useful.
Steve Maxwell