VIDEO BELOW: As do-it-yourself jobs go, installing a new dryer vent doesn’t look complicated, but there’s a lot more to it than meets the eye. At least if you want to do things right, that is. It’s one thing to punch some kind of pipe through an exterior wall, but quite another so the installation ages gracefully and doesn’t encourage wintertime condensation inside your wall frame.
How to Install a Dryer Vent: Use Two Pipes
The trick to making a good installation happen involves the use of not just one pipe, but two going through your wall. Typical dryer vents are 4″ in diameter, but instead of putting this single pipe through the wall on its own, I recommend starting with a larger, 5″ or 6″ diameter galvanized steel pipe first. Available at all hardware stores, this pipe gets sealed permanently where it meets both interior and exterior wall surfaces, with the actual dryer vent pipe going through this outer pipe. This keeps your wall in better shape and it makes it easier to replace the dryer vent pipe in the future.
Location Matters
Start work by determining the location of vertical wooden wall frame members (called studs) in the area where you want the vent to be. You’ll need to choose a spot where no studs exist and where wires are unlikely to be found. The zone within 8″ of the floor is usually free of wires, though you’ll want to cut a careful, exploratory inspection hole through the drywall first, to get a peek into the wall cavity. An electronic stud sensor is pretty good at finding wall studs, but double check your proposed hole location by driving finishing nails through the drywall before cutting. This nail shouldn’t hit anything solid after penetrating the drywall.
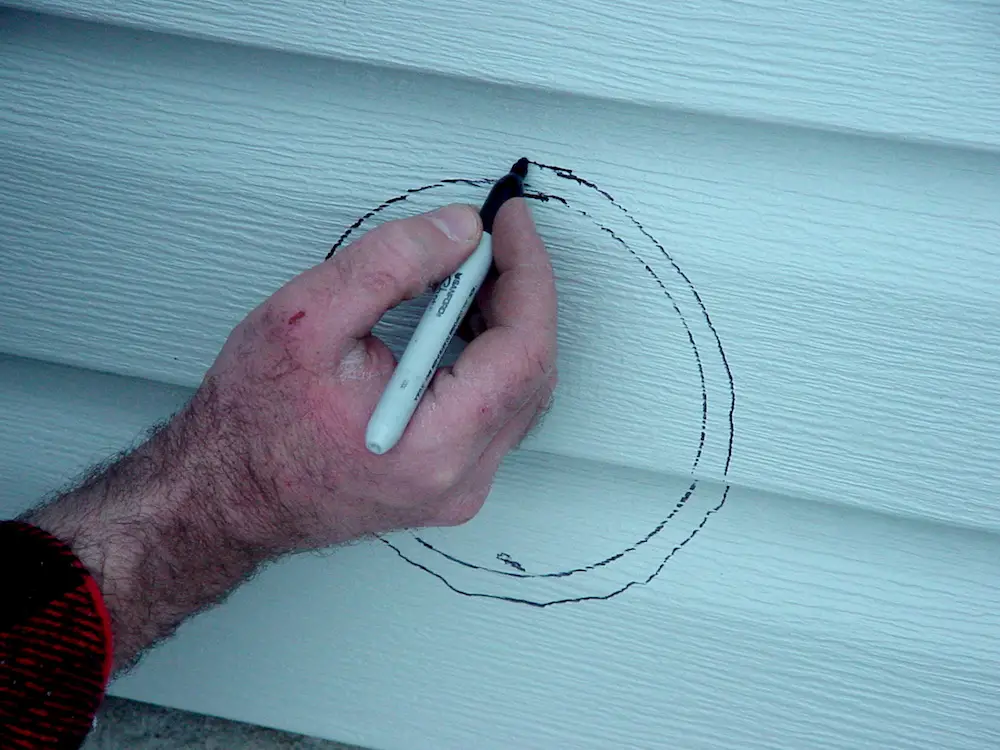
Draw a Circle
Next, go outside and use a felt tip marker to draw a 5” or 6″ diameter circle centered around the hole that just surfaced. This is for the outer pipe you’ll be installing first, and how you actually create this hole depends on what the outside of your exterior walls are made of. You can see me drawing a couple of circles below. I decided the first one wasn’t big enough.
How to Install a Dryer Vent: Drill Before Sawing
If you’re well away from wood and wires (and you must be), grab an electric drill and install a 1/2″ diameter drill bit in it. You’ll use this to bore a hole right through your wall, but if the outside of your house is brick or stone, you’ll need to rent a special drill called a rotary hammer with a matching masonry bit. It combines rotation and percussion to bore through masonry quickly. Look for a coring bit that’s the diameter you need to accommodate your outer pipe. It removes a nice, neat, cylindrical plug of masonry.
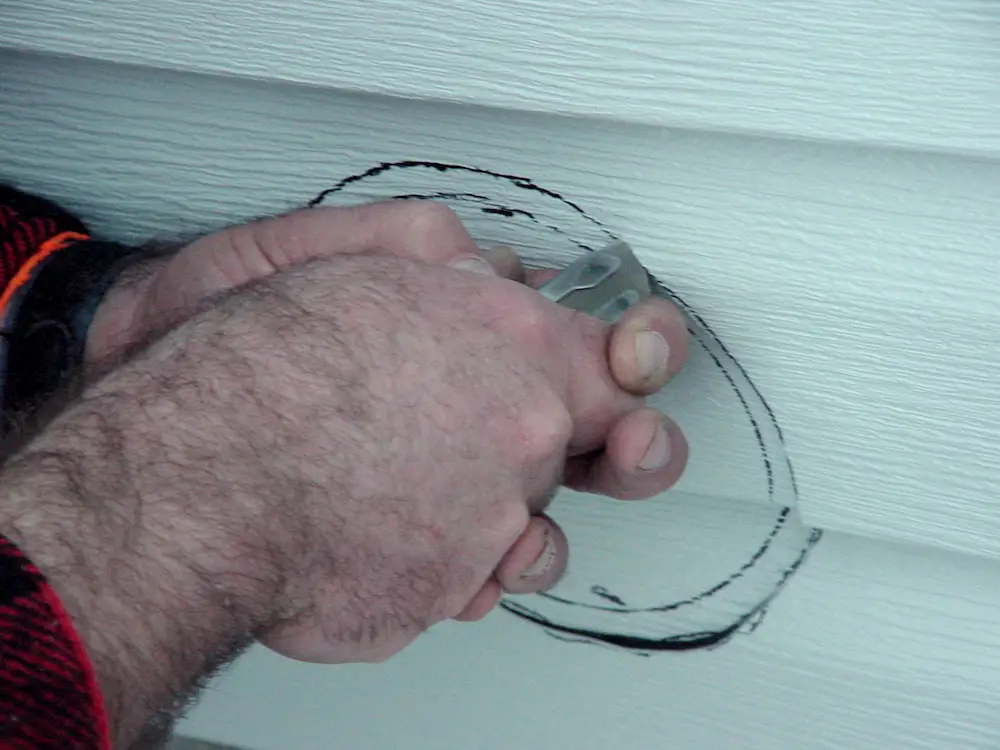
What’s your exterior wall made of? If you’re dealing with non-wood siding, cut through the vinyl or aluminum with multiple strokes from a sharp utility knife, then bore a series of 1/2″ diameter holes all around the edge of the circle, as closely as possible to each other, right through the internal wall sheathing. That’s what you see me doing below.
Perfect Piping
Now’s the time to permanently install that 5” or 6″ diameter outer pipe I talked about before. All hardware stores carry them, and you’ll need a piece long enough to go through the entire wall thickness. As you set this pipe into position, make it slope slightly downwards and outwards when installed. Use a level to verify the outward slope of the pipe, then use expanding foam to seal the interior wall surface and exterior caulking to seal outside.
Final Step: Vent Installation
Installation of your actual dryer vent louver and pipe comes next. Set it into the opening from the outside, using small chunks of foam to support the pipe evenly all the way around, about 1” back from both the interior and exterior wall surfaces. Shoot a small amount of expanding spray foam between the two pipes, then let it set. You’re now ready to hook up your dryer to a pipe you can count on.
Why Consider Hiring A Professional
Are you too busy or too handle a dryer vent installation job? Or maybe you don’t feel capable of carrying out the step-by-step guide above because you lack the tools and experience to perform such do-it-yourself (DIY) jobs. It would be best to hire a professional dryer vent installer in situations like these to save time and energy.
You can try engaging the services of Milwaukee dryer ducting professionals or other similar service provider in your area, to help you with dryer vent installation and cleaning. Choose a company that adheres to vent cleaning standards and is equipped with high-powered agitation tools and air duct cleaning equipment to safely remove lint from the vent.
Create a shortlist of prospective dryer vent installers and narrow your options by researching each company’s services and customer feedback. Visit the company’s website or call a representative to ask about their project timeline, terms, available schedule, and service rates. Additionally, you can seek referrals from friends, neighbors, and close relatives who have completed similar projects.
Conclusion
Installing a dryer vent is easier and safer when you follow the steps and tips mentioned above. Ensure you have the right tools, techniques, and knowledge to carry out those steps to install your dryer vent correctly. If you’re busy, you can always hire a professional to do the installation for you.
Watch the video below for a tour of the best dryer vent I’ve used so far. It’s much better than the usual designs:


I hope you found this content useful!
Your generous support helps me produce more practical, hands-on content that I hope you’ll find useful.
Steve Maxwell