There are an infinite number of ways to build ugly visual mistakes into your home, but far fewer ways to do things right. That’s why every homeowner looking to build or renovate optimally needs to know something about home design concepts. While it’s not your job to be an architect, eventually you’ll find yourself making decisions that either make or break the look and feel of major renovations or your new home. This is where these five real-world design strategies can pay off.
- Reading time = 10 minutes
- Video watch time = 3 minutes

They have nothing to do with colour choices or furniture layout or any of the fluffy things usually talked about in the name of “design”. What you’ll find here are practical, tangible, solid ideas that have helped me over the years. Perhaps they can do the same for you. Many times it’s the overall approach taken that determines how well a renovation or new home feels. Things like this are too important to leave to chance.
Home Design Concept#1: Make Scale Drawings or Models
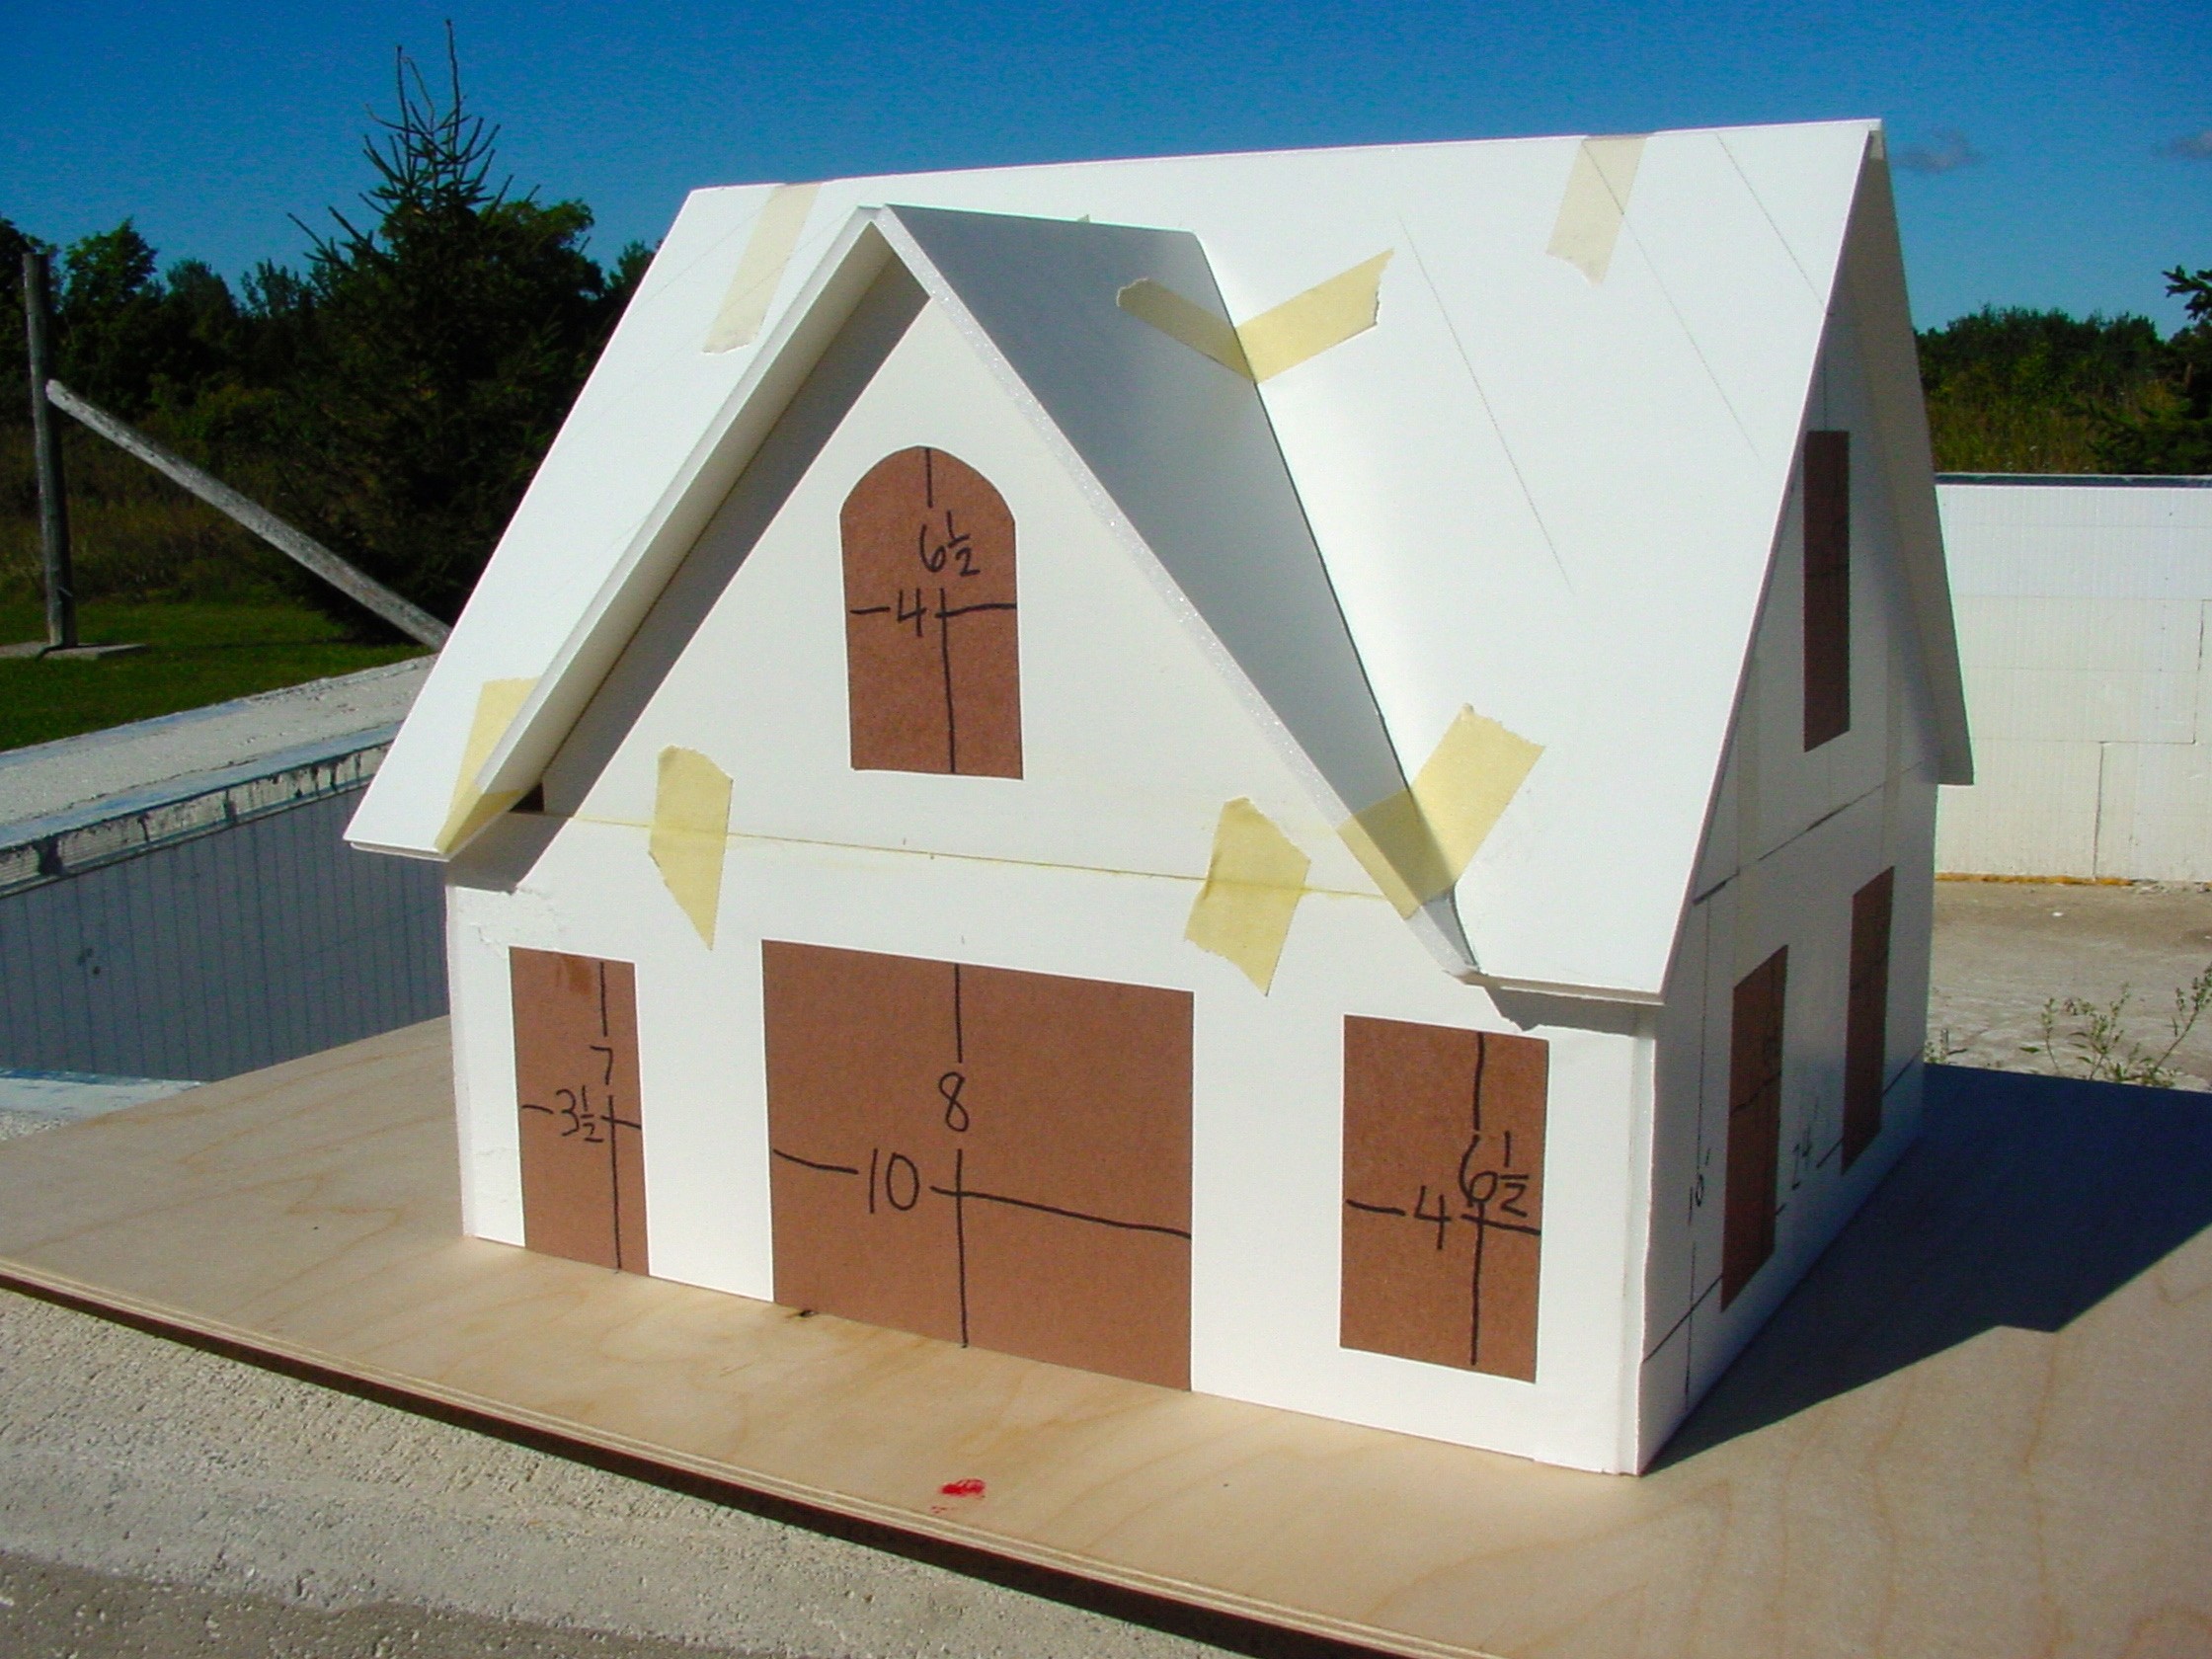
Building a scale model is one of those ideas that seems like a waste of time until it saves you from a major visual mistake. Then the value of a model is obvious. Even experienced builders can’t always imagine the overall effect of making, say, a roof a foot or two higher. Verandah’s and decks can ruin the look of an otherwise beautiful home if they’re too wide, narrow or long. The slope of an addition roof can either enhance or ruin the overall appearance of an entire house. Even window shape, proportions and placement have a huge influence on how your project looks. Finding the sweet spot for all these design details is what a scale drawing or model delivers, and it does this by letting you make mistakes on a tiny and manageable level. If something doesn’t look right, change the drawing or model until it is, then build the real thing with confidence.
Despite years of experience, few professional builders that I’ve seen have the ability to fully imagine how a house or addition will look in 3D simply based on numbers and dimensions. Homeowners are typically much worse off in their ability to imagine building shapes ahead of time. That’s why creating some kind of scale rendering offers so much value.
A sharp utility knife, some 3/16”-thick foam board, a roll of masking tape, a bottle of wood glue and a ruler are all you need to get started building models. Experiment with window size, door placement and roof pitch on the model. You’ll find a scale of 1/2-inch to the foot is ideal for most homebuilding projects. If you’re handy with computers, you can do the same thing on a screen using a program like Sketchup. Scale modeling and drawing has saved me from making big, ugly mistakes many times. That’s why I never build out of my head.
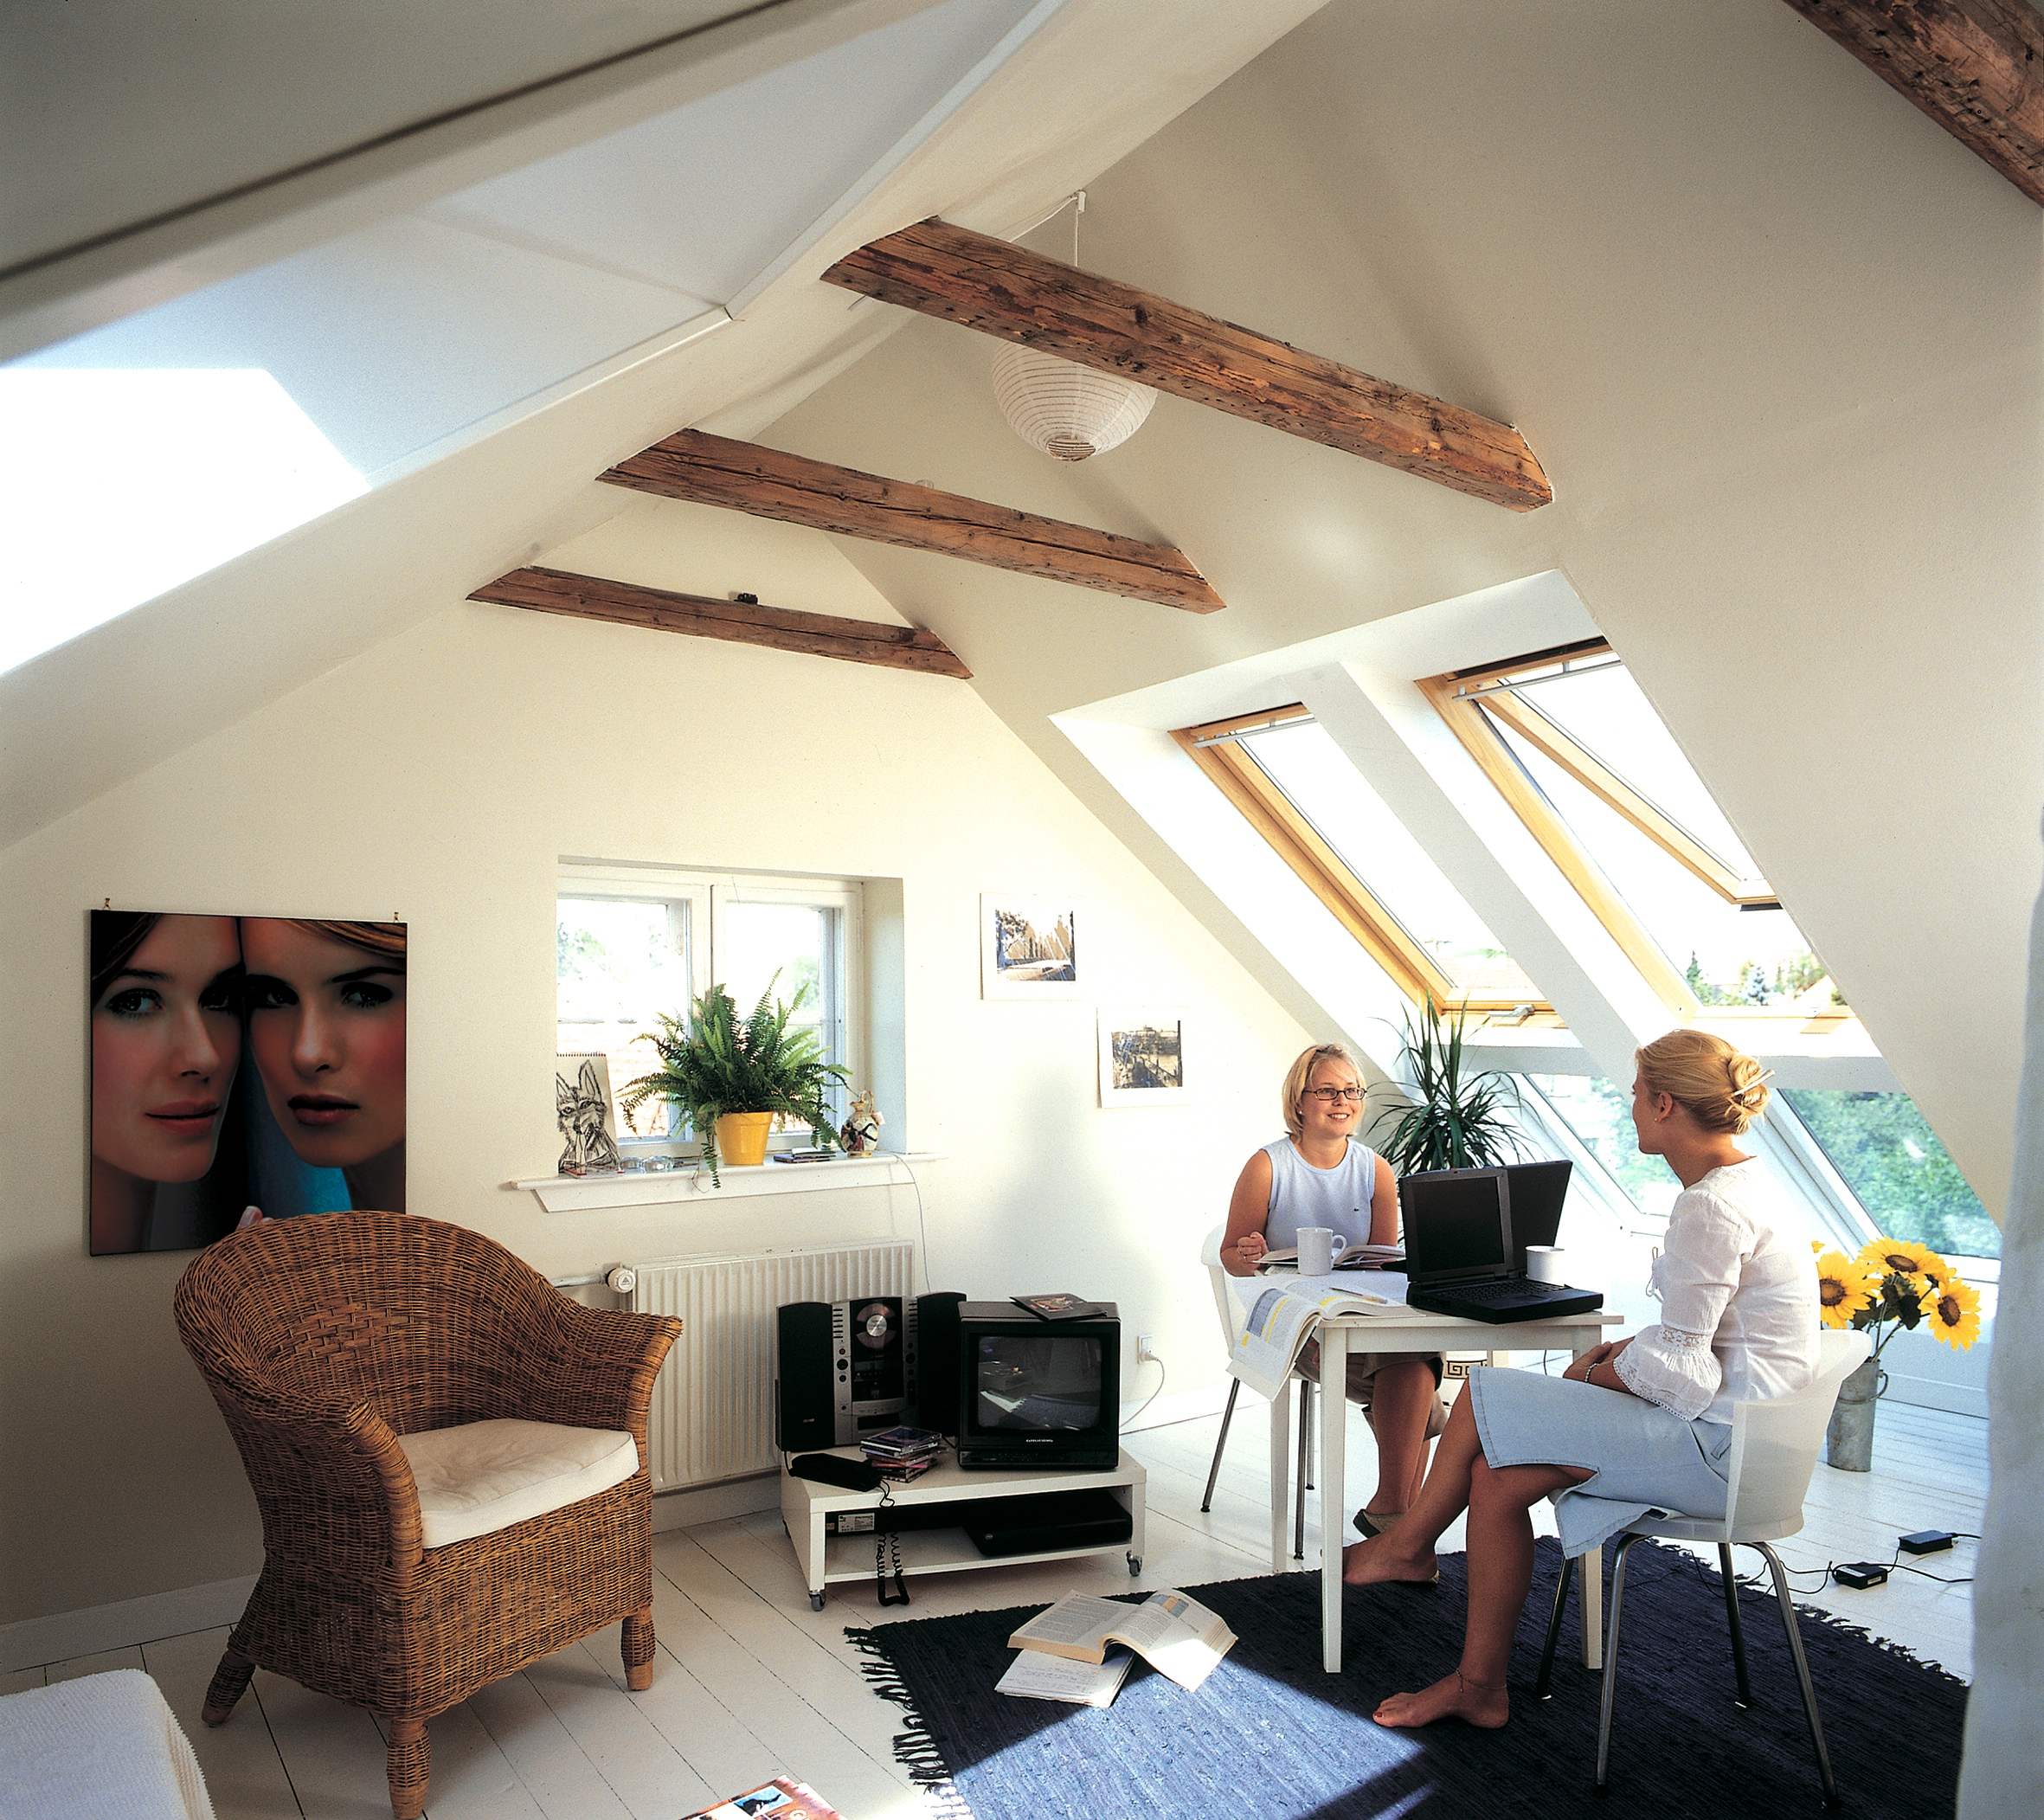
Home Design Concept#2: Create Light on Two Sides of Rooms
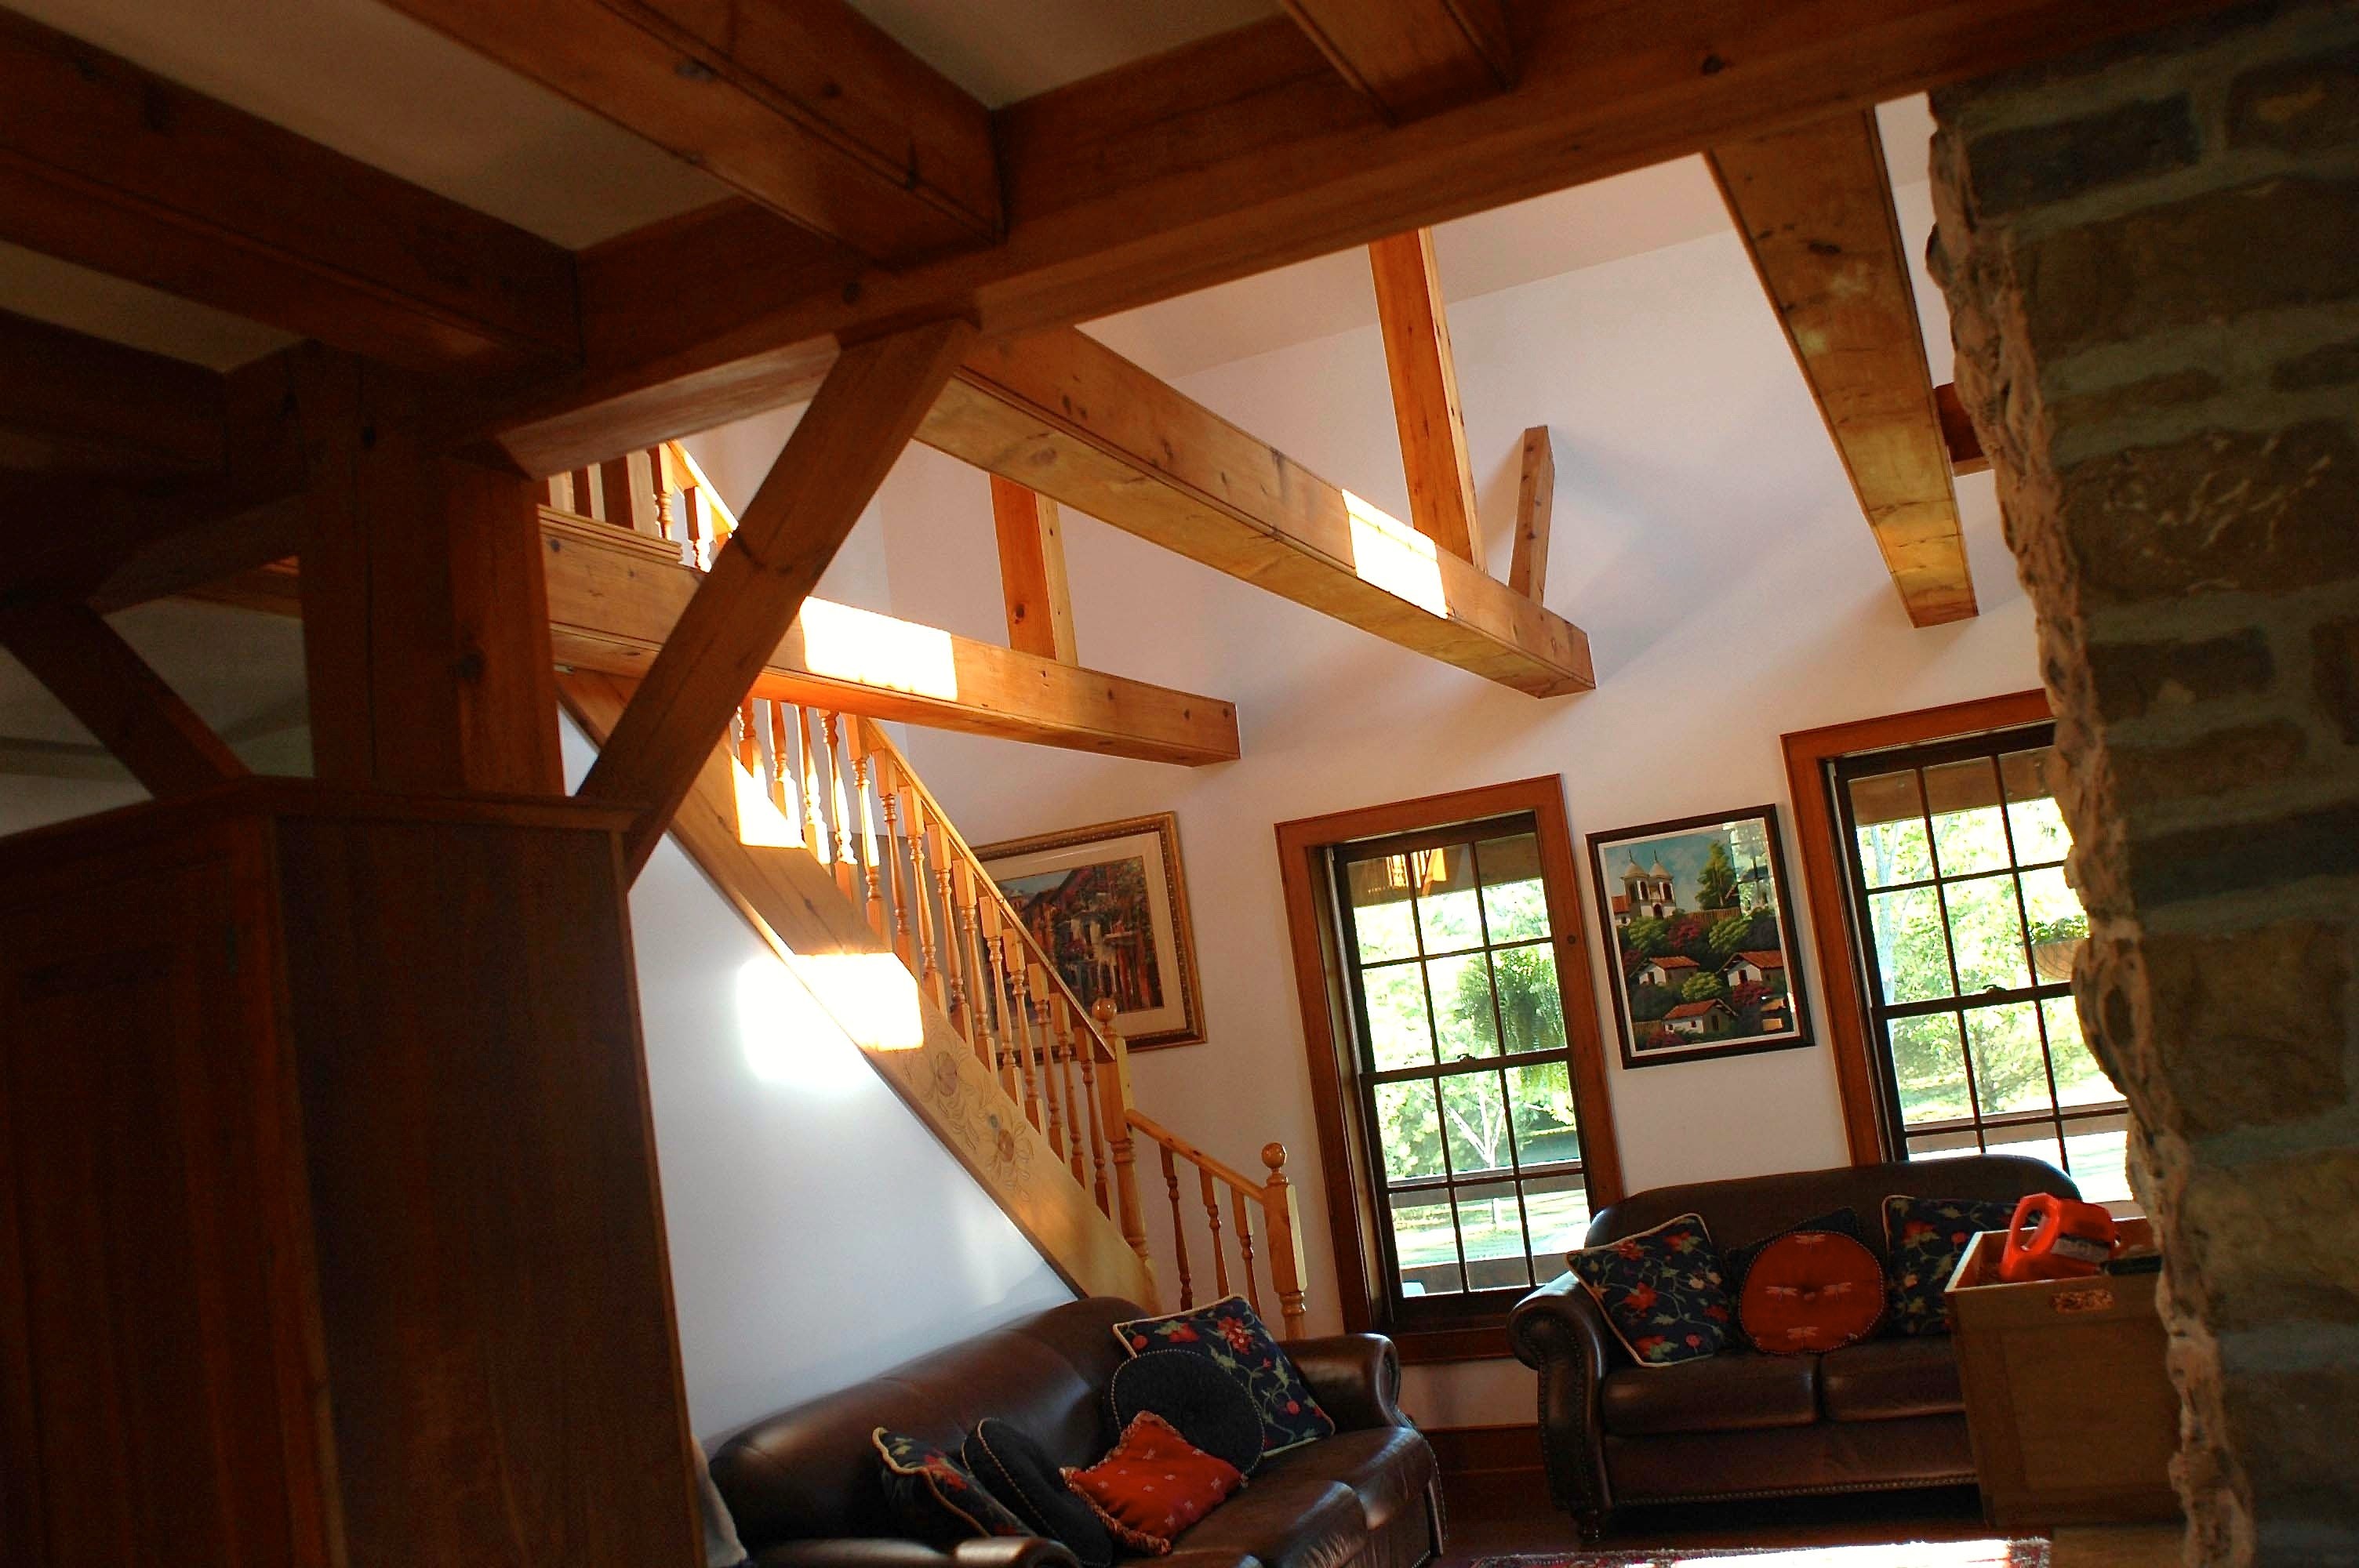
Have you ever noticed how some indoor spaces look and feel terrific, while others seem ugly and sad? Why the difference? More often than not, it’s about more than just the quantity of light, but also the quality of that light. When outdoor light enters a room from two adjoining sides, it almost always makes a space feel more inviting than the same space with light entering from one side only. It’s a striking effect and worth pursuing.
This effect was first noted by the team of six authors behind a classic 1977 book called “A Pattern Language”. Together this team scoured the globe looking for specific reasons why some regions, cities, towns, neighbourhoods and buildings make people thrive and feel alive, while others don’t. They identified 253 specific “patterns”, the most useful for builders being the last ones in the book that have to do with exactly how building design affects the sense of well-being enjoyed by people. Pattern #159 notes how important light on two sides of a room is. It’s not always easy to do, and sometimes skylights or sun tunnels are needed to make it happen when windows can’t be used. But despite the hassles, the results are exceptional
Home Design Concept#3: Go For Steep and Interesting Roofs
When manufactured roof trusses first became popular after WWII, roofs got flatter, plainer, easier to build and considerably uglier. Slowly but surely even truss roofs have been getting steeper and more interesting over the last 30 years. Not fast enough for my liking, but things are getting better.
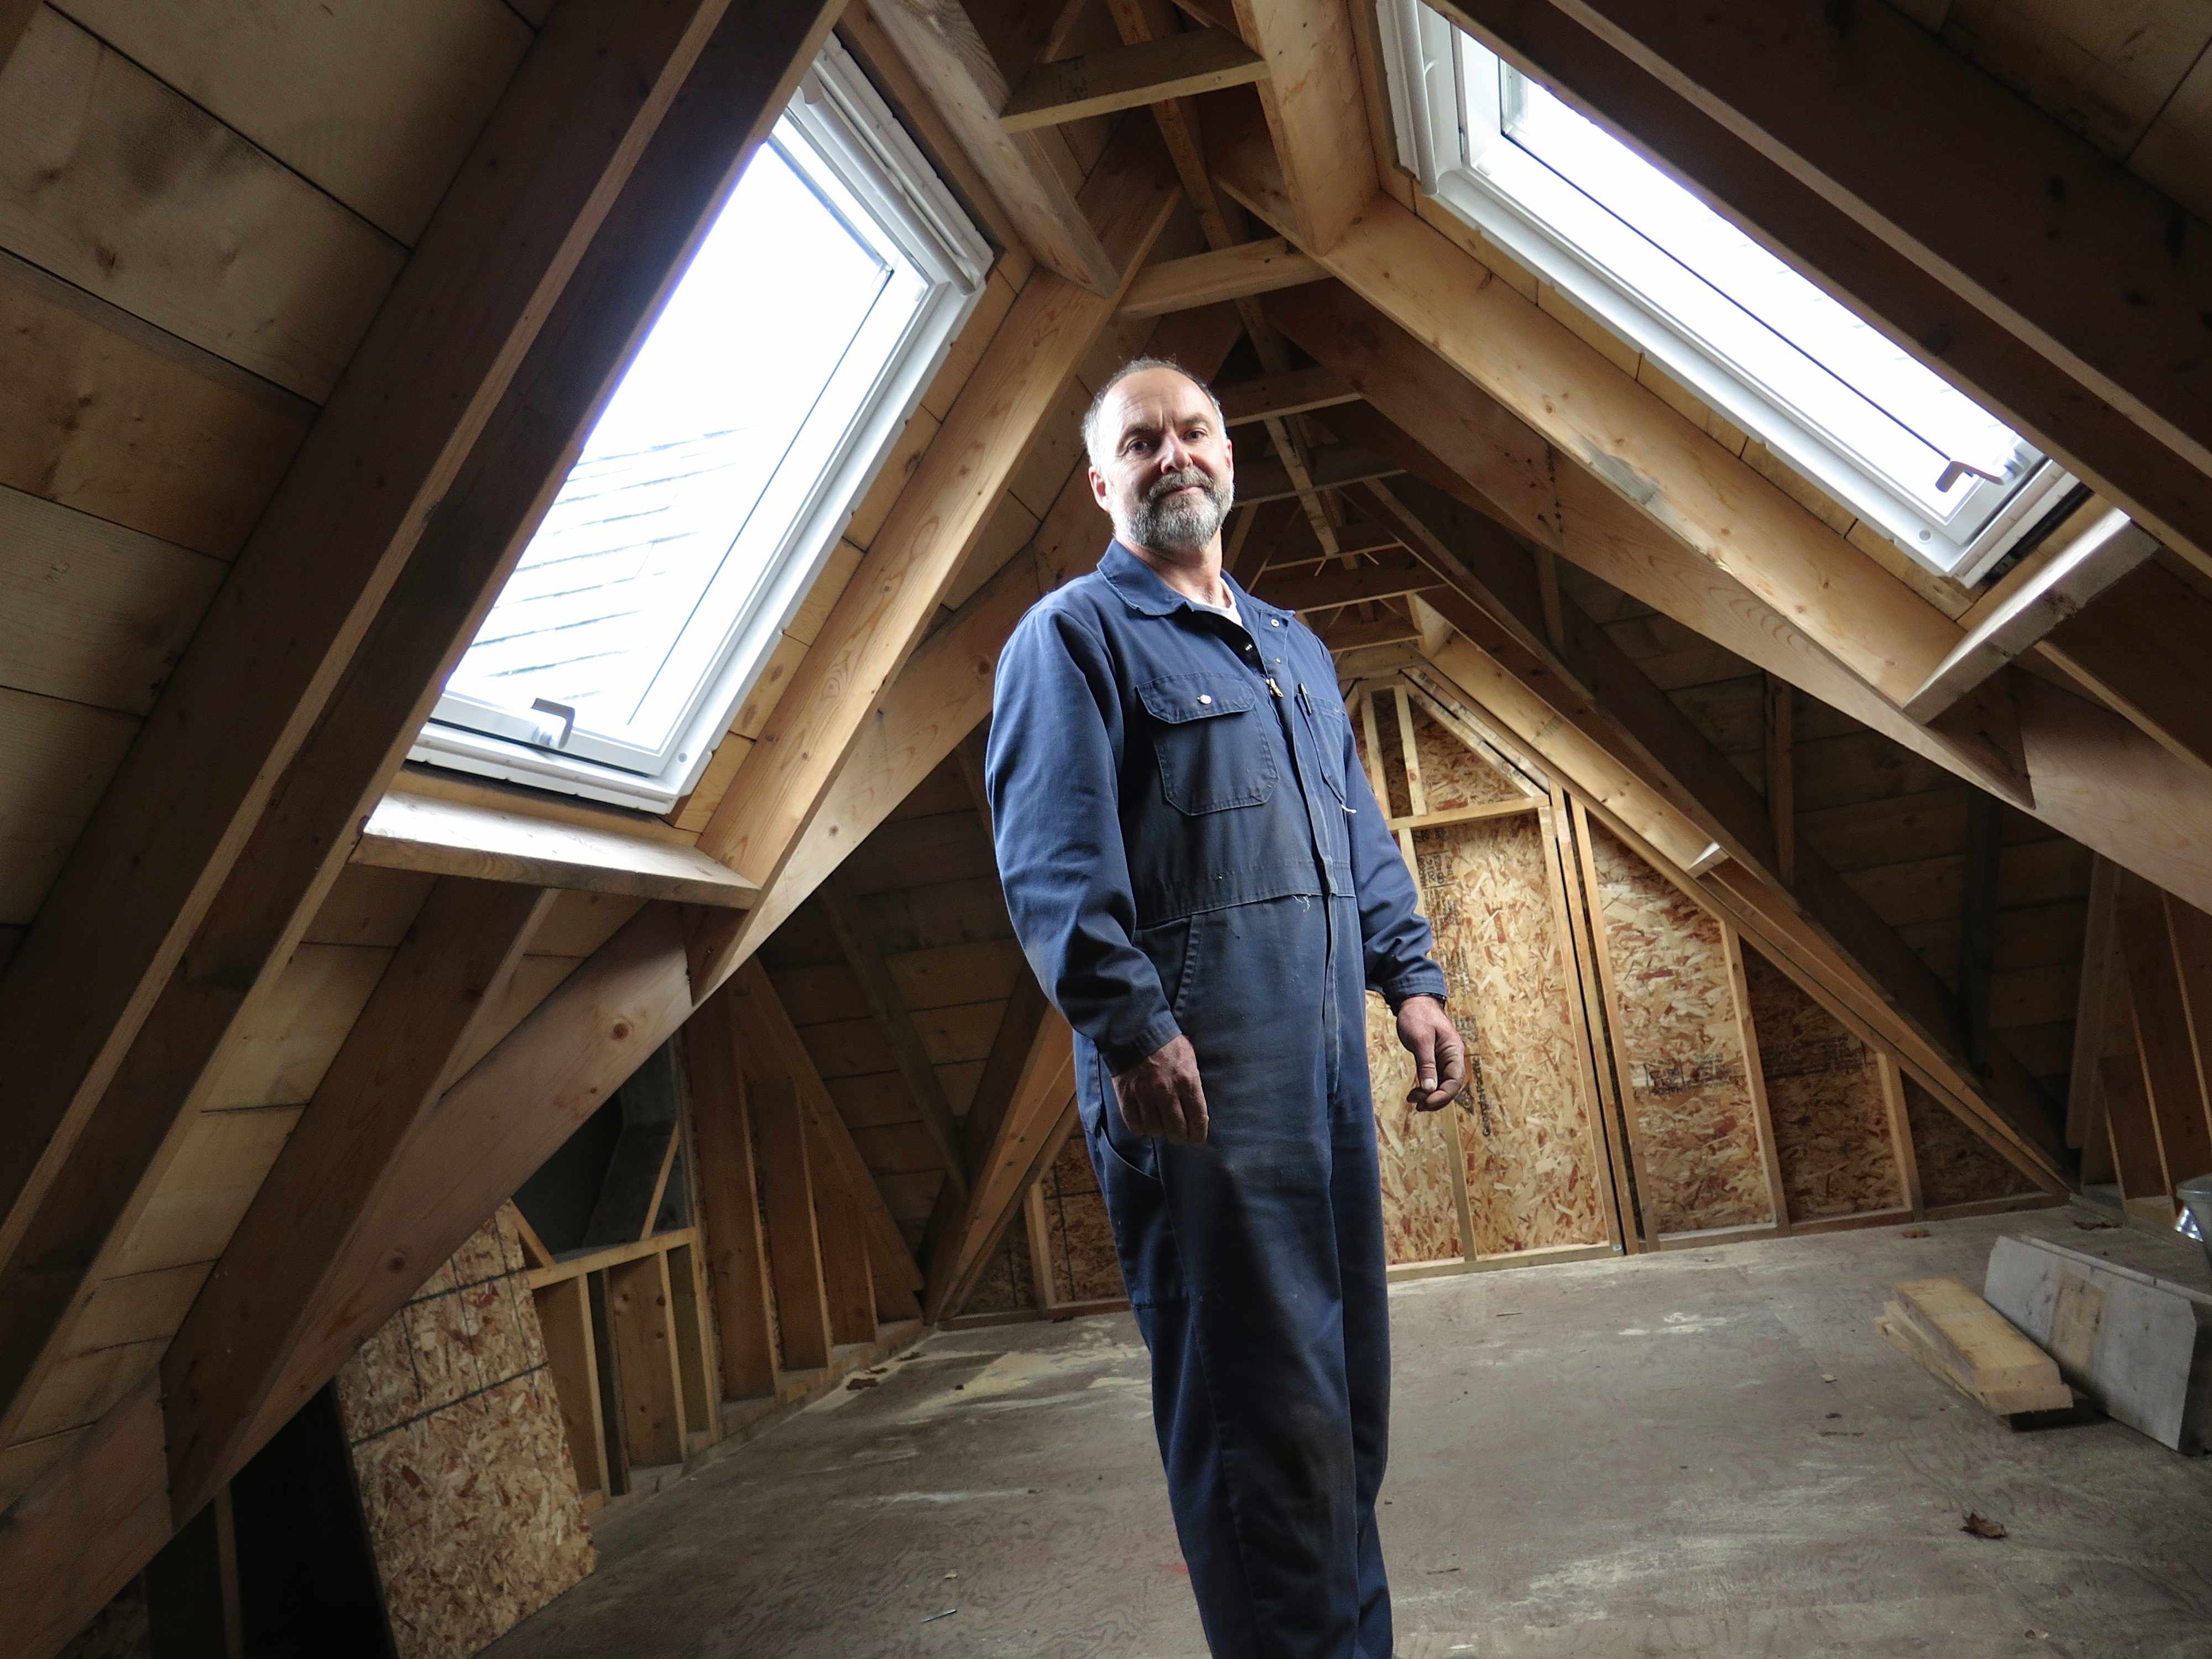
Computer-aided design means that truss manufacturers can now do a lot more than they could to accurately add gables, dormers and other interesting features to truss roofs with steep pitches. That’s why pleasing roofs are becoming more common. While it’s true that not all building budgets allow more than the cheapest possible roof, when people realize how much more beautiful and interesting steep and varied roof lines are, it’s surprising how budgets expand. The sleeping loft below is the finished version of the rough attic you can see above.
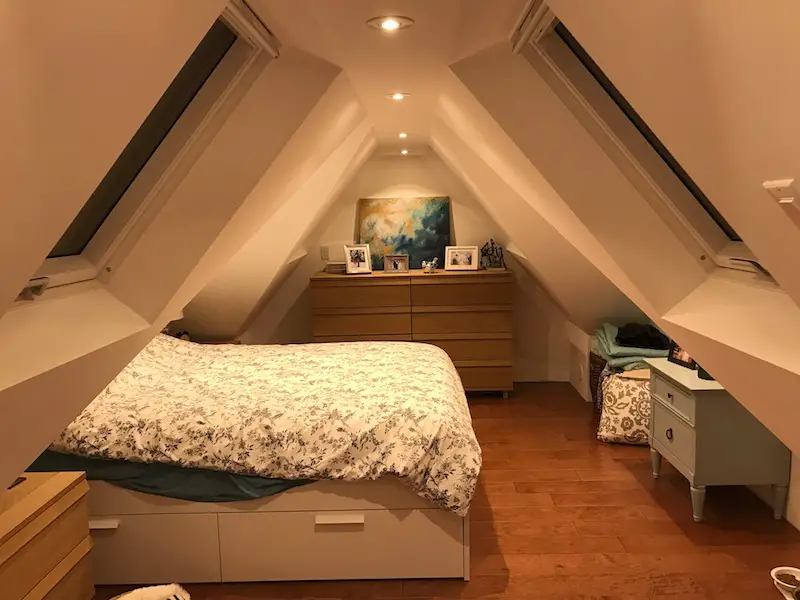
Home Design Concept#4: Consider a Livable Attic
Back in 2007, two large group homes were built about 25 miles from my house, and their design was both visually impressive and enormously wasteful. The total volume of space underneath the steep and beautiful roof structures totaled more than the volume of the entire living space within the walls, and yet the area immediately under the roofs was completely unusable. Complicated truss webbing and lack of foresight made this space forever inaccessible. A different roof structure would not only have more than doubled the living space in these homes, but it would have created coveted attic loft space – something that most people consider exceptionally premium living areas.
Built right, attic spaces are inviting, mysterious, romantic and rare. They can also be built so they’re comfortable year round. The first key structural detail is adequate insulation of the roof structure. Build with SIPs or use spray foam between rafters. Either way will create a hot, unventilated roof surface. If you’re roofing with shingles, use fiberglass instead of organic asphalt. Fiberglass shingles have no problem lasting under extremely hot conditions that would cause organics to curl in 7 or 8 years.
Home Design Concept#5: Create Transition Zones
No matter how effective exterior doors get, there’s simply no substitute for a transition zone between indoor and outdoor spaces. Builders of old new this fact, and that’s why they built mudrooms, covered porches and awnings over doors. If ever there was a country that needed intentional transition zones between the warmth of indoors and the harsh realities of outside, Canada, my country, is it. Why we forgot this truth, I don’t know. But thankfully, I’m seeing more and more builders remember.
No one likes to step out of a house only to feel the full brunt of the elements inches away from the door handle. What you’re looking to create is a realm that’s neither completely inside nor outdoors, a space that eases the movements of people on a practical and visual level. Decks are a feeble attempt at this, but the lack of a roof is like a hamburger without the patty. That’s why you should consider some type of covered entrance, verandah or mudroom in your projects. People are so starved for this kind of thing that they don’t even know enough to ask for it.
None of these five strategies will ever show up on the radar of slap-happy contractors, but that’s fine. The fewer builders who use them, the better off it is for homeowners that choose to use them. And when it comes down to it, beautiful work is always a rare and exceptional thing.
Router-Based Home Details
Click below for a video tour of how to use specific router bits to make great trim and home design details that you won’t find in most houses. I made this video for a contractor audience, but it applies just as well to hands-on homeowners. Video transcript is below the video.
VIDEO TRANSCRIPT:
00:00 Just about every time I go into a new house, I’m at least a little bit disappointed. The reason is because of what I don’t find there. More often than not, the interior of new houses lacks a lot of the flair and interesting details that could have been easily introduced but wasn’t. If you think back to houses that were built new 30 or 40 or 50 years ago, they were all pretty plain. They’re one or two story bungalows for the most part. We’ve gotten away from that. Roof trust design and floor plan layouts are much more classic then ever. The problem is, a lot of that hasn’t translated into what goes on inside. So I want to give you a tour of a few tools and techniques that can be used to raise the quality of what you’ll find there, economically, help your homes to sell better and it’ll also, better interior design which everyone can enjoy.
00:56 What I want to show you has to do with wood and wood finished in the way that let’s the grain show through. What you need to know as a new home builder is that there’s a large and expanding range of router bits and router accessories that make it economical to mill a lot of these interesting profiles on site, or in a simple workshop. The bullnose profile is a simple semi-circular shape that you can mill on portable or stationary router tables. You can use it to jazz up all kinds of details. Wainscotting, door and window trim. It also helps you to solve problems when parts don’t necessarily align well as they go together, as in this doorframe here.
01:39 Many builders are surprised to learn that you can route, beefy, thick handrail, on site or in a workshop using just a handheld router. It’s a three part process that allows you to use non-standard species. First you start by milling the finger grooves, along the edges, then you ply out the champ for along the bottom edge, and finish up by routing the top profile in two passes.
02:11 The wainscotting bit is a Canadian invention that allows you to easily mill interlocking ends and edges on styles and rails for wall mounted wainscotting. It’s now possible to mill five and a half inch wide crown molding, using an ordinary router. Even two and a quarter horsepower router will do it, using these bits here. They work together on a tall fence that supports the work solidly on edge to create the profiles you need.
02:42 None of what you’ve seen here is typical in the home building industry, at least not yet, but you probably don’t want to stay typical. Try these things out, small at first, and just see what they do for you. I guarantee that you’ll be pleased with the result.
 I hope you found this article and video useful. Please consider helping me cover the cost of creating and publishing content like this. Click below for a safe, simple and fast way to make a contribution. Thank you very much!