0:00
Do you remember that trunk lid that I was showing you in a number of videos ago
0:15
It was brown at the time and it was part of a refurbishing project for a trunk
0:21
Well, this is the lid. It's been fixed and I've put some milk paint on it now
0:29
And I must say, I think it looks pretty crummy, actually. I didn't expect the one coat of white to cover the dark surface very well
0:40
So that's why we've got all these splotches. What I don't know if you can see or detect here is..
0:47
Listen to this. It's pretty rough. Milk paint is a powder that you mix with water and it's not unusual to get some lumps
1:00
in it. I power mixed it with a big spade bit in my drill to make it as dissolved as possible
1:08
but we still have a lot of bumps here. My plan is to use some of this 180 grit sandpaper
1:19
I'm going to be sanding by hand. I've actually already started here on the end
1:24
It does sand quite nicely. I've just sanded the end here and it's very smooth
1:29
So I'm going to be sanding like this. With the grain. The bumps come off quite well
1:39
I'll give it a little bit more than that. And then I'm just going to see how it looks
1:46
I mean, as I said, I'm not crazy about it now. I'm thinking that it's probably going to need a second coat to even that out a little bit
1:53
But definitely not until I sand it smooth. I'm also going to strain the milk paint through a screen to try to make it smoother
2:03
And then we'll see what happens. The end result will be a kind of intentionally worn look
2:09
I started to do it here. You know, with the dark showing through in that kind of shabby chic sort of way
2:17
That's the effect that we want. And we've got some old weathered metal hardware we're going to put on here as well
2:24
But that's where we're at now. Just a bunch of hand sanding to do
2:28
And then I'll come back and show you what that looks like
2:32
And whether we need a second coat or not. Well, I'm all finished sanding now
2:38
It's sanded up quite nicely. It feels really good. But it doesn't look all that different
2:45
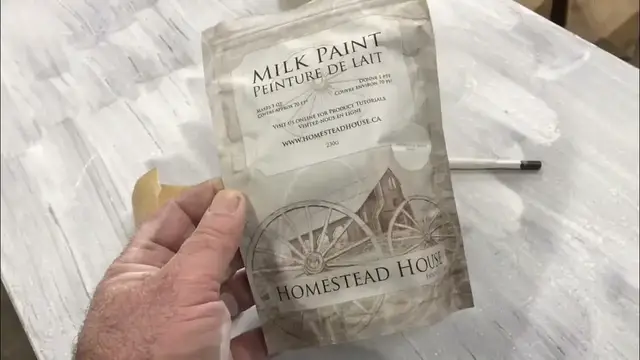
So I am going to be giving it a second coat. I haven't shown you yet the milk paint I use
2:51
This is the stuff here. It's made in Canada. Which is the country where I live
2:57
I first started using this Homestead House paint back in 1987. When I was working at a cabinet shop
3:06
We made solid wood cabinets in an antique style. And milk paint was part of some of the designs
3:13
It's a powder. This one happens to be Stirbridge White. It's a powder that you mix with water
3:24
This is what I mixed it in before. As I said though, for some reason there were some lumps in here
3:30
So I'm going to strain this. Add some more powder and mix up some more water
3:36
I'm going to clean this off too. This is what I use to mix things like this
3:42
Nothing fancy. Just an old wide spade bit in a drill. It doesn't mix very well by hand
3:50
It's a lot of work to mix it by hand. The likelihood of lumps is even higher
3:55
Than with electric mixing. So that's what I'm going to do next
4:01
And I'll show you what it looks like. This is a little more like it
4:07
This has been sanded at the top here. And I've used a small fuzzy roller
4:14
To put on this next coat of milk paint. I'm glad I did because even with the roller
4:21
It's not covering the dark stain that used to be here. Very completely
4:28
I think it will be fine once it dries. You can see the reflections there
4:33
It's not exactly a new car finish. But the advantage of the milk paint approach
4:39
Is that it kind of looks banged up and rough. In a nice sort of way
4:44
Not that it really looks that way now. It's kind of an orange peely kind of surface
4:50
But once that dries. And I start to sand it through. Here and there around the corners
4:56
And different places to simulate wear. I think it should look pretty good
5:00
That's the way I've done other projects like this before. And it's always turned out well
5:07
I'll show you when we get to that stage