0:00
In this video I want to talk to you about staining. Now that's a process where you
0:06
impart color to the wood, color that wasn't there already, and you can see a
0:10
bunch of stained things. Everything is stained here except this. So nowadays you can get all kinds of different colors as you can see, but the
0:22
staining I'm talking about and the staining that I'm going to show you how to do later on is entirely different from what people mean when they say I'm
0:30
going to stain my deck or I'm going to stain the outside of my wooden house. And
0:34
that usually does impart color too, but that's kind of another process. It's not
0:39
the same as this process. It's a much coarser process, so don't be confused by
0:43
that. Now I am NOT going to show you how to apply stain in this video. We're going
0:49
to do that later, but I just want to show you what you can expect and what it
0:54
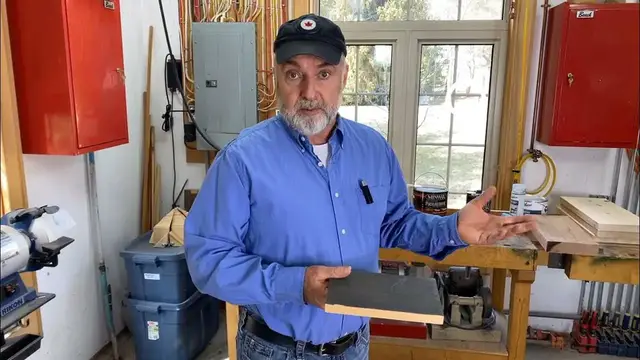
looks like and some of the drawbacks to do with stain as well. So here we got a
0:59
bunch of different colors. This is sort of a traditional brown, nice and smooth
1:05
Now the smoothness comes from, in this case, polyurethane sealing, like the
1:11
stuff I've already shown you. Same for this. This is the top half of a
1:17
frame and panel door. I cut this so that I could use it as part of my
1:22
demonstrations for how to do cabinet making and things. Both this stain and
1:27
this stain were oil-based stains that are now under a sealing coat. All of
1:33
these stains are water-based stains, so they're a little nicer to use. They're a
1:38
little safer to use, and you can get, as I said, a wide range of colors as you can
1:44
see here. Now the first thing I want to point out is that staining on its own
1:51
for interior work doesn't really make wood look all that good. I mean, take
1:57
something like this for instance. It's shiny, it's got some depth to it, it's
2:01
attractive, it's nice to run your finger over. Well, this is the same sort of wood
2:06
and it's been stained, but stained only. And well, there's nothing really to write
2:13
home about that, is there? It doesn't feel nice either. It's just got a color to it
2:17
But even the color is not representative of what you're going to
2:21
see once this is under some sort of sealing coat. So for our purposes here
2:26
all stains, all traditional stains, will be applied underneath some kind of
2:33
sealing coat. And that could be urethane, maybe some wipe-on poly, something a
2:38
little easier to apply. Less protection, but easier to apply. And that really
2:43
brings out the color. So one thing to keep in mind is when you're deciding on
2:48
what stain to use and you want to maybe do some some test patches or something
2:52
somewhere, don't assess the results until you get some some sort of a sealing coat
2:56
on it. Now another thing about this, and I hope you can see it, staining brings out
3:04
imperfections in the wood. Imperfections that you can't normally see. And you
3:09
can see what I'm talking about here. If you look closely, you'll see that there's
3:14
kind of some swirl marks. You see that? It's not too attractive. And you know the
3:20
swirl marks wouldn't go away after I apply urethane either. This is caused by
3:27
the use of a random orbit sander with a fair amount of hand pressure. This did
3:33
not look bad before I put the stain on. But stain brings out imperfections. So
3:40
that's something you need to keep in mind. If you're going to be staining
3:44
something, the sanding job really needs to be quite well done. And you need to
3:49
examine it closely to make sure that you don't have any scratches or swirl marks
3:54
There's another another thing you need to watch for, and that's any area where
4:00
the glue has touched the wood. Because even if you wipe the glue off, the
4:06
surface is still sealed. Which means that when you go to put stain on, the stain is
4:11
going to soak in all around that glue patch. But where the glue was, it won't
4:15
soak in. And so you're going to have a very light area. You might not even
4:21
notice it at first, but it's going to stand right out when you start your
4:24
finishing. In cases like that, you're going to want to take the time to sand
4:29
that spot or maybe use a little chisel or a scraper or something like that to
4:33
get the residual glue out. And it's not just glue on the surface either. It's
4:37
glue that affects the first few layers of wood cells. It's basically sealed
4:43
them ahead of time so that the stain can't soak in. So one other thing, when
4:50
you're making a decision about whether to stain wood or not, don't just consider
4:56
the appearance. You also need to consider durability. Because, I mean for
5:01
instance, this piece of wood here, urethane finish, no stain. If this was a
5:07
piece of furniture or even a floor or something like that, and we scratched
5:12
through this or we wore through the urethane, it wouldn't be the end of the
5:15
world. Because the wood underneath is pretty much the same color. It's just a little bit of yellowing that has happened here from the urethane. But if
5:23
you go through a dark stain and there's light wood underneath, it's really going
5:29
to show up and it's going to look ratty. You can go over with more stain again to
5:33
kind of hide that color difference. But you need to be aware of that. And this is
5:38
why sometimes it makes sense to finish as minimally as possible, to just seal
5:42
the wood and not to color it. Or if you're a woodworker, say, and you have
5:47
some control over the kind of wood you're finishing, then you might want to
5:51
choose a dark wood if you want a dark look. That way when you've sealed it with
5:56
a clear sealer that imparts no color, the dark wood is going to provide the
6:01
color for you. So even if you go through that urethane, no big deal because it's
6:06
still darker wood underneath. So that's staining in a nutshell. There's a little
6:10
bit more to talk about than this, but this will get us going