0:00
In this video I want to talk to you about how to fix a kind of very common
0:06
problem with older vehicles and that's when you get the cloudy headlight lens
0:11
thing going on here. It makes your vehicle look terrible. It reduces the
0:17
amount of light that gets out at night when you're driving but it's also a very
0:20
easy fix too. I'm going to show you how I use a simple buffing tool. There's
0:26
different options and some rubbing compound to really make a difference on
0:31
something like this and not to take very much time doing it. So this is the lens
0:36
I'm going to do first. I'm not going to do that other one and then you'll be
0:40
able to see the difference and it all starts with with wetting the surface and
0:46
then getting busy with some of this compound here. This is a very fine
0:49
abrasive compound and depending on how bad your lenses are you might want to
0:56
use one or you might want to use both. This is a rubbing compound. It's meant
1:01
for polishing down auto finishes and it's just called rubbing compound. This
1:05
is the coarser of the two. It's still quite fine though. I mean if you look at
1:09
it here it's you know it's just a it's just a looks like hand cream or
1:14
something like that. There's no discernible abrasive to it but it is abrasive and this is what you want to use if your headlights are really bad
1:21
These ones aren't really bad so you might just want to go with this finishing
1:26
polish which is the same sort of thing same sort of cream stuff but it's just
1:31
microscopically finer. So let's get started. So the first step is to figure
1:36
out what kind of a machine you're going to use for this. I will be using this. This
1:40
is a sander. It's a woodworking sander believe it or not but it also accepts
1:44
this foam pad which does a great job buffing not just headlights but general
1:49
automotive finishes. Now you could also use a dedicated automotive polisher like
1:56
this one here. That'll work too. You can even just use a regular cordless
2:02
electric drill with a buffing pad chucked into the end so it's going to do
2:06
a spinning action. It's going to get the job done for you but I'll just set these
2:11
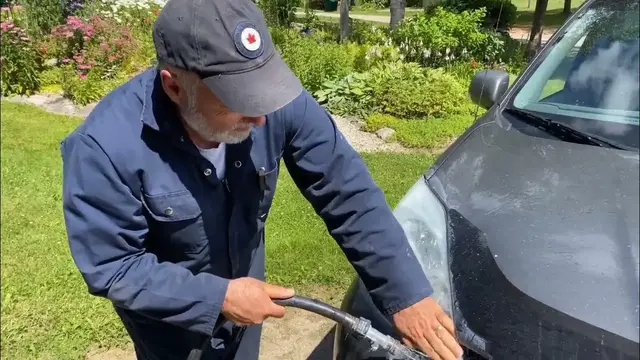
aside for a moment and we can start by wetting the lens. This is a wet process
2:21
The whole thing is done when it's wet so keep the hose handy not just for the
2:32
initial wetting but also later when it comes time to wash off the abrasive
2:39
compound. I'm also going to wet the pad here a little bit and we'll go with some
2:49
rubbing compound which as I said is the slightly coarser of the two and we
2:57
probably don't need to use that here but I'm going to start with it anyway. Now
3:02
notice I'm not going to turn this thing on because if I turned it on now the
3:06
compound would fly all over the place so you only turn it on when it's in
3:11
contact with the lens and you wait for it to stop before you take it off
3:16
because as I said if you lift it off there's going to be compound everywhere so let's just start buffing
3:25
It won't hurt anything if you go beyond the lens a little bit. Just make sure you get all of it. You don't have to stay away from the paint
3:46
You also want to be methodical about it. Everywhere needs to get the treatment
3:55
I'm switching off but I'm not lifting it off yet because if I did as I said
4:10
there'd be a big mess. Now I've only done that for a minute or two. Now let's
4:15
rinse it off and see how it's looking. I want to alert you to a
4:22
little bit of a problem here. Something you need to watch for. Now that lens looks a
4:29
lot better doesn't it? One of the reasons it looks better is because it's wet. It'll always
4:35
look better when they're wet so I'm going to do a little bit more. I'm going
4:40
to use the fine compound now for I guess it's another minute or two and then
4:45
we'll rinse off and see what we've got. Now that should do it
5:19
Yeah it sure is looking a lot better. There's two things that need to happen at this stage
5:28
Thing number one is I'm going to let this dry so that I can see if I've really done this enough. I
5:36
think I have. It certainly looks way better than the lens on the other side. I'm going to let it
5:42
dry because that's the only way I can assess it properly and then if it looks good I'm going to
5:47
put a coat of automotive wax on that because the reason why it goes cloudy is because the
5:53
sunlight is microscopically etching the surface so it's not as smooth as it was. It's textured
6:00
and it's dull for that reason. The automotive wax will preserve this polished surface for longer
6:06
than if I just left it bare. If I just left it bare I might get six, seven, eight months of
6:13
clear performance and then it's going to start looking cloudy again. I should get more than a year if I've coated it with the automotive wax so not a lot of work and as you can see it makes a
6:22
big difference but let's come on back in a few minutes and I'll see what it looks like when it's
6:27
dry and we'll put some wax on it. So I think the lens looks pretty good right now. It's all dry
6:32
You can see it's quite a bit clearer than the other one so I'm going to go ahead and use some
6:38
automotive wax here. It doesn't really matter what you use. Anything for an auto finish will
6:43
work fine and I find it actually makes the lens a little bit clearer too it seems somehow. Just
6:53
a thin coat. Spread it all around. And we'll let it dry. Come back and buff it by hand for
7:14
the finished result. So the wax has been on here for about 10 minutes. It sure is buffing off
7:20
nicely. Just as clear as it was maybe a little clearer. As I said the wax is going to keep this
7:30
looking good for longer so it's well worth the few minutes that it takes. Just compare. Look at
7:41
that lens and look at the other one. It's like night and day and I don't know about you but
7:46
cloudy lenses on a vehicle make the whole thing look really stale and old. This vehicle is 18
7:52
years old. It's got almost 400,000 kilometers on it. Original lenses and they still look great
7:59
So a little thing like a lot of other little things can come together to help you get a
8:04
lot more out of your your vehicles and your home and everything in your life