Up next in 10

PERFECT MITER JOINTS - Watch Detailed Tutorial and Learn How to Cut Them
Feb 22, 2024

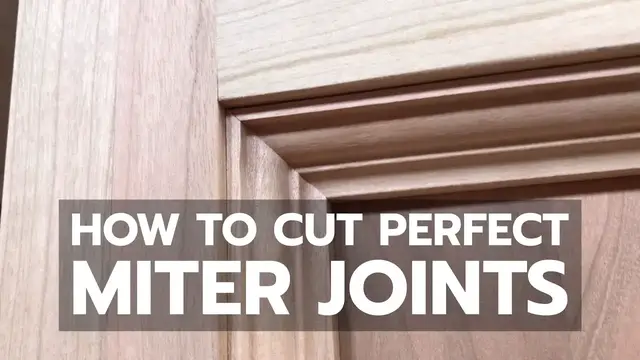
Watch cabinetmaker Steve Maxwell demonstrate all the tricks for cutting perfect miter joints on inside trim using a knife and a chopsaw.
READ MY POPULAR ARTICLES ABOUT:
Polyurethane Finish - https://bit.ly/powerbuffing
DIY Hoop House Plans - https://bit.ly/hoophouseplans
Submersible Pump Installation - https://bit.ly/pumpinstallation
Air-Drying Wood Tips - https://bit.ly/wooddrying
How to Build a Table - https://bit.ly/tablebuilding
How to Stain a Deck - https://bit.ly/deckstain
Choosing Waterproof Outdoor Glue - https://bit.ly/exterioradhesives
How To Build A Wheelchair Ramp - https://bit.ly/wheelchairrampplans
SUBSCRIBE: http://bit.ly/BLRchannel
WATCH MY POPULAR VIDEO: How to Kill Household Mold
https://youtu.be/mj1WJFqos6Y
WATCH MORE BAILEY LINE ROAD:
Winter Tips - https://bit.ly/2rpnUcm
Show More Show Less View Video Transcript
0:00
��
0:09
Lately I've been working on some box newels for a stair railing I'm working on
0:14
That's what these are here. They essentially act as a post for the handrail to connect to
0:21
during final installation. There'll be some spindles underneath. I've made all this
0:26
starting with rough cherry. But this video is all about the installation
0:32
of these pieces of trim in the panel area. There's a lot of trim to go in and the joints
0:39
have to be quite nice because they're going to be prominent. So I'm going to be showing you how
0:43
I do this both accurately and in large enough quantity to get the job done
0:49
So these are some of the pieces of trim I made. I just used the scraps left over from the
0:53
construction of the newels themselves. So it was a good use of materials. Made them on the router
0:58
table and the first step in mitering is to cut one miter on the ends of all of the pieces of trim
1:06
The trim turned out pretty well but as with homemade trim sometimes the ends are a little bit
1:13
chattery as the bit starts to stabilize. So I'm looking for that. I don't want to include that
1:18
that roughness. But the first step is really very simple. If my end is good
1:24
it's good up to about here in this case, I'm just going to make the first miter for each piece
1:43
So this next step is all about marking and you don't use a pencil. A pencil is not precise
2:24
enough. Even a sharp pencil. You need to use some kind of a utility knife and you always mark each
2:30
piece to fit a specific spot. So theoretically the length of this edge here where I'm going to
2:36
be putting the trim is the same as the length of this here. But in practice there's going to be
2:42
several thousandths of an inch difference and that's too much. So each piece is custom cut
2:49
and I set the piece in this way touching the the outside edge and I make my mark
2:57
Now let me show you what doesn't work as well. I could put it in this way and I'd still be
3:03
registered against the edge of the opening but now it's just a whole lot harder to mark
3:08
See because I don't have as neat access with the knife. So do it this way, put it in tight
3:16
put the trim against the edge and now you've got everything held nice and solid
3:23
Put the blade here and just make a little mark. It doesn't have to be too big but
3:32
there's the mark there and that's all we need. Now in the interests of efficiency
3:39
I always mark at least two pieces before I go back to the saw. You can waste a lot of time
3:46
walking back and forth with a saw if you don't do at least two at a time. So I'm registering the
3:51
far end against the opening and now I'm marking it here with the knife and we've got another mark
4:06
So that one's a little light. I'm just going to make it a bit more prominent and now it's
4:13
back to the saw. Now this is the piece that's closest to me so I'm going to keep that in my
4:19
left hand and I'm going to keep this in my right hand so I can remember where they go
4:31
Now one of the things I like about this saw is that the position of the blade is
4:41
evident on the workpiece because of the shadow that it casts. So this is much better than the
4:47
laser blade devices because it shows exactly where the blade is because the blade makes the
4:55
shadow. Now I need to to swivel this over because my last cut establishing the first miter was in
5:02
this direction so now I need to swivel the saw over make sure I hit that 45 degree stop
5:10
Now this is where the precision comes in. I'm going to do this just by talking
5:17
but can you see there's the there's the saw but there's the knife mark and then there's
5:26
the shadow of the blade. Now the shadow of the blade is not very distinct right now because it's
5:30
not spinning. I'm going to start it spinning and when you do I want you to notice how
5:35
this far corner of the knife mark I'm going to align it just on the edge of the shadow of the
5:43
blade. So pay close attention to that and that's how I get a precise cut. So here we go
6:02
So that's one done. I don't want to waste my trip over to the saw so I'm going to do that again
6:13
Now I know from experience that if anything these pieces might be slightly too long
6:23
Very a few thousandths of an inch too long. My goal is to get them on the right on the first cut
6:29
to get a perfect fit. I definitely don't want to cut them too short because then my piece is ruined
6:34
at least for long lengths. So let's go over and see how they fit
6:43
They should just slip in. I would say that was just about perfect
6:53
And another one just about perfect. So I'm not going to fasten these down yet because I know
7:01
from experience that I want to make sure that the other pieces are going to fit perfectly before I
7:07
nail anything down. Fasten it permanently. Occasionally it might happen that you didn't
7:11
set the saw correctly. You didn't hit the right detent and so you don't actually have a 45 there
7:17
You don't want to have to wrestle this piece out after it's more securely installed. So
7:23
next step it's just like the first step. I'm not going to mark it this way
7:31
Because that's clumsy I'm going to turn it around this way so it nestles right in
7:38
It's right in there tight. I have to push this down a bit more. Push this tight and
7:51
mark it. So we got a mark. We're going to do the same thing
7:55
on the other side because I never go to the saw with less than two pieces to cut
8:02
So there it's tight. And the knife mark. Now since it all comes down to the knife mark I just want to before I take
8:22
the piece away I'm going to make sure that knife mark is in the right place. This one's a bit light
8:26
so I'm going to to make it a little more firm. And now we go back to the saw
8:40
So I've cut these two short pieces now and none of these longer ones are in permanently. They're
8:46
not even pushed down all the way. I just want to get a sense that they are going to fit finally
8:52
And when I put this one in I'd say that's a little on the tight side but I'll be able to
8:57
tap that in later so I'm not going to worry about that. And then this one here
9:06
that's a smidge too tight. As I said, going back to the saw isn't the greatest thing but it's a
9:13
lot better than making the piece too short. So I always err a little bit on the side of
9:18
too long and I have a trick to show you for cutting off just a little bit because it's very
9:24
easy to go too far and to ruin this piece and all the work that you've invested in it. But
9:28
this technique ensures that you don't cut it too short and it has to do with the kerf of the blade
9:37
So the teeth on a blade like this are just a little bit wider than the body of the blade
9:45
So what I do is without the blade running I push the blade all the way down and then
9:57
push the piece tight to the body of the blade. It's kind of dark in there but it's touching the body of the blade not any of the teeth
10:06
I'm not pushing really hard I'm just snugging it up to the body of the blade
10:11
Then I'm going to raise the blade and start it spinning and you'll see that it takes off just
10:16
the slightest little smidge. So now we should go back and find that this little piece fits just
10:31
fine. I've never had it overshoot. It just takes the slightest little bit off so yeah it's actually
10:39
just perfect. This is a perfect fit. Occasionally if it's too long for one cut I'll just go back
10:45
and give it another cut. Now I know these pieces are going to fit. This one actually that's kind
10:52
of tight. I think no I guess we can we can tap that in. We can tap that in. So now it comes time
11:04
for installation. What I do here with these longer pieces in a longer panel opening like this
11:16
is I apply a little bit of glue but only to the bottom edge. I don't want to apply glue here
11:23
on the the side because when I put the trim in and push it down that glue is going to smear and
11:30
come up and just make a big mess that's going to be visible. But if I put the glue on the bottom
11:35
like this then the glue is only going to contact the wood of the panel when it's fully
11:48
Sorry about that. That was the compressor kicking in. Compressor for the pin nailer that I'm going to be using to secure this
12:00
so I don't strictly speaking the glue is not completely necessary but I prefer to use as few metal fasteners as possible and
12:14
the pin nailer helps to hold things while the glue dries. Now I can't push that down any further
12:23
with my hand but I've just got a little block of wood here and if I align it correctly
12:31
it lets me drive that trim down nice and tight with everything. So all I've got now is my last
12:41
piece and I just want to double check yeah that's going to be a really nice fit. Just a nice
12:48
sort of just the right level of snugness so I can confidently put some glue on
12:56
slip it in place. Remember once again no glue back here because that would smear
13:00
all across the side and it would be visible on this little edge that that remains open so
13:12
so just probably don't strictly speaking don't need to tap this in but
13:18
I'm gonna do it anyway just to be sure. So there we have it
13:25
now there's only one thing left to do as I said I'm going to secure these with 23 gauge pins
13:30
They're very small they're the diameter of a sewing needle they have no head so they don't
13:34
leave much of a mark but they do leave a tiny mark and I find it best if that tiny mark is
13:41
symmetrical. So I'm going to make small marks two inches from each end of the long piece of trim
13:49
and then one in the middle. It's a little thing but keeping the fasteners symmetrical just helps to
14:00
raise the quality a little bit. So here we've got this now if you've never seen 23 gauge pins this is what they look like they're
14:10
very small I mean this is a whole strip of them and it fires off one at a time. In the right kind
14:16
of gun you can even shoot two inch long pins in hardwood and they don't buckle so we don't need
14:24
two inches this for this job but I'm going to do the middle one first because the middle one has
14:32
has always has a little bit of flex in it. I can't really do too much to push the ends in
14:36
but I can push the middle in and I'm going to center this pull the trigger
14:46
Now that probably looks more prominent on the camera than it will in real life when everything's
14:54
all finished and this cherry has darkened up. Cherry darkens really nicely on its own in exposure
15:03
to light and when that happens the holes from these pins are going to be pretty well embedded
15:13
So there you have it. Trim work done precisely and fairly quickly with hardwood
15:21
Thanks for watching. Click here to join the thousands of people who get the Bailey Line Road
15:27
hands-on how-to newsletter for free every Saturday morning
#Home Improvement
#Construction & Power Tools