Up next in 10


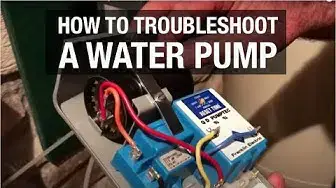
In this video I explain in detail how to troubleshoot a water pump. There are a number of possible causes when your water well pump stops working, or doesn't work properly. Learning how to troubleshoot a water well pump correctly means doing some methodical detective work.
MY ONLINE COURSES:
► My Cabin Building Course: https://bit.ly/36bRARX
► MIG Welding for the Home Workshop: https://bit.ly/3CGuUFv
► Woodworking for Beginners: https://bit.ly/3w6ZnLW
► How to Build a Deck: https://bit.ly/3i2LWV3
► Build Traditional Wood Cabinets: https://bit.ly/3JbLQ9v
► Renewable Energy for Your Home: https://bit.ly/3w9K4ls
► 3 Solar Energy Projects: https://bit.ly/3KLNUp9
READ MY POPULAR ARTICLES ABOUT:
► Polyurethane Finish - https://bit.ly/powerbuffing
► DIY Hoop House Plans - https://bit.ly/hoophouseplans
► Submersible Pump Installation - https://bit.ly/pumpinstallation
► Air-Drying Wood Tips - https://bit.ly/wooddrying
► How to Build a Table - https://bit.ly/tablebuilding
► How to Stain a Deck - https://bit.ly/deckstain
► Choosing Waterproof Outdoor Glue - https://bit.ly/exterioradhesives
► How To Build A Wheelchair Ramp - https://bit.ly/wheelchairrampplans
Show More Show Less View Video Transcript
0:00
So this video is all about the basics of troubleshooting a submersible water pump system
0:06
So you've turned on the tap, there's no water coming out, and you want to find out what's going on
0:13
So the first thing you want to do is to look at your pressure gauge
0:18
In this case it's over here. I've got a nice big one. It's actually originally made for a water sprinkler system for fire protection, but it works really well for this too
0:32
If you see no pressure there, well you know that for some reason the pump is not working
0:39
And here's how you go about figuring out what the problem might be
0:43
It could become something quite simple. The first thing you want to do is to shut the power off
0:50
Now my system has a shut-off valve here. You don't want to try any of this unless you're already familiar with the safety aspects of dealing with electricity
1:00
But right now the power is on. I'm going to shut the power off, and then I can open up my door
1:06
And in this case I've got a couple of time delay fuses here
1:10
Are these fuses blown or are they good? That's the first step. You want to determine if electricity is getting to the pump
1:19
That's the first step. So assuming that electricity is going to the pump properly
1:25
the next thing you want to look at is this thing here
1:30
This is the pressure switch. It's the same kind of switch no matter what sort of water pump system you have
1:39
whether it's a jet pump or a piston pump or a submersible pump. They all use similar pressure switches to this here
1:47
So the power is off, and I'm going to be opening it up and taking a look inside
1:56
The power is completely off here, or I think it's completely off
2:00
but I want to have multiple layers of safety here, so I've got my multimeter
2:06
and I want to check that there should be no voltage across
2:14
So there's just one volt there, just some stray voltage, less than one volt there
2:20
So we really are dead, which is what we want to be
2:24
Now the purpose of this pressure switch is to turn the pump on
2:30
when the pressure drops to a certain level in the tank, and then to shut the pump off once you've hit a maximum level
2:38
And it happens with these contacts here. So the contacts are closed right now, and they're open
2:48
This pressure switch senses the pressure in the system through this stem here
2:55
So water pressure goes up in here, there's a diaphragm inside, and that either opens or closes the contacts to maintain that pressure
3:06
Now, because these open and close every time the pump goes on and off
3:11
the contacts can get pitted. And if you see here, there's a contact here, and here's another contact here
3:22
So electricity has to flow through these things when they close, and because there's a little bit of a spark every time they open under load
3:32
these contact surfaces can get burned and pitted. So if your pressure switch ever stops working, chances are it's because these contacts
3:42
there's four of them in all, two on each side, have gotten to the point where they can't conduct electricity anymore
3:50
So if you have any doubt about the functionality of these contacts
3:57
go ahead and clean them with a little strip of 220 or 400 grit silicon carbide paper
4:07
That will clean them to the point where if that's the problem, then you'll get working again
4:15
What I prefer to do, though, is to have a completely spare pressure switch on hand
4:22
They're not very expensive, and if the contacts are going, then maybe cleaning them might get you through, but why not have a fresh one on hand
4:32
And it just threads in to the bottom, and you've got your nice clean contacts here
4:40
and the wiring is exactly the same, so you're ready to go
4:44
Now, just as an aside before I go on, although this strictly isn't a troubleshooting tip
4:50
I want to give you, but these two nuts here allow you to adjust the pressure of the water
5:00
So if you want to, say, raise both the cut-in and cut-out point
5:08
so the point at which the pump will turn on and off, then you tighten this one
5:14
That's why I keep this wrench here. The tighter this goes, the higher both cut-in and cut-out pressure is
5:22
If you want to change the differential between them, so the pressures spread
5:27
then that's the one you work with there. Now, let's say you've done all this, and you find that your pump still isn't working
5:37
Well, you can button this back up again, and it's time to look at the control box
5:46
All submersible pumps have a control box, and there's things going on in there that can cause a problem
5:53
It's also possible to test, electrically test, your submersible pump from up here
6:00
So you don't have to pull it out and try a new one to see if it's electrically broken
6:06
There is a test procedure inside here, so I'll just open this up and show you how that works
6:16
Once again, you don't want to open this box unless you're absolutely sure that there's no power going to it
6:25
So remove the screw at the bottom, open it up, and then this is what you see
6:32
So the main thing inside here is this unit. This is the capacitor
6:38
and its job is to give the pump a shot of electric power to get it spinning
6:45
If electricity were just applied to the pump motor with no extra shot of juice, then it might not get going
6:53
So the purpose of the capacitor is to kick-start the pump, and this is one of the things that can cause a pump to stop working, a pump that's otherwise good
7:03
Now there are methods of testing a capacitor. They're fairly complicated, but you see this circle here
7:11
If that's kind of bulging out or broken or exploded or something, then you know for sure your capacitor's bad
7:20
And they're not very expensive, so you can take it off, unclip it, and take it with you to an electrical supply shop
7:30
or you go online to find a replacement. Before you touch those contacts, though, you should lay a screwdriver across them
7:36
because if the capacitor is good, then you can get a little bit of a shock if you touch that
7:41
It won't kill you, it won't really hurt you, but it's not going to feel comfortable either
7:45
So the capacitor is one thing that can go wrong. The other thing that can go wrong is the pump itself
7:54
The windings can be burnt out, and that's where the multimeter comes in again
8:00
If you look here, you'll see some very important information on this chart
8:07
See, down here, you'll see the different horsepowers of pumps. Mine is a half horsepower, and then it's available in two voltages
8:18
Mine's a 230 volt, half horsepower. And you see here, main, black-yellow, start, red-yellow
8:29
These numbers here are the ohms ratings that you should find across these terminals
8:36
In this case, that's the black-and-yellow terminal, and that's the red-and-yellow terminal
8:41
Ohms is a measure of electrical resistance, and every multimeter has the ability to measure ohms
8:50
I'm going to show you what that looks like now in real life. So the first thing we want to do is to turn our multimeter to the ohms range
8:58
Ohms looks like this horseshoe here. And, of course, my probes aren't touching each other, so there's an infinite electrical resistance between the two
9:09
But according to the chart, for a half horsepower 230 volt pump, there should be between 4.6 and 5.2 ohms between the black-and-yellow terminals
9:23
So here I go, yellow, black. Touch it on here. What do we have on the screen
9:31
We've got 4.9. Now my pump's working fine, so that's kind of what I expected
9:38
It's within the acceptable range there. Let's look at the other one, between the red-and-yellow terminals
9:47
Let's just see what that reads. Between the R and L terminals
9:55
It should be 17.4. Well, the acceptable range is 16.7 to 20.5
10:02
So we're okay. Now, as I said, my system's working fine. But that's the test procedure that you'll go through, and you will find some problem somewhere
10:15
Either there's no electricity coming into the system, your pressure switch contacts are faulty, or they're not moving, they're not closing, or you've got something wrong with your pump
10:28
And two of those things are pretty easy to fix, because they're above-ground fixes
10:34
But if your multimeter readings are off, then you know that you've got to pull that pump from the well and get a new one
10:45
One more thing here on this video. It's not strictly about troubleshooting, but it's related to the inside of this control box
10:52
In my design for the trickle system, which is what you'd use to get a lot of water from a weak well
11:00
you absolutely have to have a submersible pump in that weak well and a mechanism, a device, that will shut the pump off automatically when the well runs out of water
11:12
And that's what this is here. This did not come standard with this control box, but it is made to fit within this control box
11:21
And it senses the current draw of the pump, and as soon as that goes wonky, this device takes it as a signal
11:30
oh, the well is out of water, I'm going to shut off power to the pump for a pre-set period of time
11:38
Now, this particular one, I can have the water shut off for 3 minutes, 9 minutes, 12 minutes, 30 minutes, an hour and a half
11:49
or manual, which means that it never comes back on again until I shut the power off to the system and turn it on again
11:55
But something like this is required for the trickle system because you need to have an automated method that will shut off the submersible pump when your well runs out of water
#Home Improvement
#Plumbing