Sheltered storage space is always in short supply around rural homes and cottages. But as true as this is, it doesn’t mean your outdoor gear and power products need to sit outside and rust. There are options for taking charge of your storage requirements, and the approach that makes the most sense for you depends on what you want to store and how you want to store it.
Quick, Economical and Durable
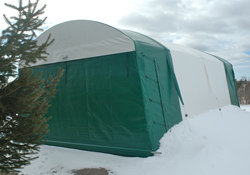
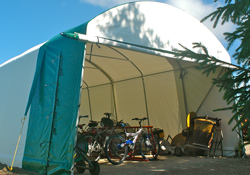
One of the fastest growing options for sheltered storage are fabric shelters. Also called temporary shelters or portable garages, this kind of structure uses hoop-shaped metal frames to support a tarp that keeps rain, sun and snow off equipment and building supplies. Four years ago I set up a shelter like this on my own country property and it’s performed flawlessly ever since.
I chose a 16’ x 30’, angled-wall shelter made by a Canadian company called Cover-Tech (www.cover-tech.com; 888-325-5757), and I chalk the success of this unit up to three things. First, this shelter is well made, with thick fabric and large-diameter galvanized pipes used to make the hoops. There’s never been the slightest bit of trouble, even on the harsh, windy, exposed island location I have it set up on. Second, I invested time and money building a decent, well-drained base. This is more important than many people realize. Third, I’ve learned the tricks of managing a fabric shelter properly. It’s not always the same as with an ordinary wood-frame structure, and as you’ll see, the reasons come down to moisture and wind.
Creating a raised, solid, well-drained base is the single biggest thing you can do to get your fabric shelter up and running optimally, and this work starts with some sharpened, 2×2 wooden stakes. Hammer these into the ground at all four corners of the area you want to make level on your pad, plus more stakes every 10 feet or so along the sides. Use a transit to mark the tops of these stakes for sawing off level, then use the sawn top ends as reference when you’re putting down fill and compacting it. I used limestone screenings, sloping this fill down when it got past the leveling stakes, extending 6 to 10 feet beyond the footprint of the shelter.
Each shelter company has their own assembly instructions, but few tell you what to expect when it comes to managing the shelter once it’s up. What’s to manage you say? Moisture is the big thing. Since these shelters are surprisingly air tight when installed properly and the door is closed, moisture can migrate up from the ground or come in on wet equipment. And when outdoor air temperatures cool down outside, it can cause airborne moisture to condense on the inside of the tarp and metal hoops enough to rain down on your stuff. This dynamic can even happen when it stays below freezing for long periods of time in winter. The sun can raise internal shelter temperatures above freezing during the day, triggering the condensation cycle even when you don’t think it can happen. Ventilation is the solution, but the question is how to get it.
The most effective approach involves leaving the shelter door open whenever wind and weather permit. Some shelters have screened ventilation openings up in the gable ends, though many require you to cut the tarp in front of the screen to open them up. Either way, check inside and see how the “weather” in your shelter looks, especially as fall cools to winter, and winter warms to spring. Visible moisture on the walls is a sign that you need more ventilation.

As with any shelter, you need to be aware of the door. When windy weather arrives, it’s important to close the door and secure it shut. Many shelters also rely on the door being closed to give the structure racking resistance during strong winds. My own shelter came with bungee cords for keeping the door closed under normal conditions, plus ratcheting strap clamps for cinching the door down extra tight in a wind storm. We’ve had winds strong enough to blow down barns since my shelter has been up, and there’s been no trouble.


