If I had to choose just one method to join project parts for the rest of my woodworking career, the dowel joint would probably be it. Strong, precise, hidden and versatile, the only danger is that dowel joints seem so very simple at first glance that it’s easy to under-estimate them. Simplicity also makes it easy to overlooked the importance of getting key details correct for dowel joints to work properly, and it’s here where trouble sneaks in. But get the basics right and the dowel joint will become one of your all-time favourites, too.
- Reading Time = 6 1/2 minutes
- Video#1 Watch Time = 26 minutes
- Video#2 Watch Time = 4 minutes
There’s a lot to like when it comes to dowel joints, as you can see in the videos below. Two developments have made dowel joints better than ever. The first is really great jigs that makes drilling accurate holes for dowels easy. And the second is the widespread availability of ready-made fluted dowels. All this and more coming up.
VIDEO: Dowel Joint Tour
Click below for a video tour of dowel joints, with lots more info following below the video.
Most dowel joints begin as ordinary butt joints, but with one or more dowels spanning the joint, fitting into matching holes that align with each other.

Dowel Alignment Matters
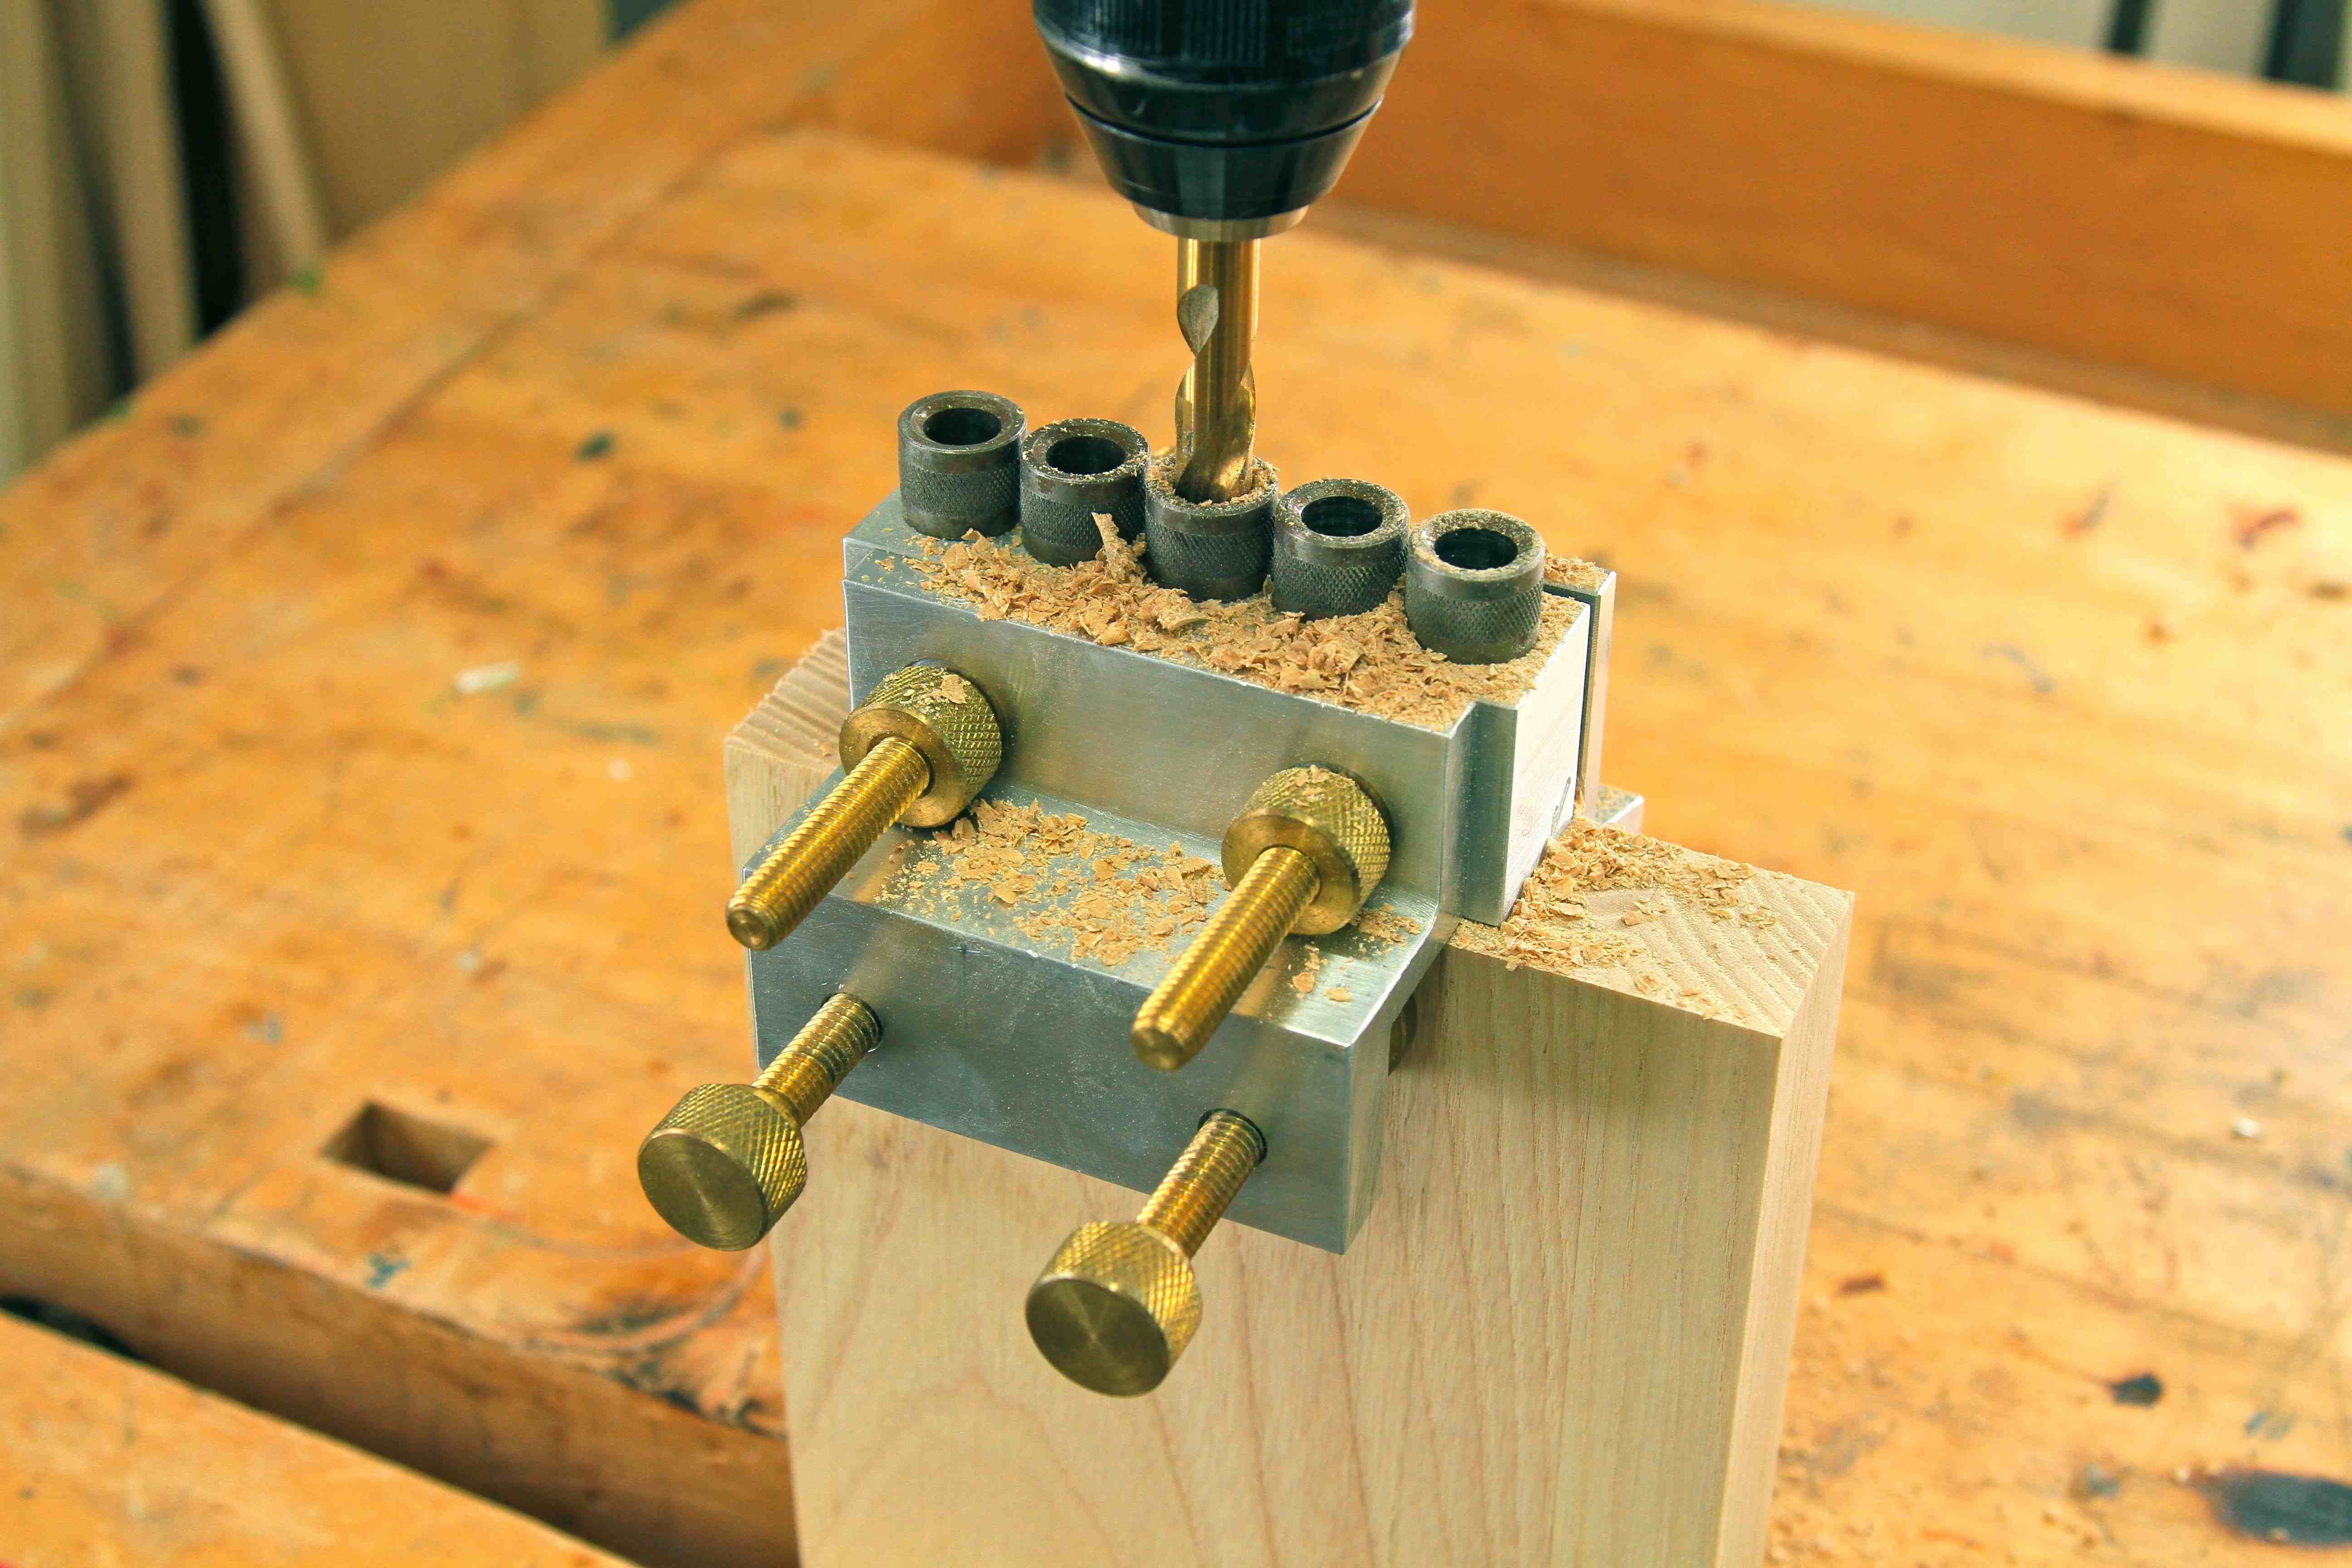
Alignment of holes, precision of dowels, tight joint assembly. These three essentials are behind every perfect dowel joint, and the first thing to understand is also the most important. Great dowel joinery only happens when drilling dowel holes is mechanically guided in some way. This is why dowel jigs were invented. They’re metal tools that guide the angle and location of drill bits in a hand-held drill as they bore into wood. There are lots of dowel jigs on the market, but the best I’ve used so far is designed and made in Canada. Dowelmax (www.dowelmax.com; 250.764.1770) is the product of the father and son team of Jim and Mike Lindsay. It offers the kind of precision, versatility and durability that you can build your woodworking life around. You can also use a drill press to complete dowel holes, either directly or to create your own drilling jig blocks made of hardwood. In fact, sometimes this is the very best way to bore holes for joint dowels. It’s amazing how accurate hardwood blocks can be if they’re made right.
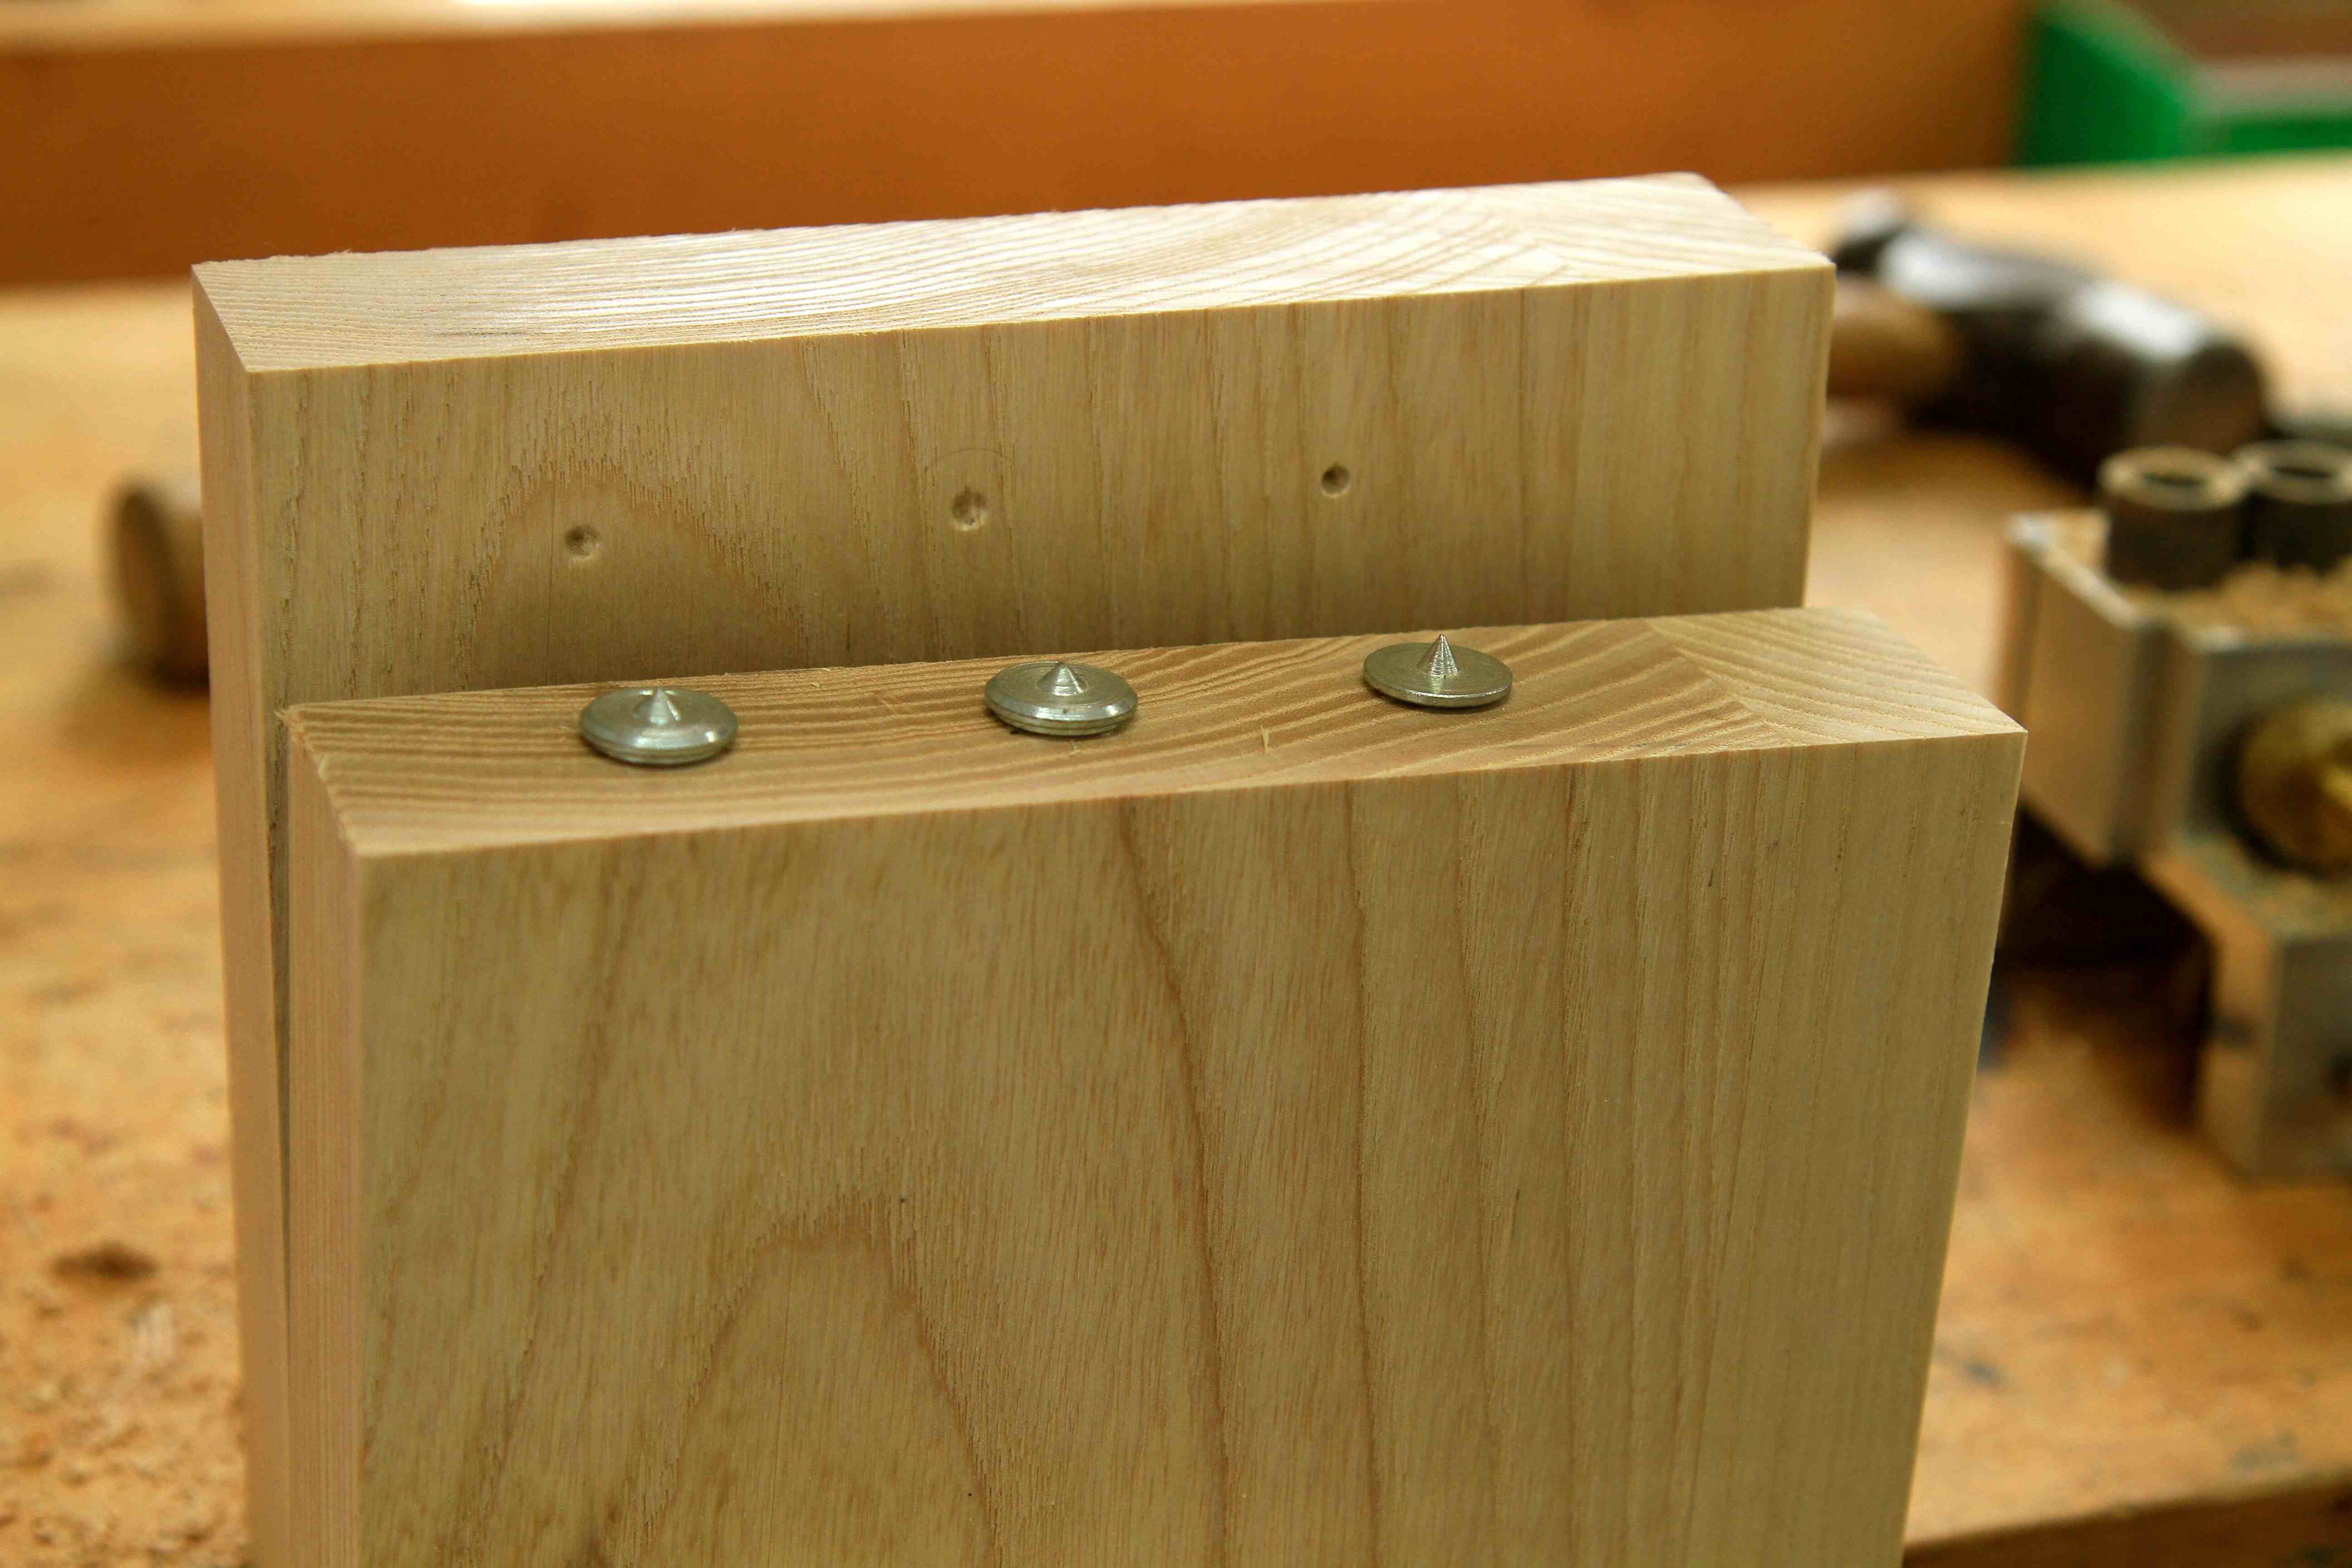
Some dowel jigs make it easy to locate mating pairs of dowel holes across a joint, but sometimes you need other strategies. This is where dowel centres can help. Typically sold as round aluminum buttons, the ends have a small, central spur. Push the dowel centre into the holes drilled on one side of a joint, bring the mating pieces of wood into alignment, then push them together tightly. The spur marks the centre of the holes required on the other side of the joint, ready for drilling. That’s what you can see going on below.
Selecting Dowels
The diameter and length of dowels for joinery matters, and cutting your own short dowels from lengths of long dowel rod isn’t the best way to get things right. Run-of-the-mill dowel rod these days is usually a little smaller than specified size and not precisely round. It’s also typically made from tropical hardwoods that aren’t all that strong. Despite the fact that I’m a purist, I opt for ready-cut “dowel pins” every time. Besides being precisely sized, truly round and made of strong wood, dowel pins also have grooves compressed into their surface. These grooves are called “flutes” and though they obviously retain more glue along the sides of dowels during assembly, there’s more. The wood that was compressed to form grooves in the factory also swell in contact with glue after joint assembly, making for a stronger joint.

When you’re working with wood that involves the edges of boards, choose a dowel diameter that’s roughly one third to one half the overall thickness of the wood, with a dowel length that’s roughly twice wood thickness. So if you’re joining 3/4”-thick x 2 1/2”-wide cabinet door frames, for instance, 5/16” or 3/8” diameter dowel pins, 1 1/4” to 1 1/2” long are ideal. I like 1/2” diameter dowels when working with 1 1/2”-thick wood. 1/4” dowels are perfect for projects involving 1/2” thick parts. Traditional timber frames are held together with 1” diameter dowels, no matter how big the timbers are.
Assembling Dowel Joints
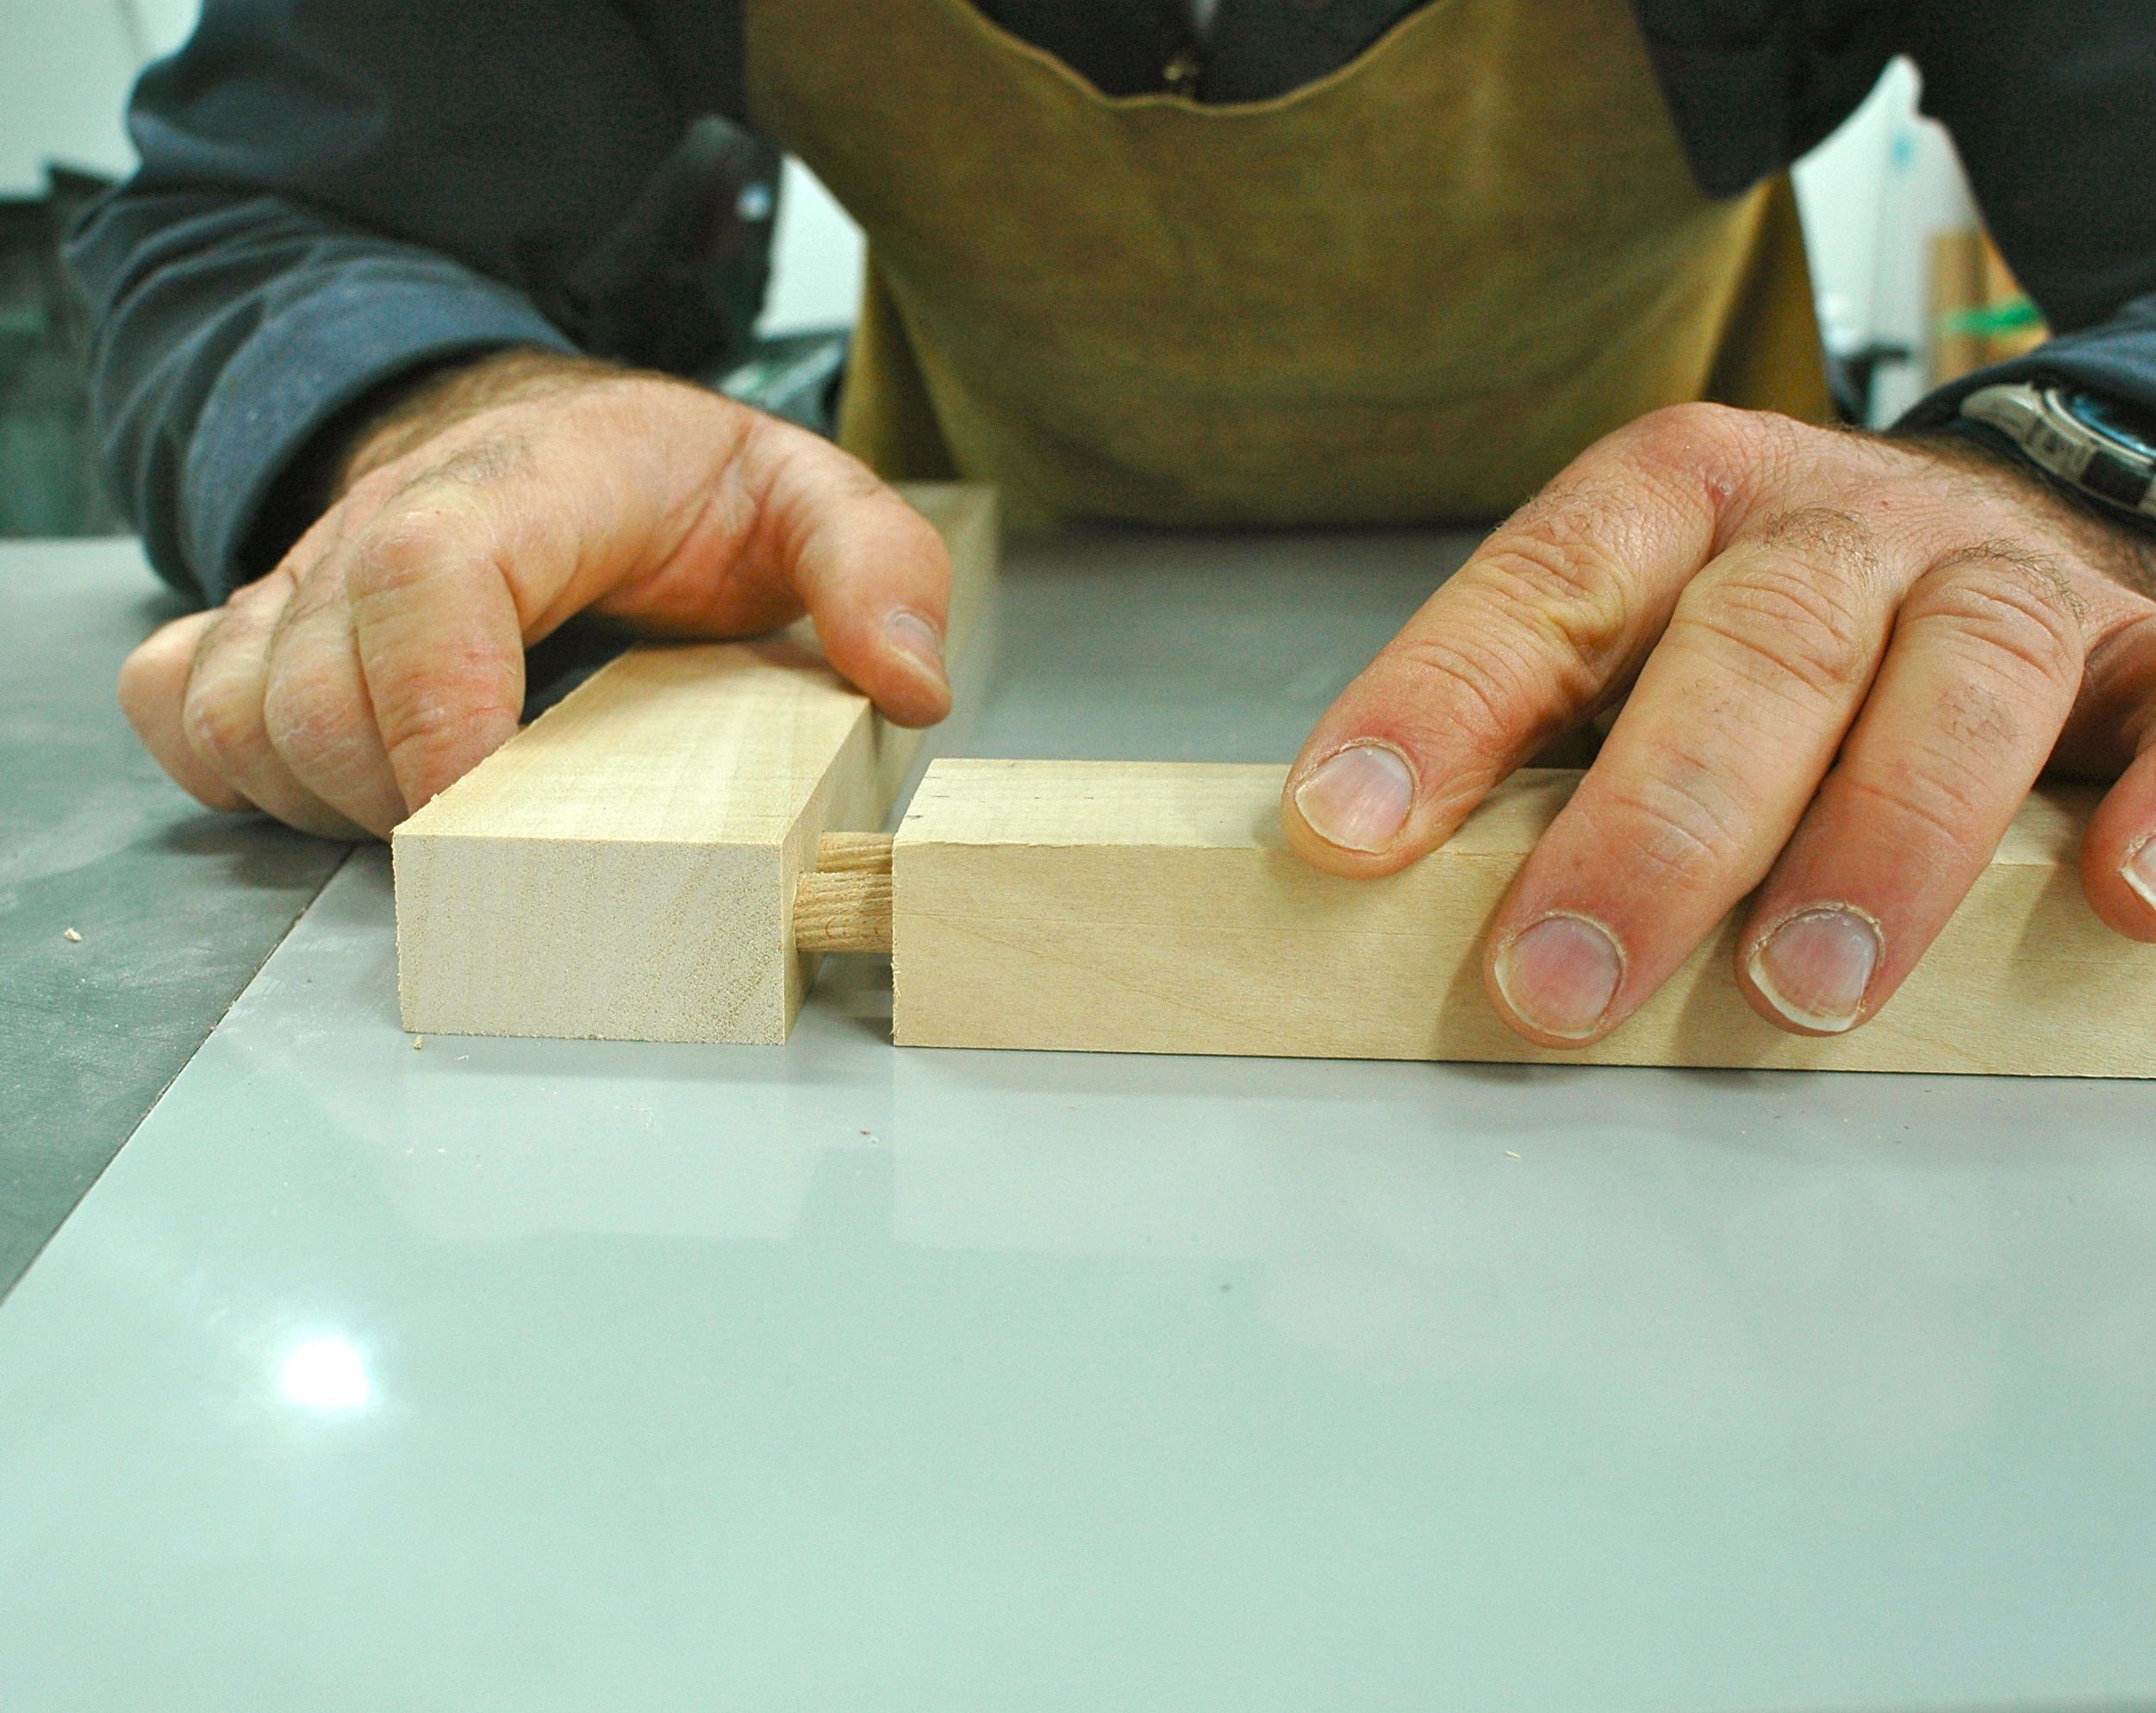
When it comes time to assemble a dowel joint, always clamp up the parts fully without glue first, and dowels in place. This allows you to see if any dowel holes have been drilled too shallow, preventing full joint assembly. Dry fitting also lets you figure out exactly which clamps you need and how they should be adjusted. You’ll appreciate the extra speed later. Joints need to slide fully together quickly after glue application since the dowel pins swell in contact with glue.
VIDEO: Dowel Joint Strength Test
So, just how strong are dowel joints? Pretty strong, as you can see in the video below.
Dowel Joinery Troubleshooting Tips
You’ll get best results if you work glue onto the sides of each dowel hole before assembly. Use a toothpick, and apply a little glue onto the surface of each dowel with a brush. A plumber’s flux brush is ideal and inexpensive for this work. Are you having trouble getting dowel joints to work perfectly with your projects? Fix the problem with the following troubleshooting steps:
Problem: Joint doesn’t come together tightly, even under clamping pressure.
Solution: Dowel holes too shallow or at mismatched angle. Shorten dowel pins and assemble joint again.
———–
Problem: Wood splits under clamping pressure.
Solution: Dowel holes not parallel. Remake parts and drill holes with dowel jig or drill press.
———–
Problem: Joint is weak, with inconsistent part alignment.
Solution: Dowel holes too large. Remake parts and re-drill, or drill holes for next larger dowel size.
———–
Problem: Dowels won’t enter holes drilled to correct size.
Solution: Dowel pins swollen with moisture. Heat dowel pins in toaster oven at 325ºF for 30 minutes to dry and shrink them.
———–
The tool world has a tendency to make woodworking seem more complicated than it is. There’s a gadget for everything, and as these luxuries gain the status of necessities, skills become less important. Dowel joints are a simple option that’s classic enough to require skill, yet advanced enough to work really well in many situations. Can you see why I like dowel joints so much?
Want cheap wood for your projects that’s also quite good wood? Click here for a video lesson on how I use construction-grade lumber for fine woodworking projects and downloadable plans for using that wood.
 I hope you found this woodworking lesson worthwhile. Please consider helping me cover the cost of creating and publishing content like this. Click the “buy me a coffee” button below for a fast, easy and safe way to make a contribution. Thank you very much!
– Steve Maxwell