Sooner or later, most homeowners get the urge to finish or refinish interior wood. It’s all part of home ownership. Trim, bare furniture, antiques, cabinets – they all need finishing or refinishing to look their best. Trouble is, the results of DIY wood finishing often fall short of that enthusiastic original vision. Follow the four steps here and you’ll be proud of the smooth, beautiful interior wood in your life.
Step#1: Start By Sanding
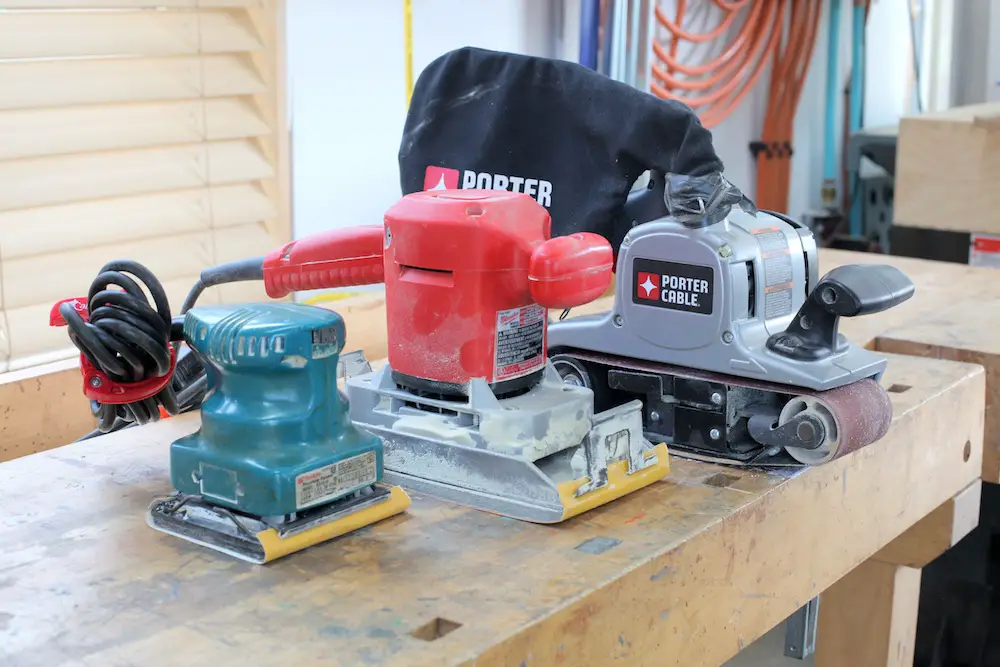
Every wood surface needs sanding to look it’s best. But exactly how you sand depends on the size and shape of the wood you’re working with. Everything can be sanded by hand if you’ve got the time, though that’s not very practical. Start with an 80-grit abrasive if bare wood shows marks left behind by the milling process or a 100-grit abrasive if it seems smoother. Sand in the direction of wood grain only, working up to 120-grit sandpaper followed by 180-grit. You’ll save a lot of time on flat surfaces with an electric sander. A 5” random orbit sander is the power tool of choice for general smoothening of wood, but it’s not my favourite choice before staining because it can leave swirl marks behind. A better option is to use a belt sander with an 80-grit abrasive then 120-grit for roughish lumber, followed by a half-sheet inline sander with 180-grit sandpaper, followed again by a 1/4-sheet finishing sander with 220. You can see these machines from my own shop below.
Step#2: Stain for Colour
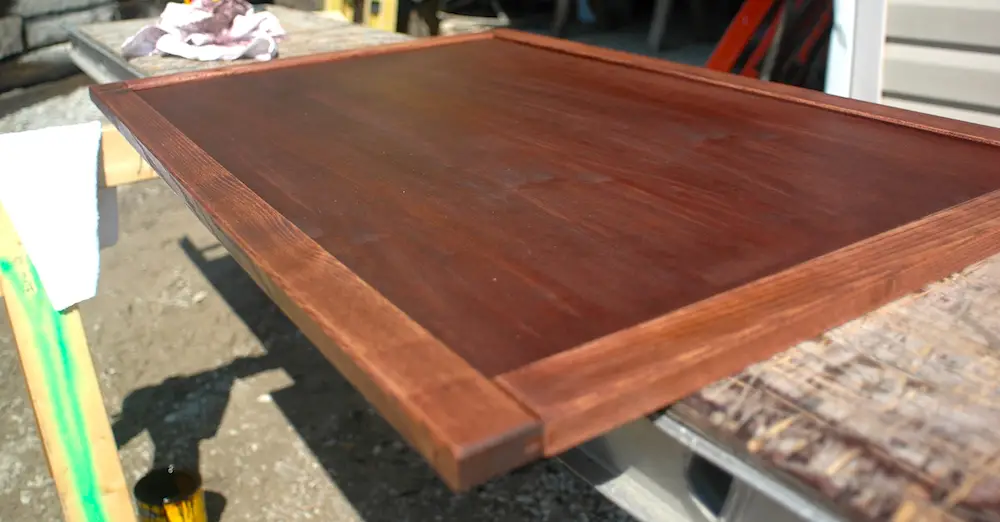
Most wood is lighter in colour than people want, and this is why staining is so popular. It’s traditionally applied by wiping on stain first, then wiping off everything that doesn’t soak in. Thorough wiping is key. Sealing the surface usually comes later, but not always.
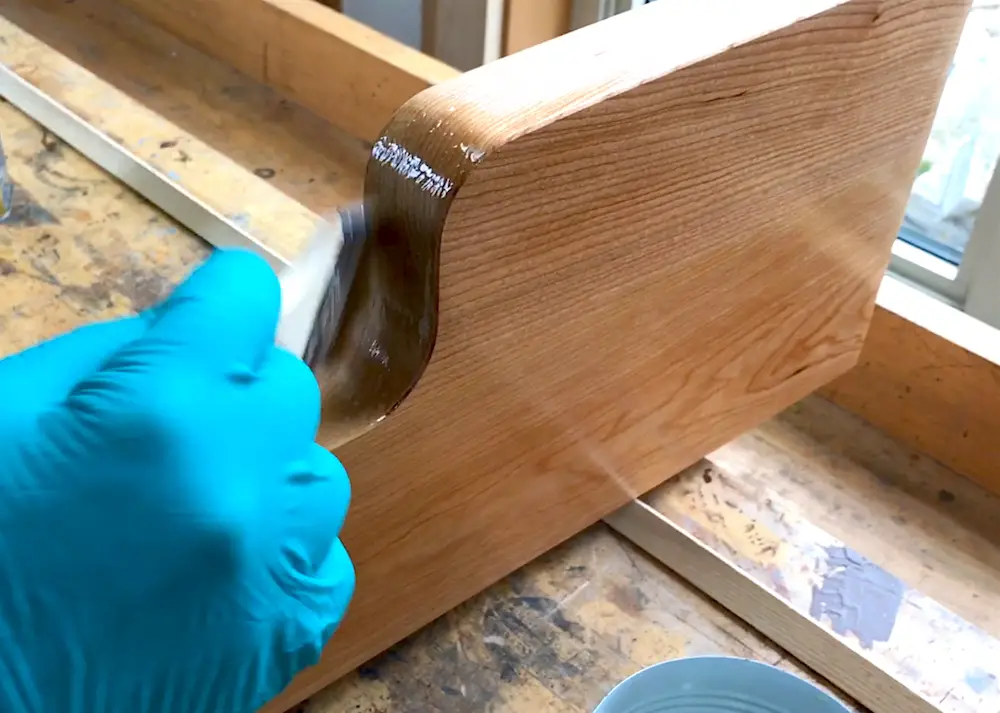
One of my favourite ways to stain is also unique and new to many people. Minwax Finishing Cloths are fabric wipes pre-soaked with a type of stain that also includes a basic wood sealer. Slip on a glove that comes as part of the package, pull a saturated wipe out of the resealable plastic pouch, then wipe the wood you’re staining. Since the product is thick and gel-like, it’s easy to control how much you put on and how evenly it colours the wood. I’ve used finishing cloths on new wood and they also work well fixing old finishes where stain is worn off in places. Finishing Cloths add a basic layer of protection, but for most things adding a sealing coat over top is the best thing. You can see me using a finishing cloth below.
Step#3: Seal for Protection
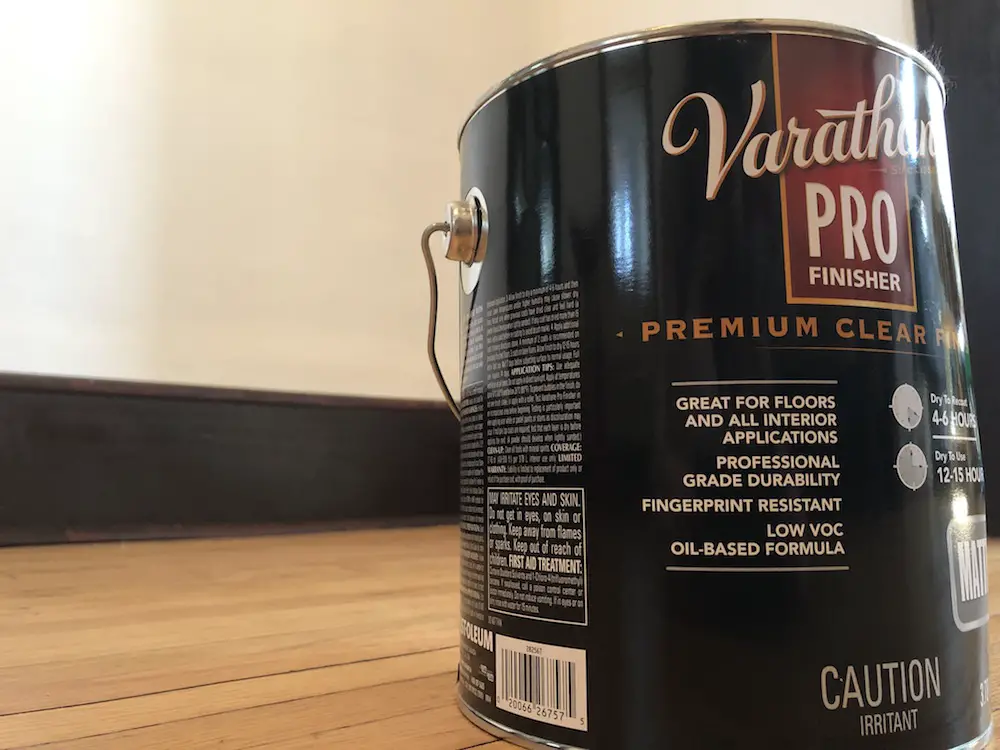
Urethane offers the simplest option for adding protection to all interior wood, whether it’s been stained or not, and there are two options to choose from. Oil-based urethanes are easier to use successfully because they dry more slowly than waterbased, but the downside is that they don’t wash up with water. You can slow down the drying of waterbased urethane using an additive. My current favourite is Dyna Flo Extender.
It used to be that many companies made oil-based urethane that was easy to apply and dried slowly enough that it had time to flow out and eliminate brush strokes and bubbles before it hardened. Not so today. Government regulations have forced to predominance of waterbased urethanes, but they’re more difficult to use than they should be. That said, one particular type of urethane is my favourite by far. Varathane Pro Finisher is not waterbased (hoorah!), it dries slowly enough to flow out, but also dries hard and sands well between coats. If you’ve had trouble getting good results with other urethanes, this one will work well for you. It is much, much easier to succeed with this than anything else I’ve tried on the market so far.
Step#4: Sand Between Coats
Regardless of how smoothly you sanded your wood before staining and sealing, it’ll feel rough after the first coat of sealer dries. That’s normal and easily fixed. You’ll find 220 or 240-grit open coat sandpaper works well for removing this new roughness. Just be careful. Even an abrasive as fine as 240-grit sandpaper can easily wear through the delicate first coat of urethane. Failing to sand between coats is the biggest single reason why wood finishes turn out badly.
Wipe or vacuum the surface, then apply one more coat of sealer for a light duty finish. Two or three more coats are best for interior wood subject to water, dirt or wear. Sand lightly with 220-grit paper after each intermediate coat has dried. Complete the job with one final coat that’s unsanded and and you’ll get a finish you can be proud of.
Want a truly glass-like finish? Take things one step further. Watch the video below to see a very simple trick you can apply to the end of the finishing process. This is one of my most popular videos.