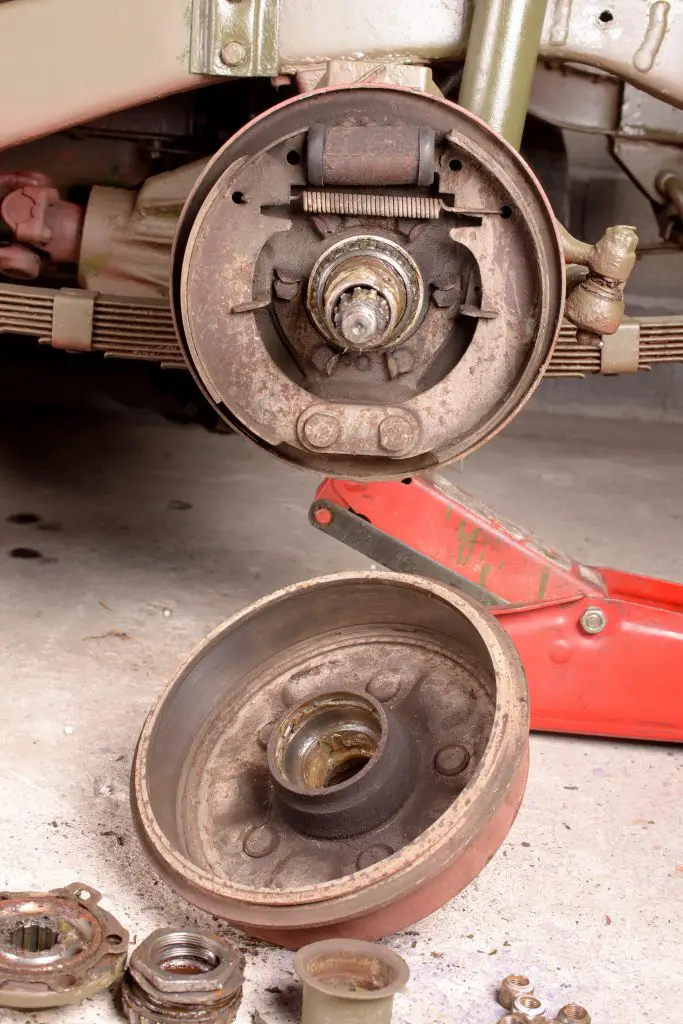
Brake drums are a crucial part of the braking system of some vehicles, and some people do their own drum brake and brake shoe replacement work. Brake pads rub against brake drums when when you step on the brake pedal, creating friction and slowly your car. You can see a drum brake with the drum removed from the vehicle below.
You can head over at this website for different types of brake callipers and parts. If you want to install them yourself, be sure that you avoid these mistakes:
1. Failure To Clean & Inspect The Hub Mounting Surface
The hub mounting surface must be clean and smooth to ensure that the brake drum will be able to sit properly after installation. If there are any rough spots or rust, you can easily work them down with a piece of sandpaper, then wipe clean with a rag.
Once you’ve cleaned up your hub mounting surface, it’s time to inspect it for damage. You should look closely at the area where the brake drum makes contact with this surface when it’s placed in its proper position. If there are any cracks or high spots in this area it’ll prevent the brake drum from sitting solidly as it should. Problems of this kind are rare, but just keep your eyes open to ensure the brake drum sits flat as it was designed to.
2. Forgetting To Check or Replace Lug Studs
When installing a brake drum, it’s important to check the lug studs. These are the threaded parts that stick out and accept the nuts that hold the wheels on. If these studs are damaged or over 15 years old, they should be replaced before you install your brake drum.
If you’re unsure whether or not your lug studs need replacing, it’s best to err on the side of caution and replace them just in case. If you have any doubt about their condition, go ahead and swap them out for new ones; this prevents future problems with your brakes that might cost more than what you’d spend on new lug nuts (and it doesn’t make sense to use old parts if there’s no need). It can also be good practice to replace all of your lug nuts every 15 years so that wheels don’t fall off.
3. Improperly Applying Brake Assembly Lube
You should always apply anti-seize lube to the wheel studs, but not too much. Just a little bit keeps the nuts from rusting and preventing wheel removal later.
4. Forgetting To Check Brake Drum Inner Diameter
Before you start to remove the brake drums from your vehicle, it’s important to make sure that you have the correct tools. The first tool you’ll need is a socket wrench set that contains a wrench for your lug nuts and another for removing drum bolts. Next, find an anti-seize compound or lubricant that can be used on metal surfaces. This will prevent corrosion from forming after installation is complete.
Next, check the inner diameter of each brake drum after removing it. On the outside of the drum will typically be a diameter measurement stamped there. If your brake drum measures more than this, it means the drum is worn and needs to be replaced. in addition to the brake shoes. If you don’t have a micrometer, measure the diameter with a ruler. As long as your drum measures less than the maximum figure, and it’s reasonably smooth inside, re-use it.
5. Failure to Properly Torque Fasteners
It’s important to properly torque automotive fasteners. The word “torque” means tightness, and the correct amount of torque ensures that a fastener will not come loose or fail prematurely, potentially causing serious damage to your vehicle. Torque specifications for automotive fasteners are easy to find online and is determined based on the material used for the part and its size. To determine if a fastener was torqued properly, use an accurate torque wrench that has been calibrated. If you don’t own an appropriate calibration tool, drive your vehicle to a repair garage and ask them to check your wheel nuts.
The next step is to make sure that when you tighten up the brake drum bolts/nuts/studs and the like, they’re done evenly across all sides and ends of each part (you can check this by putting chalk marks around each nut/stud). It’s also important not to over-tighten wheel nuts because too much pressure could cause them to strip out or break. Also (and this is key) tighten each nut a bit, before skipping a nut and tightening the next one. Go around like this, snugging up each nut partially, before eventually getting maximum torque applied to all. This incremental tightening ensures that the wheel rim doesn’t get bent or cracked.
Conclusion
Remember that brake drums aren’t just a set of metal bowl-shape things. They’re an integral part of your vehicle’s braking system, and need to be installed correctly to ensure safe operation. One way to begin is by following the tips here for brake drum installation. Care and attention to details might take a little more time, but it’ll save you from costly repairs down the road when something does go wrong because you didn’t do things right from the beginning.


I hope you found this content useful!
Your generous support helps me produce more practical, hands-on content that I hope you’ll find useful.
Steve Maxwell