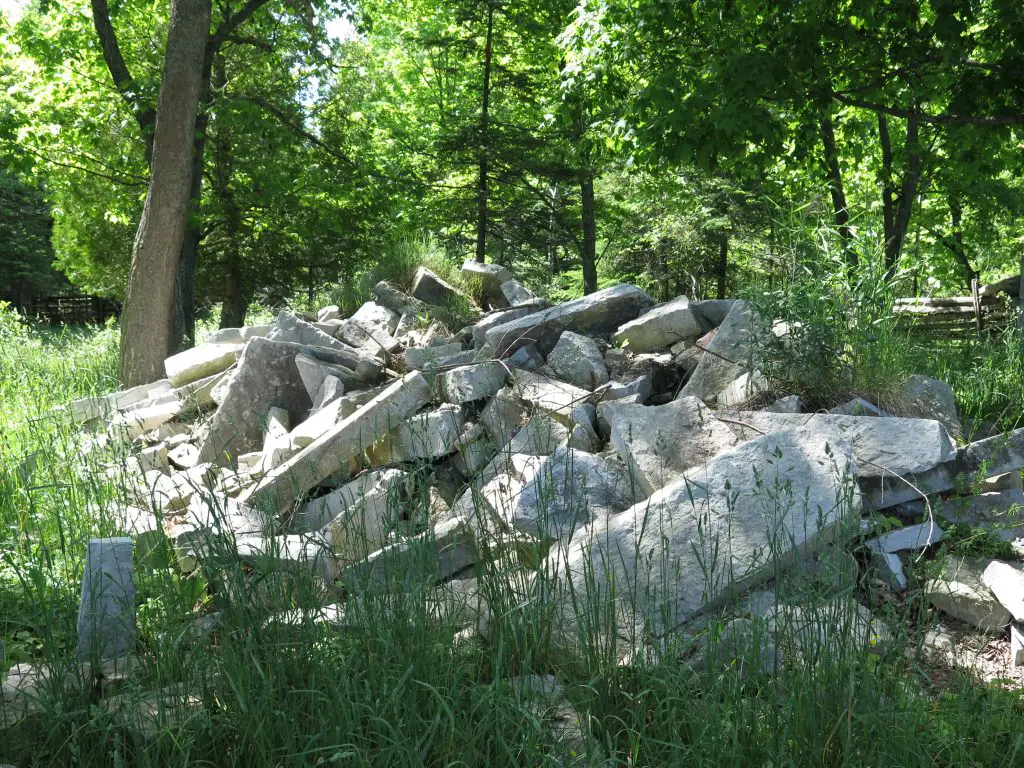
Natural stone is one of the classiest building materials going, and that’s why inventors keep coming up with manufactured substitutes for the real thing. But nothing quite matches traditional stonework for authenticity and good looks. Beautiful, yes, but is real stonework practical on modern projects? Perhaps more than you might think. The stonework you see below is some that I’ve done. Raw stone, a handful of tools and a surprising amount of time is what it takes.
I’ve been building with sedimentary stone since 1987, and the approach I’ve settled on uses traditional tools wherever stone surfaces are visible, and a few modern tools that boost efficiency big-time behind the scenes. Even with the help of modern technology, real stonework never happens quickly, but it can still be a realistic part of higher end projects. Find a mason willing to try the techniques I’ll tell you about here and even building projects not funded by millionaires can benefit from authentic stonework in at least smaller quantities. You might want to give it a try yourself.
Before I get down to details, here are a few terms. When I say “traditional” coursed stonework, I’m talking about a wall that’s 9” to 24” thick, textured with hand tooled surfaces following a horizontal and vertical pattern. There are many other kinds of stonework in the world, but building the way I’ll show you here is what I know and love best. See the example of “Broken Ashlar” below to learn more about my favourite classic stoneworking pattern.
Traditional stonework can function as a wall on its own, but the project in the photos uses a 9” thick layer of stone built as a self-supporting layer over an insulated wood frame. This combination delivers all the beautiful deep window openings and thick corners of traditional stonework, plus the energy efficiency necessary to meet code.
Step#1: Rough-Cut Stones to Length and Thickness
Gas-powered masonry saws do a lot to boost the efficiency and precision of building traditional stonework, and I run two saws right now – a 111cc Stihl and a 67cc Echo. Both spin 14” diameter diamond wheels. Water injection is key, too. It lengthens abrasive life and keeps everyone happier and healthier.
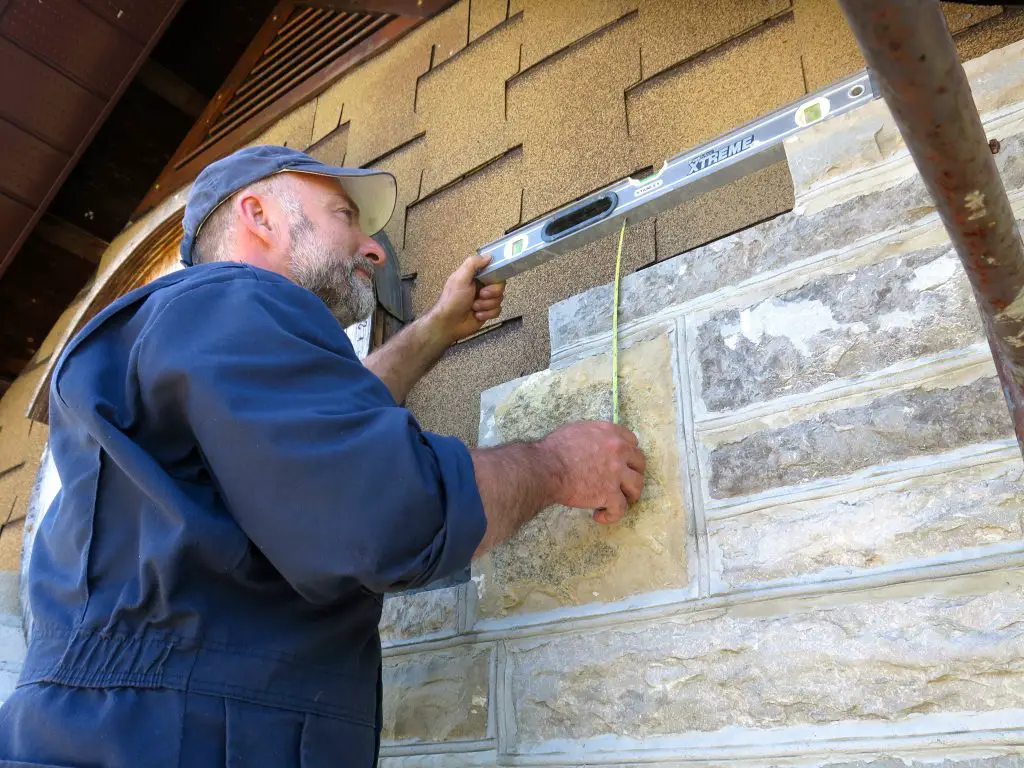
The first stones you set on a foundation can be just about any size and shape within the pattern you’re creating. It doesn’t matter where you start, but as the wall rises you’ll need to cut stones to fit within a given space between neighbouring stones. Measure the length and height of these spaces, then subtract half an inch at each end for mortar joints and half an inch underneath for bedding mortar. The most accurate way to measure the height of a space is to place a 24” level on a neighbouring stone, centre the bubble, then measure down to the stone below. I make a list of a dozen or so stones, cut and face them, then bring the stones back after tooling for bedding in mortar on the wall.
Cutting stones to length is easier than changing their thickness because less sawing is involved. That’s why I always scour my pile for stones that are already the thickness I need naturally. It’s not unusual to find stones that are just a little too thick for a given spot, perhaps because of a lump or bulge on the top or bottom. See “Air Force” below for a quick look at a 130-year-old stoneworking power tool that speeds progress and makes it easy to remove trouble spots like these.
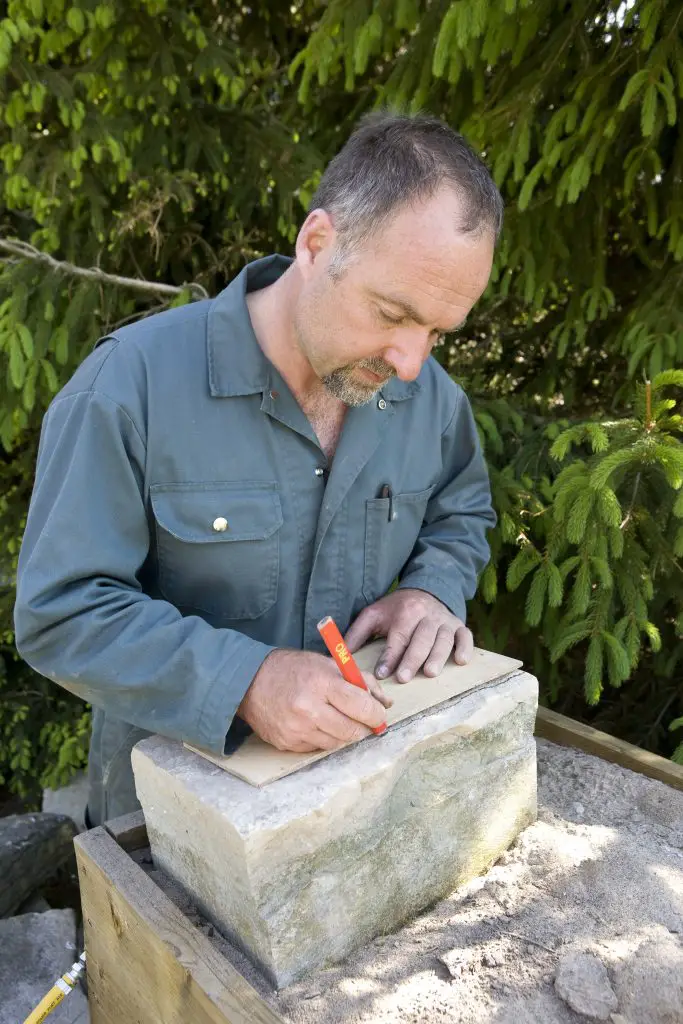
Simple height and length measurements are all you’ll need for cutting ordinary wall stones to length and thickness, but when I’m building an arch or round window, I create plywood templates to guide the more intricate and angled stone shapes. That way it’s just a matter of tracing the pattern, cutting the stone, then chiseling the face before installation.
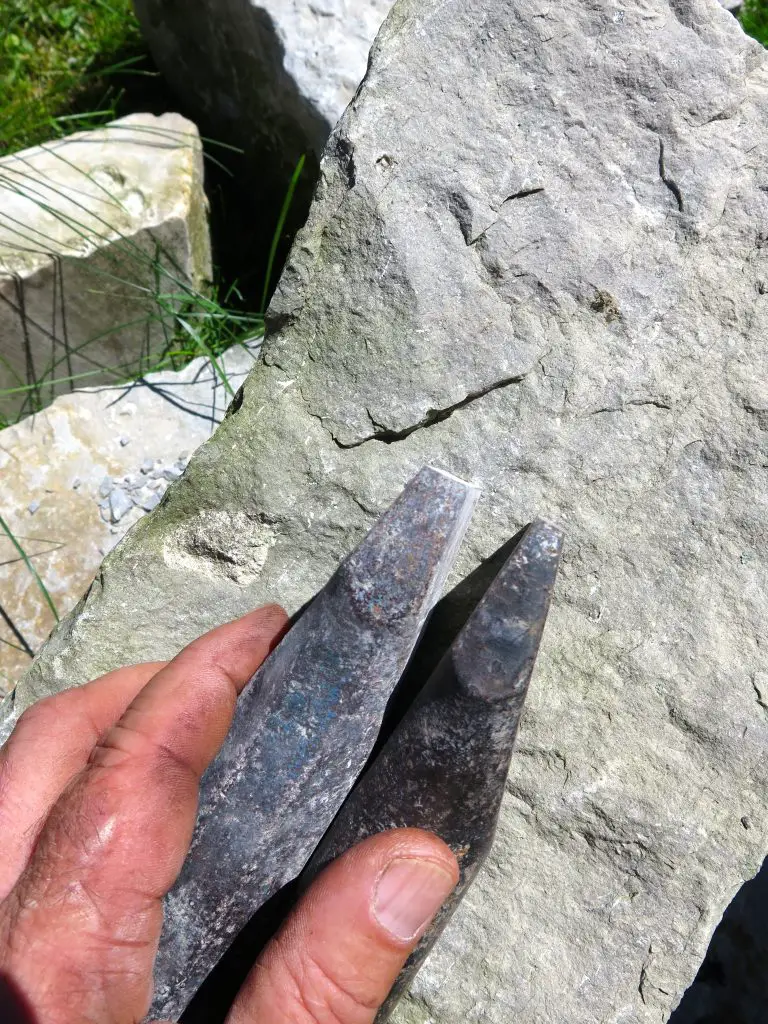
A 14” diameter diamond abrasive wheel offers almost a 6” depth of cut, which isn’t usually enough to make it completely through the stones I work with. If there’s still a couple of inches of uncut stone under the line, hammer steel wedges into the saw kerf every 6” to 8” to break the stone all the way. A few hammer blows and you’re done.
Step#2: Mark and Face the Stone
The face of each stone that’s visible in the finished wall is its most important side, and chiseling an outwardly bulged surface is called facing. Although the chiseled face itself will be irregular (that’s part of the attraction), the lines where the chiseling starts on all four sides must be straight and in the same plane as each other. I use a straight edge and carpenter’s pencil to mark four lines back about 1/2” to 1” back from the face, then chisel on the line.
I face stones with a stout, thick chisel called a pitching tool and a 4 lb mason’s mallet to strike it. The edge of the pitching tool is ground to an 80º bevel, with the high side of the edge placed along the pencil line before striking a sharp blow. The aim is to cleave a crisp, sharp shard off the face of the stone, move the pitching tool over on the line, then strike again. Complete this operation by following lines on all four sides of the stone and you’ll have achieved two crucial things: a facetted face that’s irregular and attractive, and a consistent edge for aligning the stones to a string along the outer face of the wall as they’re laid in mortar.
Step#3: Lay Stone and Point the Joints
I use 3 parts sand to 1 part cement for my stonework mortar, with the cement being a 50/50 blend of Portland and masonry cements. The thicker mortar joints in traditional stonework often exceed the 1/2” thick maximum recommended for mortar made with masonry cement, hence the need for Portland cement.
Trowel a 1/2” to 3/4”-thick layer of mortar onto the place where the next stone is going, then nestle that stone into place along a guide string. This is a lot like laying brick, except that the area behind the face of the stone is quite likely to be irregular. Fill these spaces with chunks and chippings of stone created by your work chiseling the face of the stones earlier, with mortar pushed in around the shards. When I’m working against an existing frame wall I’ll often use a tape measure to position stones a certain distance from the wall, rather than following a string.
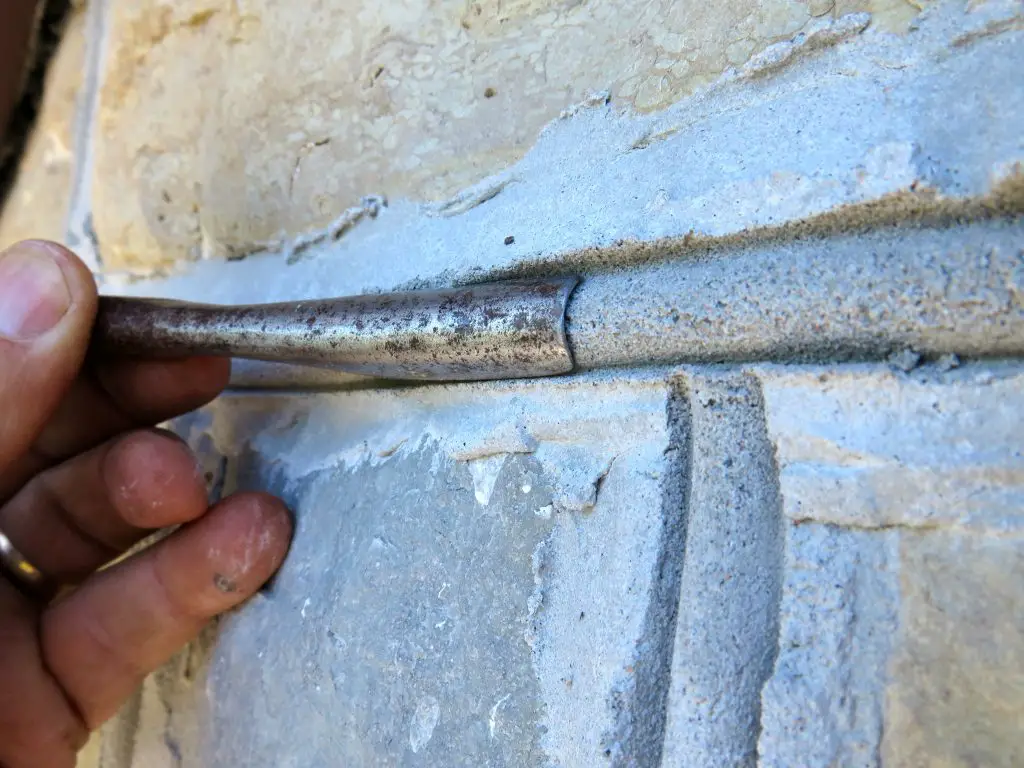
One key to traditional stonework is to avoid the modern practice of recessing mortar joints. My favourite classic pointing involves tooling mortar onto the joint so it bulges outwards slightly, then drag a bullnose slicker across a 24” carpenter’s level to create horizontal and vertical lines. This creates a regular pattern of double lines over the rough stonework that looks just great.
No one ever became a stonemason by reading an article online, but perhaps my experiences will help you see that real stonework can boost some of your projects in a big and not too impractical way.
Broken Ashlar: A Classic Pattern
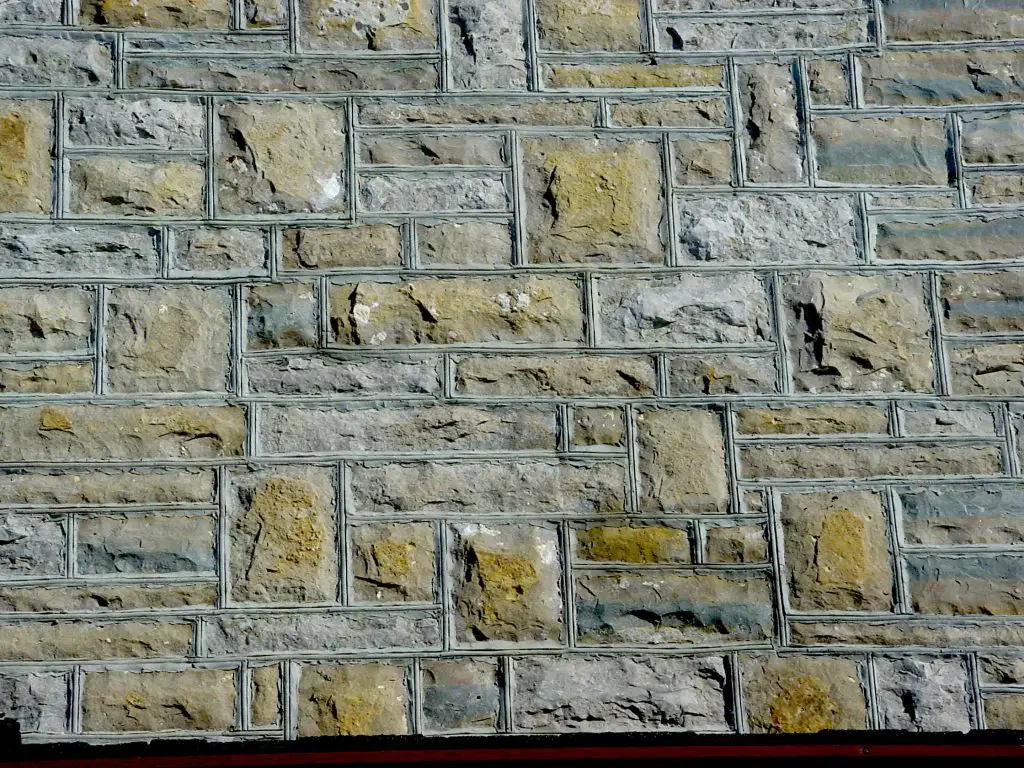
Broken ashlar is my favourite style of stonework because it combines refined, square-edged blocks in a rhythmic and varied pattern. Square or rectangular stones are laid level to create a visual rhythm, with taller square stones always separated by several longer, horizontal ones. No two areas of a broken ashlar wall are exactly the same, and that’s part of the attraction.
The Air Hammer: A Tool That Time Forgot
In 1885, 29-year-old William Holden invented the hand-held, air-powered stone hammer that has since revolutionized the way stone is worked around the world. An internal piston oscillates back and forth as air flows through this cylindrical tool, delivering hundreds of blows a second to the stoneworking chisel held in the end.
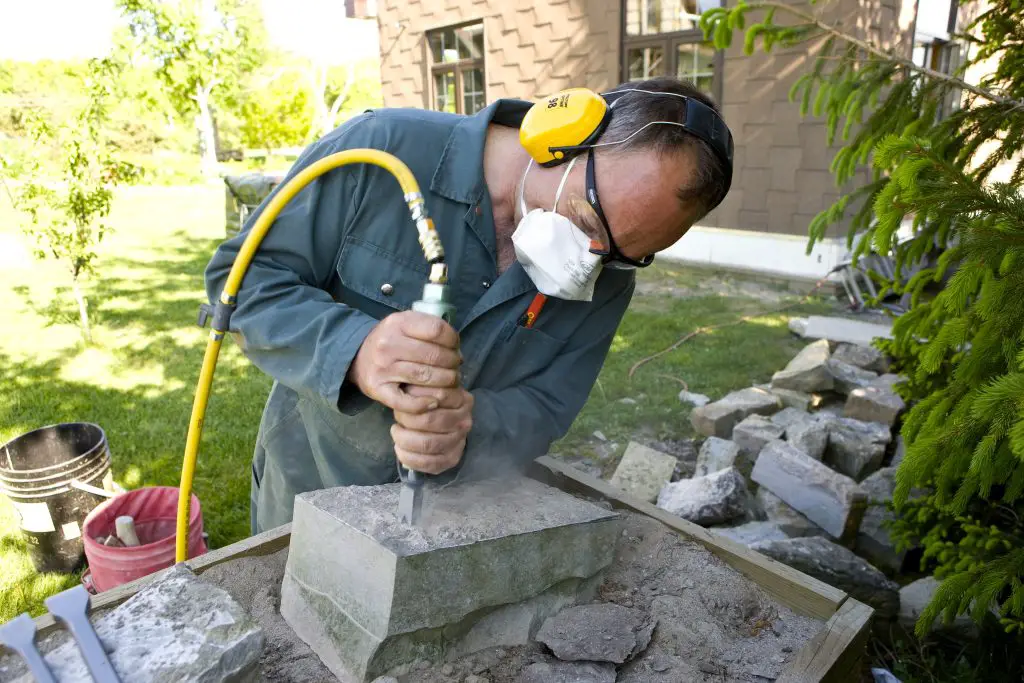
The action is just a much faster version of hitting a chisel by hand with a mallet. The two air hammers I run are made at the Trow and Holden plant in Barre, Vermont and look just like those first made 130 years ago. I most often use either a 4- or 9-point tooth chisel with my air hammers to hog off high spots on stones. It takes at least a 5hp electric or gas-powered compressor to run an air hammer. It takes a lot of air volume.


I hope you found this content useful!
Your generous support helps me produce more practical, hands-on content that I hope you’ll find useful.
Steve Maxwell