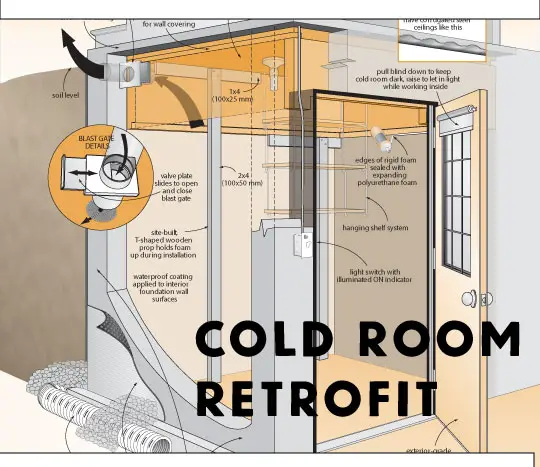
Got a basement cold room that doesn’t work well for food storage? Too high temperature, plus too wide temperature fluctuations are the usual problem with under-the-steps cold rooms, at least as they’re created by most homebuilders. During cold weather the cellar forms lots of ice and frost on the ceiling and part way down the walls. In summer temperatures are too warm for proper storage of produce, too. If you’ve got a cold room that’s wet and frosty during winter, and way too warm in summer, begin by clicking the image below to download a retrofit plan that I designed as part of my book The Complete Root Cellar Book . . .
What Is A Cold Room?
Cold rooms are a type of simple root cellar that are included in many modern homes with basements. Root cellars are cool, subterranean spaces ideal for storing vegetables, fruits, nuts and other foods, but at first glance you’d think they should be something you only see in museums. Yet somehow, despite the proliferation of convenience foods, the habit of eating out more often than in, and the steady decline in cooking skills, the old fashion idea of a root cellar is not only still with us, but it’s on the rise. Root cellars can preserve things for weeks or even months, typically without the use of additives or outside energy inputs. As old and homely as they are, root cellars still grab us because there’s something fundamental about the urge to store food.. This urge is also why more and more people ask me for help with a widespread problem with their basement cold rooms.
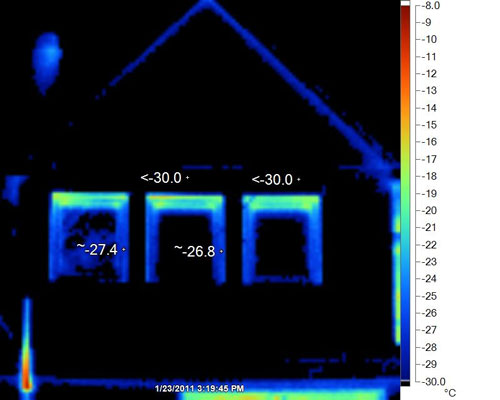
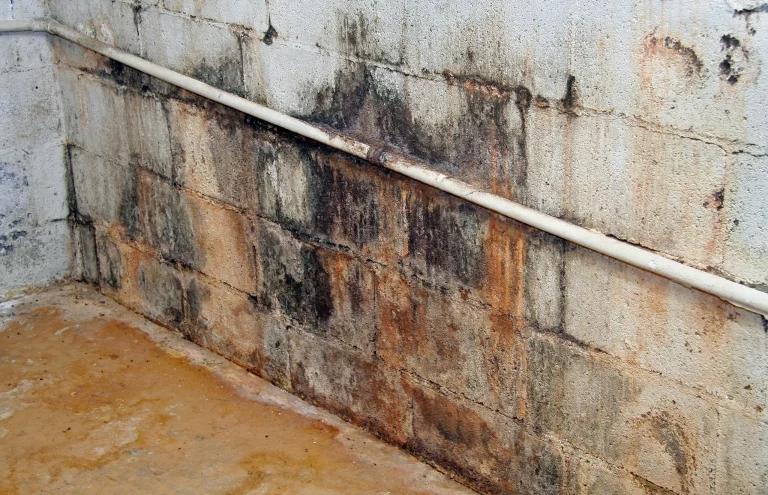
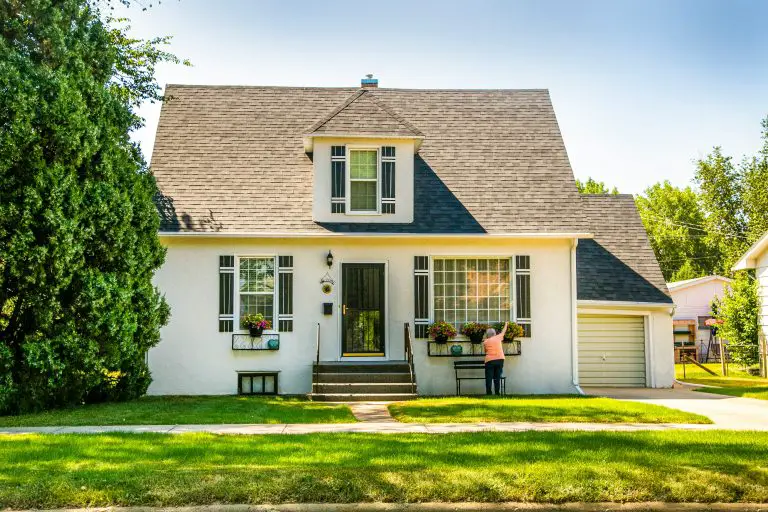
Designs vary, but typical modern cold rooms are small spaces that extend out from one side of the basement, usually capped by a set of precast concrete steps outside the entrance door. Cold rooms are a token attempt by house builders to provide some kind of root cellaring zone in a modern context, but there are three problems that typically arise. Most cold rooms get too hot in summer, too cold in winter, and they’re prone to developing dampness and drips of condensation and ice that leads to mold growth. But empowering a dysfunctional, under-the-steps cold room so it works is not only possible, it’s also fairly simple.
Cold Room Problems
The main problem with modern cold rooms is that too little wall and ceiling area is covered by soil on the outside. Not only are the top ends of walls sticking up out of the ground, but the entire roof area is exposed, too. That’s why the fix involves adding a small amount of the right kind of insulation, watching how cellar performance changes, then adding more insulation if needed.
You could make your overly-cold cold room warmer in the winter by covering all walls and ceiling with insulation, but that would make it too warm, both summer and winter. But a little insulation of the right kind, especially over the upper areas of cold room walls and the ceiling, can make all the difference while still allowing the surrounding cool soil temperature to chill the room from the sides and below.
Fixing a Bad Cold Room
All this is why 2”-thick extruded polystyrene foam board is the best insulation for tuning up a cold room. It’s available at every building supply outlet, it’s reasonably priced, easy to work with and perfect for evening out temperature swings that plague typical, residential cold rooms. Whatever you do, don’t use the cheaper, white, beady, expanded polystyrene insulation for your cold room upgrade. It’s not impervious enough to the passage of water vapor. That’s why it leads to large and troublesome internal condensation problems behind the foam.
Polyurethane construction adhesive is the best way to secure pieces of foam to the walls and ceiling of your cold room, at least initially. Start by applying a continuous bead 1/2” away from the edges of each piece, then in a zigzag pattern across the surface of the foam that touches the masonry. Use props to hold up the foam until the glue dries, then cover it with drywall or wood. The purpose of the perimeter bead is as an initial sealing barrier, to keep warm air from sneaking in behind the foam. Be sure the construction adhesive forms a continuous line, without breaks.
Start by insulating the ceiling of your cold room, then down the inside of the walls as far as the soil extends on the outside. You may need to extend foam further down the walls later, but wait and see what temperatures are like this coming winter. Check out other details for making the most of your cold room space on my plans. Click here to download them. Your basement cold room might not be as large as an old-fashioned cold room, but it’s still great for satisfying that urge to preserve that so many of us still have.


I hope you found this content useful!
Your generous support helps me produce more practical, hands-on content that I hope you’ll find useful.
Steve Maxwell