- Video#1 Watch Time = 3 minutes
- Video#2 Watch Time = 11 minutes
If trees grow where you live, then making them into firewood is a great way to reduce heating costs and get exercise. I’ve been cutting firewood and heating with it for 35+ years, and there are five main steps to the process. Learn to do these yourself and you’ll enjoy a sustainable, affordable and effective source of off-grid heat. This article covers the basics of how it’s done.
Wood heat can save money and build self-reliance, but only if firewood is prepared properly. From felling trees safely to seasoning split wood long enough to burn cleanly, each step affects how much heat you get and how safely the work goes. These are the essential stages of turning trees into dependable fuel.
Key Takeaways
- Safe firewood production starts with proper tree felling and escape planning.
- Logs should be cut to consistent stove length before splitting.
- Split firewood dries faster and burns better than unsplit rounds.
- Round wood piles can speed stacking and improve stability.
- Firewood should season at least one year, and two years is often better.
Making Firewood Step #1: Cut Down a Tree
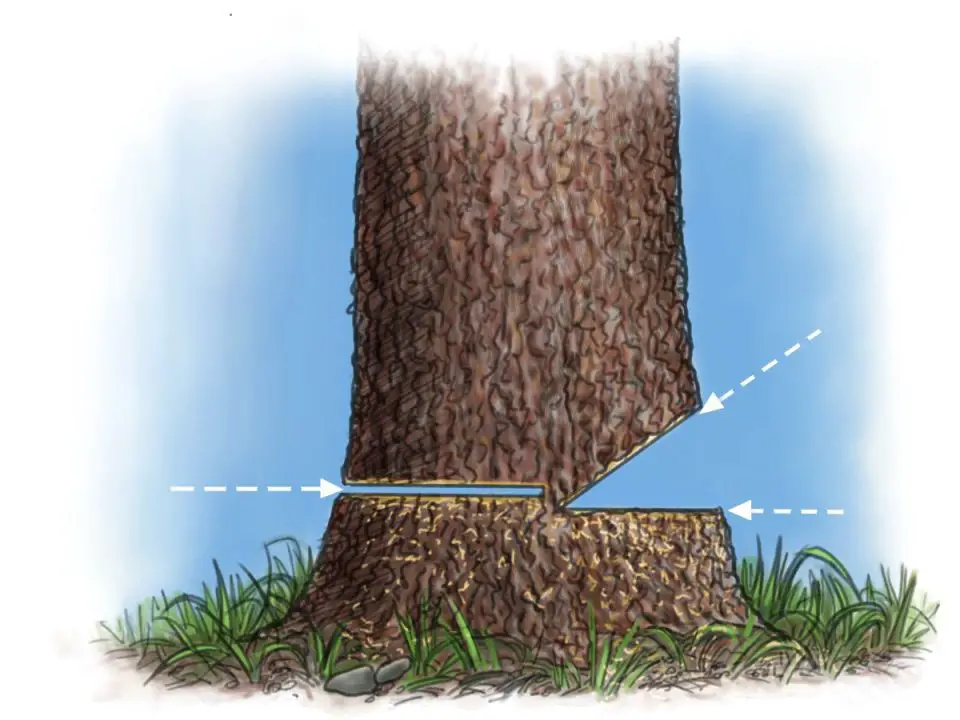
There are three cuts needed to fell a nearly-vertical, complication-free tree safely with a chainsaw. If a tree is leaning heavily in one direction, or if it’s within two trunk-lengths of a power line or building, don’t cut it down yourself. The risk is too high. Hire an experienced and insured arborist if a tricky tree needs to come down in just the right way. Also – and this is important – chainsaws are very dangerous tools. Probably the most dangerous that the average person can get their hands on. If you don’t know how to use a chainsaw safely, learn how before putting any of the information here into practice.
Before you get started, cut and remove any saplings, bushes or dead branches from around the tree. You’ll need a clear escape route to briskly step away from the tree as it falls. Now’s the time to create one. It takes just a few minutes and it could save you from injury or worse.
The first two of the three felling cuts you’ll make in the trunk, create a wedge of wood that’s removed from the trunk. Start some distance up from the ground and cut one-third of the way through the trunk, horizontally, on the side that the tree will naturally fall towards. I like to make this first cut about one length of firewood up from the ground. This is easier and safer than cutting right at ground level. After the tree is down you can cut this single remaining block off the stump, nice and neat in one continuous cut. I hate the look of ugly, ragged stumps in my forest, so trimming stumps flush with the ground is something I always do.
The second cut is angled down and intersects with the inner edge of the first cut. This creates a loose wedge of wood that you need to remove before making the third and final cut.
The third felling cut is horizontal, entering the side of the trunk that’s opposite the wedge you just removed, about 2” above its bottom face, and extending inwards within several inches of its point. The fact that the third cut doesn’t intersect with the wedge-shaped gap is key. It’s this feature that preserves some uncut wood fibres across the centre of the trunk, creating the all-important hinging action that keeps the tree under some control as you step aside yelling “timber!” as the tree falls. Put on your safety equipment (hearing protection, eye protection, leg protection chaps, and safety-rated work boots), start up the saw, rev it to full speed, then move the spinning chain into the trunk to make the three felling cuts.
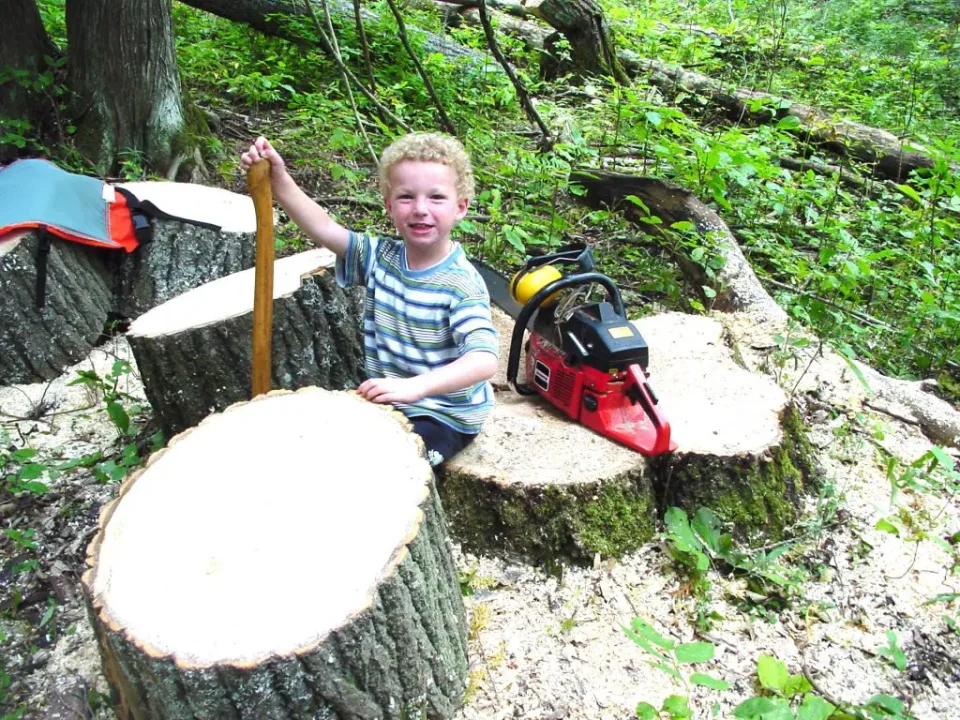
Making Firewood Step #2: Crosscut Logs to Length
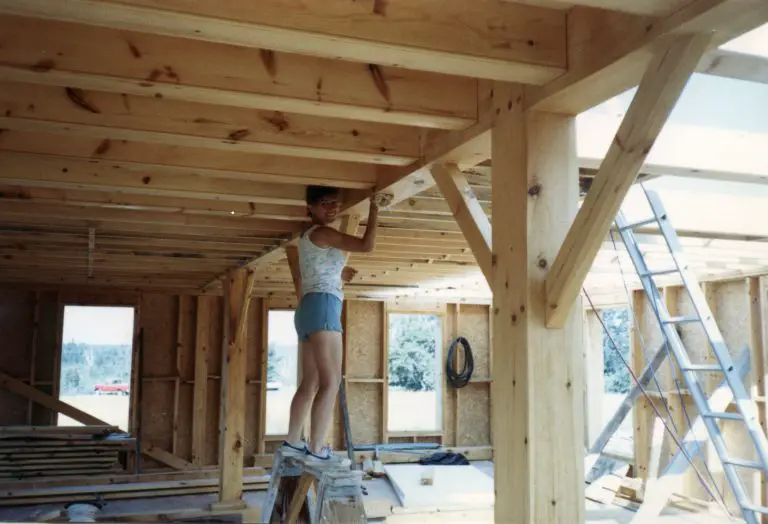
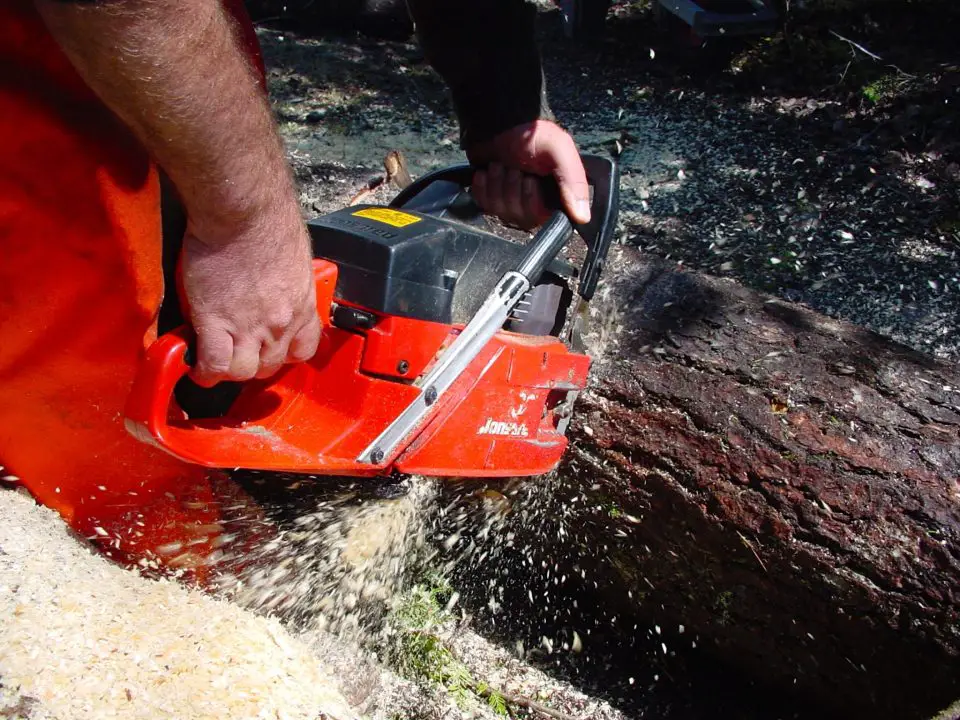
With the tree on the ground, it’s time to use your chainsaw to cut logs into lengths that fit your woodstove or fireplace. Measure the space inside your woodburning appliance, then subtract an inch to get the firewood length you need. That’s me below cutting a log to stove length.
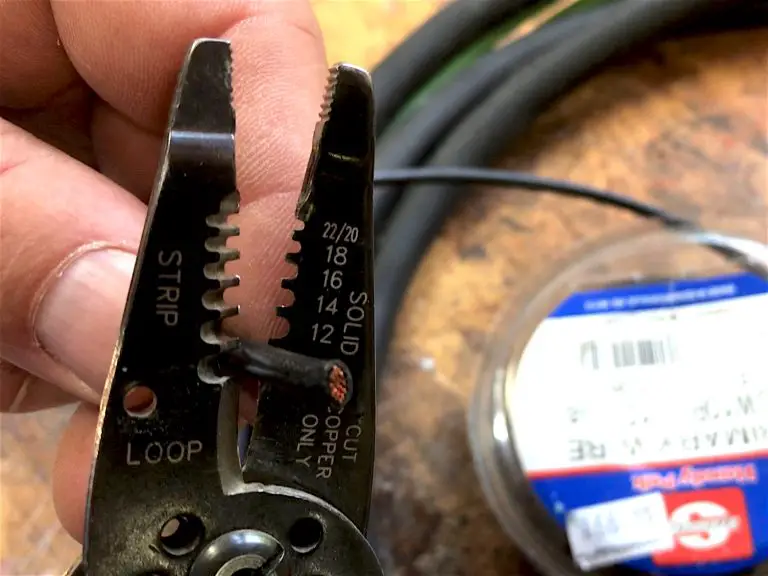
It’s common practice to eyeball the length of firewood blocks being cut from logs, but there are two problems with this. Besides the fact that a pile of firewood of varying lengths can’t be stacked neatly, if you happen to cut the odd block too long, it’s a big pain when you can’t close your woodstove or fireplace insert door properly. You’ve just thrown a log onto a big bed of red hot coals and it’s starting to catch fire quickly. Since the door won’t close you’ve got to pull the burning wood out and throw it into the snow outside. This has happened to me and it’s why I always take the trouble to mark logs to length before cutting. Make a measuring stick to the firewood length that’s ideal for your set-up, then use it to guide a hatchet for marking block lengths. A couple of hits with the blade makes a mark on the bark that ensures consistency when sawing to length. Before you continue, watch the video below about making your chainsaw last as long as possible. There are a couple of tricks that most saw owners don’t put into practice.
- Video#1 Watch Time = 3 minutes
As you work, keep the saw cuts square as you go through the log. Also – and this is vitally important – avoid letting the saw chain hit soil or rocks underneath the logs as they sit on the ground. Even a split-second contact with a small rock will turn a razor sharp chain into a near-useless assembly of spinning metal. A dull chain can be resharpened, but the process takes anywhere from 10 to 30 minutes. A two-part cutting process is key to avoiding trouble like this. Make each crosscut three-quarters of the way down through the log as it lays on the ground (no more), then roll the log and complete the cuts from the top. I use a cant hook to help rotate large, heavy logs. Need help learning to sharpen a chainsaw? Here’s a detailed guide to using an electric saw chain sharpener. This is all we ever use at our place now.
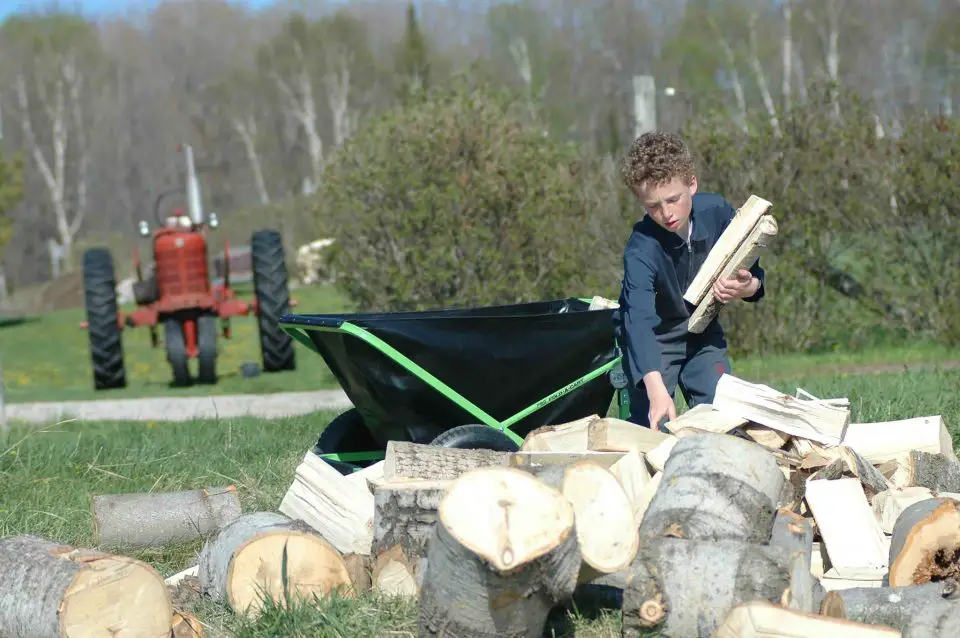
Making Firewood Step #3: Split Your Firewood
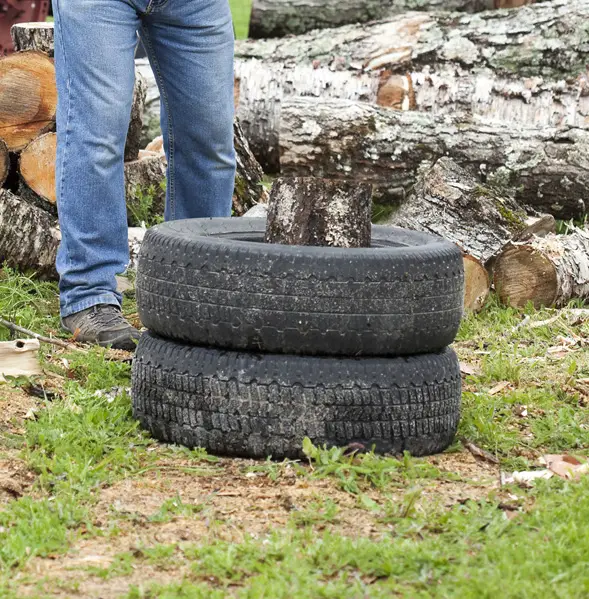
There are two reasons firewood needs to be split along its length. Besides making the firewood smaller and easier to handle, splitting allows wood to dry more quickly and thoroughly. If you’re splitting by hand, these DIY tips on how to best split firewood can make the job faster, safer and more effective. A gas-powered wood splitter is easier to use than an axe for knotty wood or blocks longer than 18”, but a good splitting axe is faster for straight-grained logs, especially oak, ash and aspen. Bolting two old car tires together makes a great log holder, keeping the wood upright while splitting. That’s my pair of wood splitting tires in use below.
Too many people struggle unnecessarily at this stage because the axe they use for splitting is far too light and far too thin. A 6 lbs, or better yet, an 8 lbs. splitting axe (sometimes called a maul) is a far more effective choice. Just don’t be fooled by the weight. The extra inertia is enormously more effective at splitting wood apart than what’s generated by a lighter axe, even though the lighter axe seems easier to wield. This is one time when a heavier tool is definitely easier to use.
Why the difference between types of axes? There are two reasons. First, a lighter axe doesn’t develop enough force to split the log, but instead just sinks the edge too deep into the wood. Second, a thin axe profile creates more work because you have to wrestle it out after each stroke. Thin axes tend to bury themselves too deeply, making splitting slower and more difficult.

Have you considered a wood splitter? If you want to make serious amounts of firewood over the long haul, then a wood splitter is definitely something to look at. The video below teaches the basics of choosing and using a gas-powered wood splitter.
- Video#2 Watch Time = 11 minutes
Making Firewood Step #4: Stack Your Firewood
After twenty years of stacking wood in the usual straight piles, l switched to something that’s much faster and better. I lay out round wood piles with a five foot length of rope that has a loop in one end. Push a 12-inch-long metal spike into the ground where the centre of the pile will be, then pull the rope tight and use the end to guide placement of the outside ends of the logs making up the bottom layer of wood.
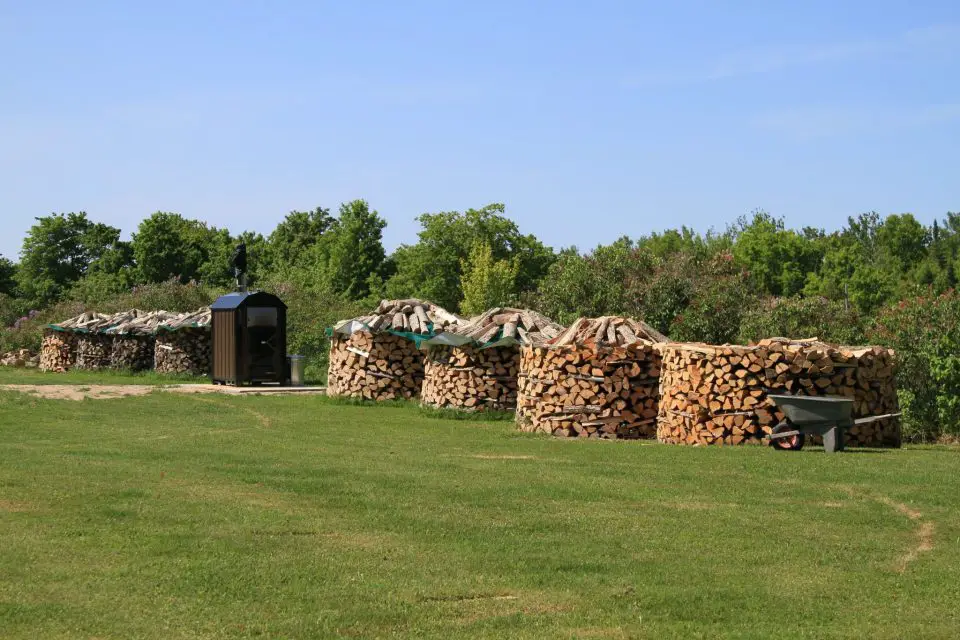
Keep stacking and checking several layers around the perimeter of the circle using the end of the rope as a guide, then remove the stake and rope and continue stacking by eye. Fill the centre of the circle with randomly thrown-in pieces of wood after you’re a few feet up, then build more wall when you’ve filled the centre portion, sloping the wall inwards slightly for stability as you go up. Add a couple of 10-foot long wooden poles across the diameter of the circle when you’re about four feet up, to bind the sides of the pile together, then dome the top and place a tarp under the last layer of wood for shelter. Another layer or two of wood on top holds the tarp down and keeps the pile dry.
Making Firewood Step #5: Season Your Firewood
The fresher the better for vegetables and fish, but not so for firewood. Firewood is more like fine wine when it comes to aging. The longer firewood dries (especially under the cover of a roof) the better. My rule of thumb is to allow at least one year of drying before burning firewood. Two years is better. The tarp I install as part of my round wood piles is especially effective because it’s protecting a wider width of stacked wood then in a conventional narrow, straight pile. This tarp is also sloped. Storing firewood in a well ventilated, covered woodshed is the very best option because it yields noticeably hotter and cleaner burning fires. That’s the reason old-time homesteaders usually had a woodshed near the house. The best wood doesn’t sizzle when you throw it on the fire, and gives considerably more heat than wetter wood.
TECH TIP: Responsible Forest Management
Being a good steward of your back-40 forest isn’t the same as managing a commercial forest. That’s because you’re managing for different goals than those pursued in industry. While you might be aiming for firewood and lumber production, you’ll also want to keep the forest friendly for wildlife and sustainable for future generations. Hollow-but-sound trees may not look great, but they’re valuable to wildlife. Depending on where you live, you should leave 3 to 12 of these “cavity trees” standing per acre for wildlife habitat. Dozens of species of birds and mammals depend entirely on cavity trees for shelter, hibernation and rearing young. Trees with openings in the upper trunk are especially valuable since they afford the best predator protection. When I cut trees on my land, I always follow a three-step selection process. First trees to get cut are the ones that blow down in wind. That’s a no-brainer. Next, gnarled, stunted or damaged standing trees. Large, mature, high-quality trees are cut last, specifically choosing to get rid of individuals that block the light and space needed by younger trees. Just don’t over-do the sunlight thing. Dappled sun on the ground is okay in a forest, but a lot of full sunlight can allow the growth of grasses that would prevent new trees from starting to grow.
Cutting your own firewood is like an exercise program that also keeps you warm and saves money. Learn the basics, put them into practice and you’ll be healthier, wealthier and maybe a little bit wiser for it.
Frequently Asked Questions
Firewood should dry for at least one year before burning, and two years is often even better for hotter, cleaner fires. Oak, especially, benefits from two years of drying time.
Yes. Split firewood dries faster and more thoroughly because exposed wood surfaces let moisture escape.
Cut firewood to fit your woodstove or fireplace, usually about one inch shorter than the firebox. This usually means 16″. Big stoves can take 24″ long wood.
A wood splitter is easier for large volumes, knotty wood and longer blocks, while a good splitting axe is often faster for straight-grained wood. I heated out house with axe-split wood for years, but I’m heating enough space now that I always use a gas-powered splitter.
Firewood should be stacked to allow airflow and kept covered on top while leaving the sides open for drying. My favourite method is the round piles here.


I hope you found this content useful!
Your generous support helps me produce more practical, hands-on content that I hope you’ll find useful.
Steve Maxwell