A homeowner notices a bubble in the paint on a window frame and presses it with a thumbnail. The surface gives way, a few crumbs fall out, and the natural next step is to scrape it, fill the hole, and repaint. It takes twenty minutes and feels responsible. The trouble is that the quick repair may have erased the best evidence of what is going on inside the wood. Early termite signs are small, easy to mistake for moisture or age, and easy to cover with ordinary home improvement habits. The sections below explain why DIY fixes feel logical, how common repairs conceal evidence, what to do before touching a damaged area, and how to move forward once the source is identified.
Why Quick Fixes Feel Like the Right Move
Most people repair what they can see. Damaged trim looks bad, and filling a hole or replacing a board is a normal part of home maintenance. Hardware stores sell fillers, caulks, and paints designed to make small flaws disappear, and online tutorials show how to do it in an afternoon. When a problem appears minor, the cost of doing nothing feels higher than the cost of a quick fix.
Termites make this tendency risky. They work out of sight, and the early signs often resemble ordinary wear. A blister in paint can come from humidity, a bad primer, or a leak, and so can soft wood or a hairline crack. Without a clear reason to suspect insects, a homeowner has little cause to hold back.
The problem is not the repair itself but the order of operations. Cosmetic work done before the cause is identified treats the surface and leaves the source untouched. If termites are present, they continue feeding under the new finish, and the repair may even make the situation worse by removing clues and creating a false sense of security.
Anaheim’s warm climate adds to the risk, since termites can remain active across much of the year. A property with older wood trim, original framing, or past renovations may have many spots where small damage could hide a larger issue. Recognizing the pattern is the first step toward avoiding it.
How Common Repairs Conceal Evidence
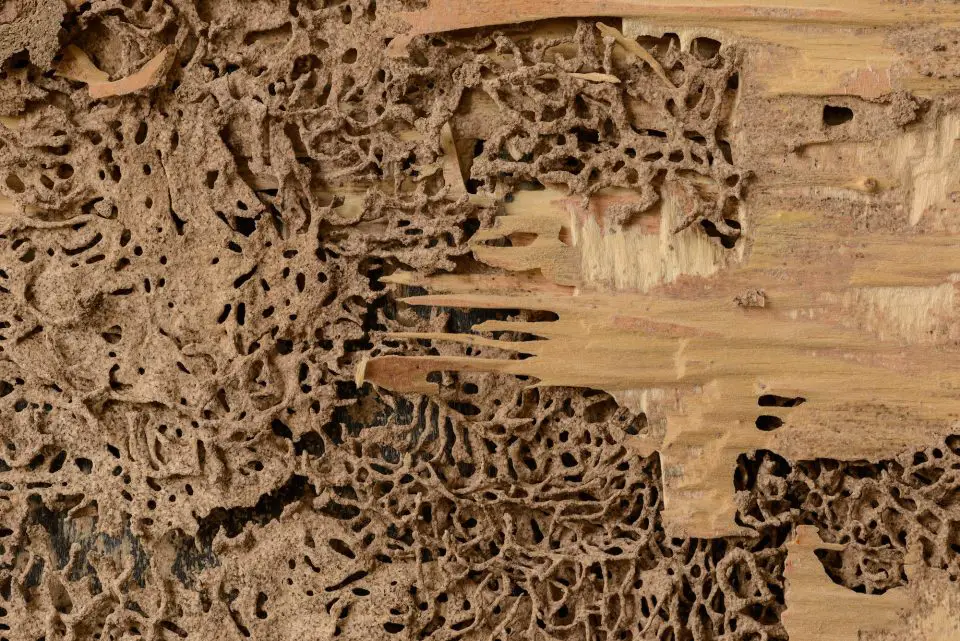
Several DIY habits can cover up termite signs. Filling damaged wood with putty or epoxy hides holes, galleries, and soft areas. Kick-out holes, the tiny openings through which drywood termites push their pellets, can be sealed over without anyone noticing what they were. Pellets that fall from them may be swept away, removing proof that insects were present.
Painting over blistered surfaces seals in the problem. Bubbling or rippling paint can mark the location of galleries just under the finish, and repainting smooths it out. Mud tubes on walls or foundations may be scraped off or painted over, which erases a key identifier of subterranean termites.
Replacing trim can discard evidence along with the wood. If a baseboard or casing is removed and thrown away, so are the galleries, pellets, and any live insects it contained, and the inspector never sees them. The new piece may be installed against infested framing, giving termites fresh food.
Patching walls hides hollow areas and cracks that might have signaled activity within the wall cavity. Caulking gaps and cracks can trap insects inside or push them to new areas. Spraying household insecticide can scatter termites and make later treatment more complicated.
Each of these actions makes sense for a cosmetic problem and works against the goal of finding a structural one. Once the evidence is covered, a later inspection must work harder, sometimes opening finished surfaces to find what was hidden, and the history of when the damage began becomes unclear.
Photograph and Document Before Touching Anything
The simplest protective step is to pause and record. Take clear photographs of the affected area from several distances, including a wide shot showing where it sits in the room or on the exterior, a medium shot of the surrounding wood, and close-ups of holes, blisters, or cracks. Place a coin or ruler beside small details for scale, and note the date.
Write down what you observed. Describe the sounds when you tap the wood, whether it feels soft or hollow, whether pellets or tubes are present, and whether there are signs of moisture. Mark the location on a sketch of the room or yard. If you find pellets, collect a small sample in a sealed container, which can help a professional identify the species.
Check surrounding wood. Termite damage rarely stays in one spot, so inspect adjacent trim, cabinets, door and window frames, floor edges, and nearby exterior wood. Use a flashlight and tap with a screwdriver handle. Look in corners, behind furniture, and in the garage or attic if accessible. Noting additional suspicious areas helps an inspector understand the extent of the problem, and finding more than one is a good moment to call Termite Control Anaheim instead of starting repairs.
Resist the urge to clean up. Leave pellets, wings, and debris in place when practical, and keep children and pets away from the area. If you must protect the surface, cover it with a loose sheet of plastic instead of filling or painting.
Finding the Source Before Cosmetic Work Begins
Identifying the source means answering a few questions. What is causing the damage: termites, moisture, carpenter ants, or something else? If termites, which type? How far has the activity spread? What conditions allowed it to start? A quick fix answers none of them.
A short checklist can guide your decisions:
- Hold off on filling, sanding, caulking, painting, or replacing the affected wood until the cause is known.
- Document the area with photographs, notes, and samples before any cleanup.
- Inspect surrounding wood and nearby moisture sources, such as leaks, poor drainage, or damp soil.
- Avoid spraying household insecticides, which can scatter insects and complicate treatment.
- Arrange a professional inspection when signs suggest termites, such as pellets, mud tubes, hollow wood, or discarded wings.
When termite-related damage is suspected, an evaluation by a licensed provider such as Termite Control Anaheim before DIY restoration begins can confirm the pest, locate the colony, and prevent repairs from hiding the evidence. Inspectors can use moisture meters, probes, and access to attics and crawl spaces to look in places that homeowners cannot reach.
Expect questions about the history of the damage. When did you first notice it? Has the area been repaired or painted before? Have there been leaks or renovations? Honest answers help the inspector interpret what they see, including whether earlier repairs concealed older activity.
The goal is understanding. If the inspector finds termites, the report will identify the species and recommend treatment. If the damage proves to be moisture-related, the fix focuses on stopping the leak and repairing the wood. Either way, the decision rests on facts instead of guesses.
Repairing After the Cause Is Addressed
Once the source is identified and treated, repairs can proceed with confidence. Treatment may include localized applications, whole-structure approaches, or soil treatments, depending on the species and the extent of the problem. A licensed professional can explain the method, how long it takes, and what preparation is required.
After treatment, assess the wood. Surface damage may be sound enough to remain, while structural members that have lost strength should be reinforced or replaced by a qualified contractor, and permits may apply. Cosmetic repairs such as filling, sanding, and painting are appropriate once the structure is sound and the cause is resolved.
Fix the conditions that contributed. Repair leaks, improve drainage, trim vegetation back from walls, remove wood-to-soil contact, and clear unnecessary cellulose near the house. These steps reduce the odds that termites return.
Keep records. Save photographs, inspection reports, treatment invoices, and notes on repairs. A well-kept file helps with warranties and later sales, and it shows that damage was handled responsibly. If similar signs appear later, the history will help a professional judge whether it is old activity or something new. Homeowners who document first and repair second tend to spend less in the long run, since a small delay at the start avoids repeated fixes and hidden damage.
End Note
Do-it-yourself repairs are a normal part of caring for a home, but they can accidentally hide the first signs of termites. Filling holes, painting over blisters, replacing trim, and patching walls all remove evidence that a professional needs. A better routine is to photograph suspicious areas, check the surrounding wood, find the source, and only then begin cosmetic work. That small change in order protects the structure, saves money, and keeps the home’s history clear for the next inspection.





I hope you found this content useful!
Your generous support helps me produce more practical, hands-on content that I hope you’ll find useful.
Steve Maxwell