- Video#1 Watch Time = 5 minutes
- Video#2 Watch Time = 2 minutes
Question: What’s the best way to shorten two wooden doors as part of a laminate floor job I’m planning? I need advice for marking and cutting the bottom of these doors accurately and without splinters.
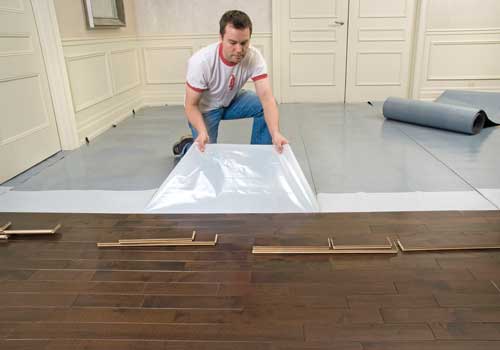
Answer: This job is actually trickier than it looks because it’s easy to get things wrong. If you haven’t installed your floor yet, marking is easier than if the new floor was already down. Place a piece of scrap laminate and whatever underlay you’ll be using on the floor next to the door as it hangs on its hinges, then use this flooring as a guide to draw a pencil along the bottom edge of the door. This marks the height of the new floor in an operation called “scribing”. It transfers a line onto the door that automatically has some clearance with the floor built in. This is because the side of the pencil is sliding along your floor tiles, but it’s the point of the pencil that’s marking the door. You essentially get a half-thickness of pencil clearance between the bottom of the door and the floor. Just remember to lay the pencil flat against the laminate as you work.

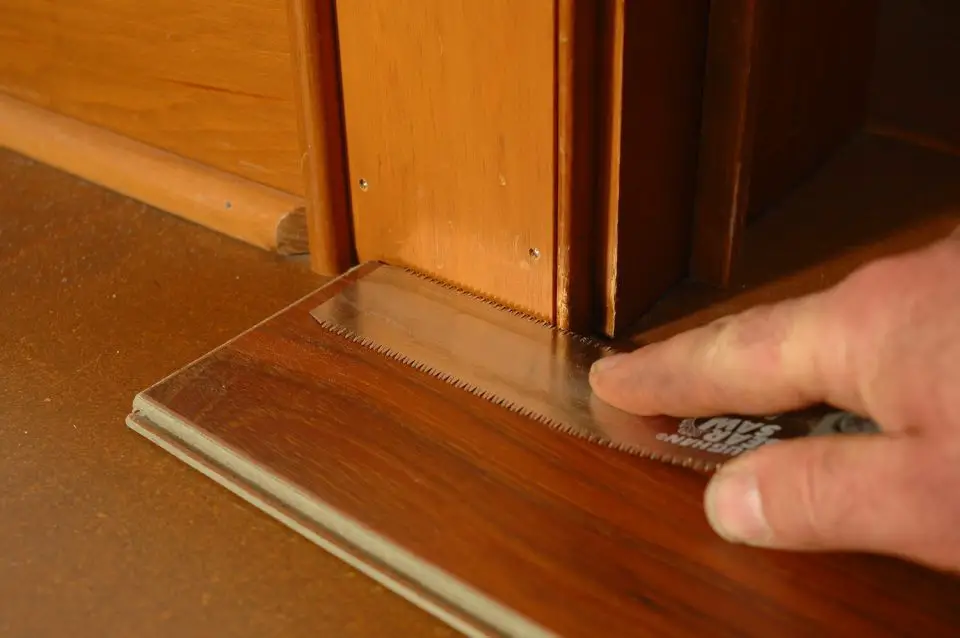
One thing to understand is that there might not be a consistent difference between the bottom of your door and the floor through the door’s full arc. Find the spot in the arc of door travel where the door is closest to the floor, then do your scribing there. This same scribing process is similar to what you’ll need to do to cut the door trim to allow the laminate to slip underneath after installation. The only difference is that the pencil line needs to follow the height of the laminate floor exactly, not hard a pencil thickness higher. You can see the trim trimming process in action below.
If your new floor is already installed, things are a little trickier when it comes to trimming doors. Begin by setting the door more-or-less back in place resting on the new floor, with a helper holding it up. Measure the distance between the top of the bottom hinge pocket in the door frame and the top of the bottom hinge. This figure (subtract the bottom-of-door clearance required) tells you where you need to cut. Allow an extra 1/4-inch to 1/2-inch gap for clearance, though you may have to adjust this later, depending on how the door swings. After totaling the amount to be cut off, apply masking tape to both sides of the door in the cut zone to reduce splintering, then mark a pencil line across the door as measured down from the top of the bottom hinge.
Regardless of whether you marked your doors before or after your new floor went down, eventually the job comes down to cutting the door itself. The main risk is splintering of the wood, and there are a few ways around this problem. The very best tool to use is a specialty item called a tracksaw. You can see how they work in my old video below. If you know a carpenter or woodworker, they might have a tracksaw you can borrow. They’re amazing tools.
The next best choice for cutting your door would be a jigsaw with a fine blade. Many jigsaws these days have orbital blade action, and this matters when you’re doing fine work such as trimming a door. Click to watch my video about orbital blade action with jigsaws and why you need to have orbital action turned OFF to get the smoothest possible cut on your door.
Also, be careful not to accidentally lean on the saw to the left or right as you cut with a jigsaw because this will make the cut edge turn out unsquare. Practice cutting on some thick scrap wood to get a feel for the saw if using a jigsaw is new to you.
A handsaw is a perfectly good option for cutting a door, and the presence of masking tape along the cut line will greatly reduce chipping. My least favourite choice of tool for door trimming is a hand-held circular saw. The chipping hazard is very high with this tool, so be sure to clamp a piece of 1/2″ to 3/4″-thick scrap wood along the cut line to support the surface of the door and prevent (or at least reduce) splintering. Regardless of how you cut your door, use some sandpaper wrapped around a block of wood to round the sharp, fresh, cut edges of the door. This will prevent splintering later, during use.
Hang the door on its hinges again, and swing it through the full range of travel. If it hits the floor anywhere because the floor is higher in one spot than others (not unusual), lay a pencil flat on the floor and slide its tip along the door face to scribe a new and higher line for trimming again in the location. If there’s only a tiny amount of rubbing in one spot, use a belt sander spinning an 80-grit abrasive to remove wood. This is slower than a saw, but excellent and splinter-free for eliminating small areas of interference.


I hope you found this content useful!
Your generous support helps me produce more practical, hands-on content that I hope you’ll find useful.
Steve Maxwell