UPDATED 19Oct2018: There are two reasons ceramic floor tiles are unique in the world of home improvements. First, they’re one of the longest lasting, easiest to care for and most prestigious flooring options available. Second, all of these virtues depend  entirely on correct installation. A failed ceramic floor is frustrating, troublesome and pretty much irreparable. You either get it right the first time, or the whole thing becomes a trashy mess of perpetually loosening grout and cracking tiles. There is no after-the-fact fix. More so than with other home decor features, the time, money and disruption you invest in ceramic tiles rely entirely on getting the details right, and that’s what you’ll learn about here.
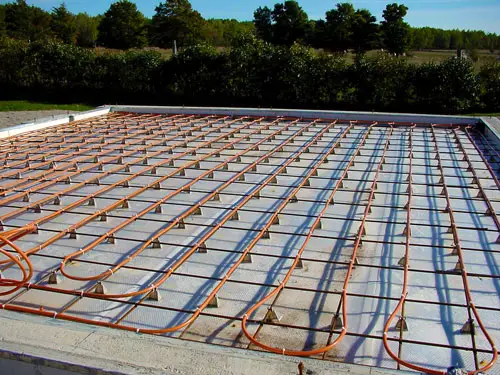
Reliable ceramic tile has been installed for centuries, but the realities of today’s building world and tighter economics makes the old ways more or less irrelevant. Modern homes typically have wooden subfloors or poured concrete floors, and both of these require installation details that go beyond traditional methods. To see why, you’ll need to start with an understanding of the two major reasons ceramic floors fail.
Two Reasons Ceramic Floors Fail
Before I show you all the details behind an optimal installation, you need to understand why ceramic tiles and grout sometimes fail. The most obvious is that the underlying subfloor isn’t rigid enough to prevent flexing under the load of furniture and people walking around. This is obvious, easy to understand, and easy to remedy before tiles go down. Ceramics don’t flex, and if they’re not fully and rigidly supported, cracking will occur. Floors built to code are usually sufficiently strong to support tiles reliably. If there’s any doubt, simply build stouter than code.
 There is, however, another issue behind reliable ceramic tile. Even with a sufficiently strong floor structure, tension and compression forces within an otherwise rigid floor can cause ceramics to fail. This is less easy to understand than flexing failures, but every bit as dangerous. Tension and compression issues happen when differences in the expansion and contraction rates of tiles and subfloors work against each other as temperature and humidity levels change. Even if the subfloor gets just 1/8-inch longer or shorter than the tiles fastened on top, the resulting pressures can be huge and damaging to your tiles. And while the mechanics of tension/compression stresses may be obscure, they are common enough to be part of quite a few failed ceramic tile installations. This is where uncoupling membranes help. Even if you’ve never heard about them before, don’t dismiss the idea. Uncoupling membranes play a major role in optimal tile installations because they relieve the stresses of tension and compression.
Keys to an Optimal Ceramic Tile Installation
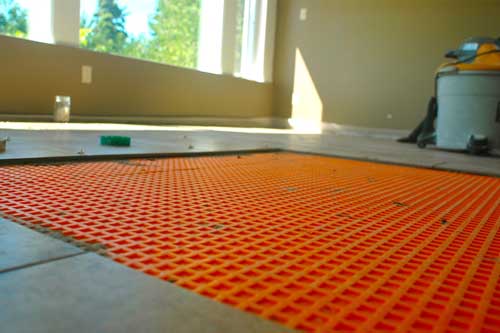
An uncoupling membrane, sufficient thinset mortar support underneath the tile, and effective grout installation. These are the three essential installation details, and an uncoupling membrane is the first. The best are made of a dimpled plastic sheet that allows a small amount of side-to-side tile movement while providing full horizontal support for tiles. The best I’ve seen so far is KERDI-BOARD. Uncoupling membranes offer value when installed over both wood subfloors and concrete, but they require three key installation details.
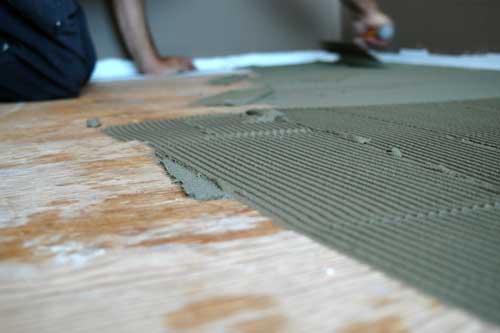 The installation shown here is over a plywood subfloor and it begins by moistening the surface of the wood with water. This prevents moisture from being drawn out of the thinset mortar you’ll put down next for bedding the uncoupling membrane.
- Sponge on just enough water to thoroughly wet the wood, though not so much that there’s standing water. Wait five or ten minutes before troweling on thinset using a 11/64” x 11/64” square tooth trowel or a vee-notched 1/4” x 3/16” or 5/16” x 5/16” trowel.
- You know you’ve got enough mortar applied when it completely covers the underside of the uncoupling membrane as you pull up a corner for inspection.
The choice of thinset mortar types is important, too. Modified thinset is ideal for installations over porous surfaces like wood and unpainted concrete, and that’s what’s being used underneath the uncoupling membrane going down here, and for most all other tile installations. That said, for tiles where the thinset will be trapped between two impervious layers, modified thinset is a mistake. It won’t harden properly in this situation, and that’s why unmodified is necessary when actually installing tiles over an uncoupling membrane later. Don’t necessarily trust your installer to get this detail right.
Also, you’ll get best results if you temporarily staple foam sill gasket to the walls where they meet the floor. This keeps wall surfaces clean and undamaged, and also preserves a small expansion space around the tile installation, if it should expand at some point. The thicker the gasket material the better the results.
Putting Ceramic Tiles Down
Tile installation happens next, and the main issue here is the correct amount of thinset mortar applied to support the tiles. Without enough thinset, your tiles will crack because of lack of support. Too much thinset and there will be messy 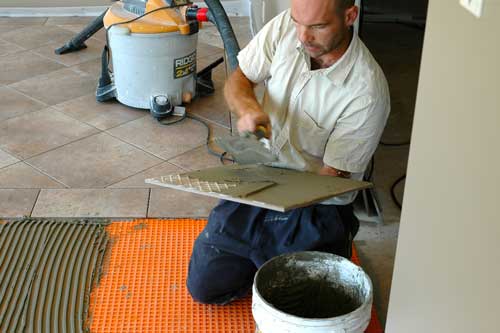 squeeze out between tiles and you’ll have more difficulty achieving a flat installation.
If you’re working over an uncoupling membrane, use a straight-edged trowel initially to work thinset into the dimples. Only when these are full do you switch to a notched trowel to apply more thinset that’ll actually support the tiles. Optimal notch size depends on tile size, but there’s something else. You’ll enjoy more reliable results if you apply thinset to the underside of tiles as well as the floor itself. This is called back buttering and though it takes more time, it also works better. Back buttering becomes more important as tile size increases, too. The larger the tile, the easier it is to inadvertently leave areas starved of thinset, not fully supported and prone to breakage.
Grouting is the last major step in tile installation, and diligence is the key to success. Each tile gap must be filled completely with grout before cleaning off the excess with a sponge. A rubber trowel works best for an initial grout removal. Grout only a 10 or 15 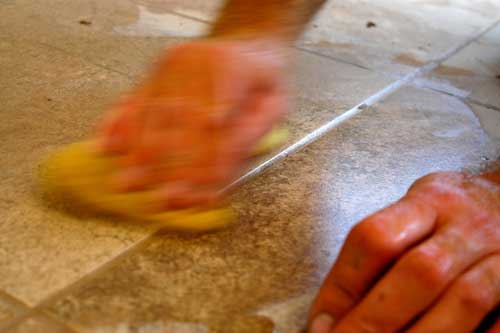 sq.ft. area until you get comfortable with the process. Continually wipe test areas of grouted tile, checking to see if the grout is ready for cleaning. It needs to be firm enough so the grout doesn’t get wiped out of the grout space with a sponge, but not so firm that you can’t get it off the tiles.
Properly installed ceramic tiles last many decades. The fact that not all tile installations endure proves that better practices are required. Modern methods and materials make it easier and faster to install tiles once and for all, but this only happens for those people open enough to try something unconventional yet proven. Overcoming the inertia of tradition may be the biggest hurdle of all.
Click below to watch a video of a certified pro install ceramic tiles using an uncoupling membrane.


I hope you found this content useful!
Your generous support helps me produce more practical, hands-on content that I hope you’ll find useful.
Steve Maxwell