Effective insulation is the single biggest reason modern Canadian homes are so much more comfortable and energy efficient than homes built even 25 years ago. And of all the options out there, foam can’t be beat for certain insulation applications. It delivers stable insulation values and outstanding air sealing, but it’s also expensive, misunderstood and sometimes unnecessarily feared. That’s why it pays to know the facts about foam and the five situations where it remains the undisputed king.
Application#1: Sealing rim joists with spray foam
 Go into any unfinished Canadian basement during winter, stick your hand behind the fiber insulation stuffed between the floor joists where they meet outside walls at the ceiling and you’ll almost certainly feel water and maybe even frost. Check this location in summer and you’ll typically find black or grey mold on the back face of the insulation because of condensed moisture that developed there during winter. This is the almost-universal problem that spray foam can solve.
Although using fiber insulation installed in rim joist areas is allowed and used almost everywhere, it’s a bad strategy. It routinely promotes moisture build up and mold growth because it’s impossible to seal the insulation behind a poly vapour barrier with all those floor joists getting in the way. This is one situation where building codes don’t address reality and spray foam is one of the only reliable ways to seal rim joist areas.
Closed cell polyurethane is the most common type of foam for this application and it functions as its own vapour barrier as long as it’s at least 3” thick. The only issue for some people is cost. Spray foam is expensive, regardless of whether you hire a contractor or buy and use a spray foam kit yourself. See “Poor Man’s Foam” for a less costly (though more troublesome) option for applying foam to rim joist areas.
Application#2: Warming floors with rigid foam
Floors over crawlspaces, open pier foundations or unheated garages get exceptionally cold during Canadian winters, and no matter how warm you make the room, everyone is uncomfortable walking on a floor that makes feet cold by conduction.
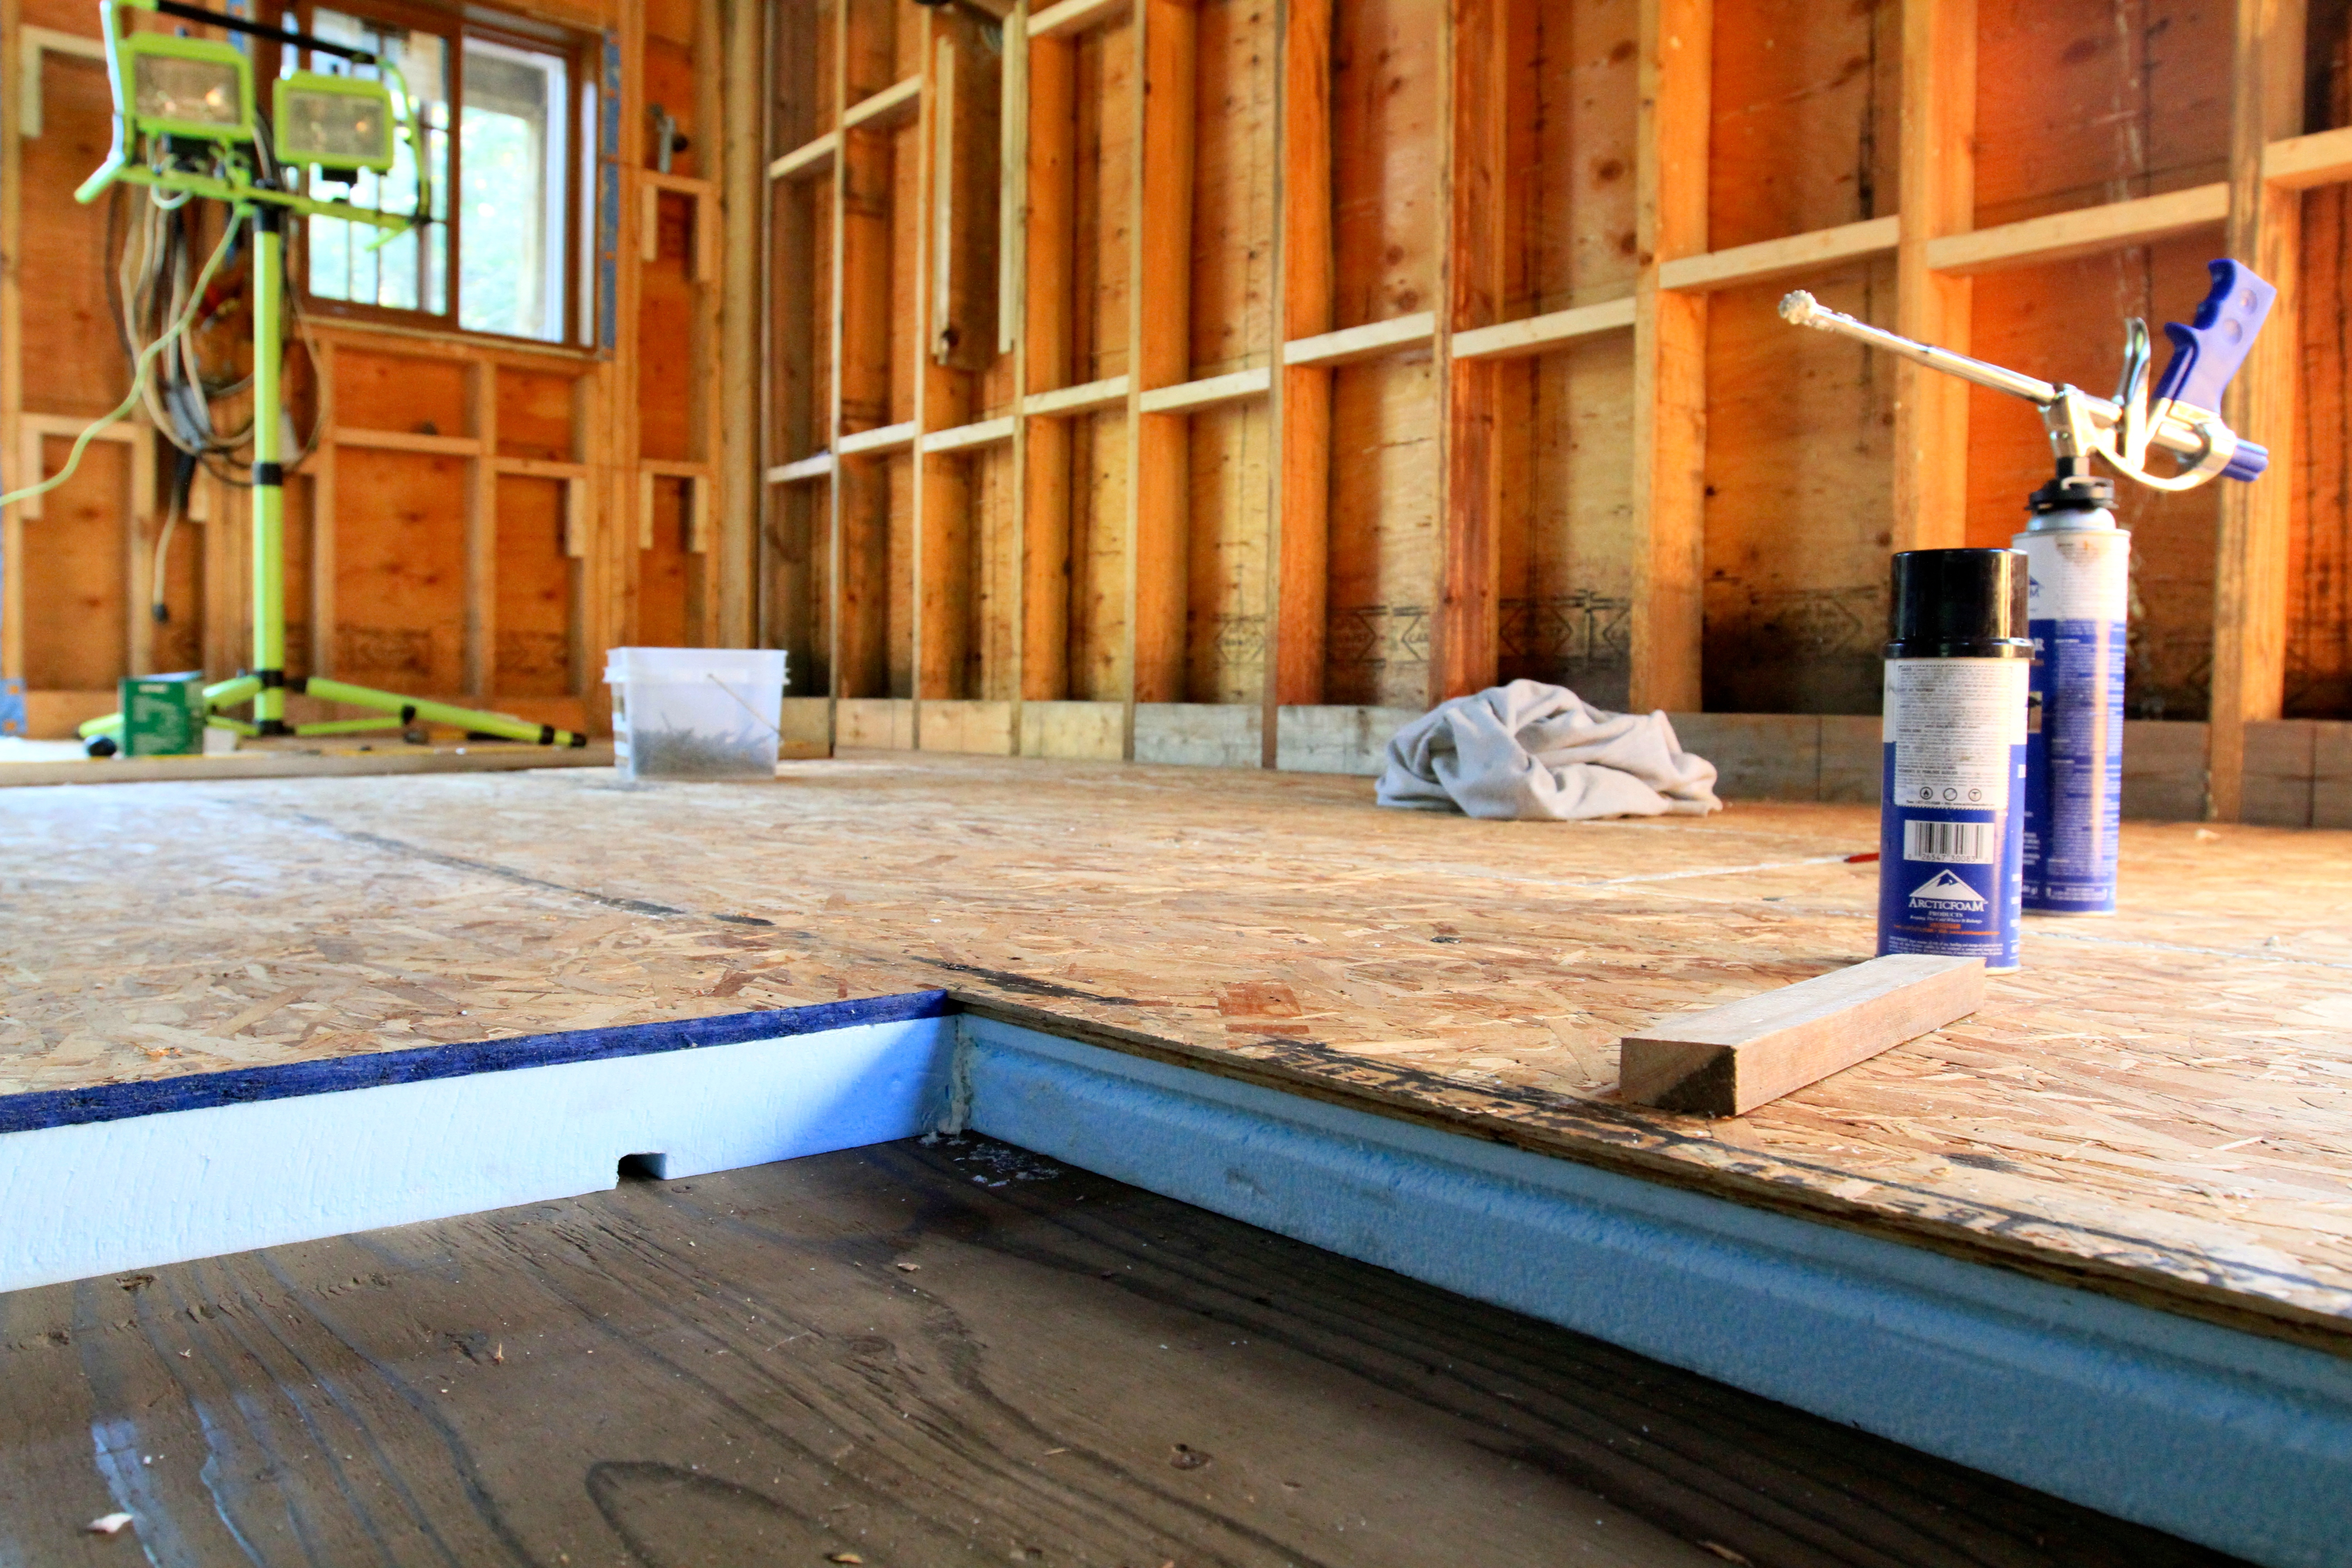 Applying rigid sheets of foam over floors like this is a highly effective way to make them much warmer, and the procedure works best when you’re planning to renew the finished floor anyway. 2”-thick sheets of extruded polystyrene foam applied directly over a subfloor or unwanted finished floor provides lots of warmth. It’s also rigid enough to support a new 5/8” subfloor on top without need for strapping or wooden support strips. Just screw the new subfloor down to the old floor using screws that go right through the foam and into the underlying joists.
To eliminate any chance of condensation, leave a 3/4”-wide gap between the foam and walls, then fill this gap with spray foam from a can. Trim the foam off with a hacksaw blade taken out of the frame and you’ve got an air-tight, condensation-proof seal around your floor.
Application#3: Insulating hollow walls with foam injection
Uninsulated wood frame walls are one of the unfortunate legacies we inherited from the past. Based on the impressively wrong idea that energy costs would always remain low, this design issue costs some individual householders thousands of unnecessary heating dollars each year. That’s why a simple but often-overlooked fix is such good news.
Injecting slow rise foam into wall cavities is much easier than tearing off drywall, adding insulation, then covering the walls back up again, and foam injection also delivers better energy performance than batts ever could, even if you could get them into hollow walls conveniently. The key to complete coverage is “seeing” where the injected foam goes as you put it into sealed wall cavities.
Two-part, slow rise polyurethane foam can be injected through either the inside face of the wall or the outside. Whichever is the easier surface to drill holes then patch them is the way to go. Identify stud locations, bore holes every couple of vertical feet, then determine how much injection time is necessary to fill the cavity.
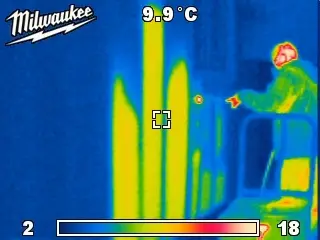 Since pipes, wires and stray nails can snag the foam as it expands inside the wall, preventing a complete fill, rent or borrow on an infrared camera. Two-part injection foam gives off heat, making it easy to see areas with incomplete coverage. Bore more holes and re-inject until the camera shows a uniformly warm wall surface.
Application#4: Insulating walls with rigid foam
Let’s say you’ve got a fully insulated 2×4 wall and you’re tired of its poor energy performance. Or perhaps you’ve got one of those double-brick homes with nothing more for insulation than a mortar-clogged, 1”-wide air space between inner an outer brick. These are two places where 2”-thick, rigid polystyrene foam on the inner or outer face of exterior walls can really help.
Installed under a new layer of drywall if you’re working indoors, this method makes the most sense when you’re creating a new interior wall finish anyway. You can also apply foam on the outer face of walls, too. Mark the location of the wall studs on the ceiling and the floor, temporarily secure foam to the walls, then fasten drywall in place with screws driven through the foam and into underlying wall studs. Figure your screw length so at least 1” of threads penetrate into the studs. You probably won’t find drywall screws this long, but deck screws work just as well for securing drywall over foam like this.
Adding foam on interior wall faces does mean you have to extend window and door jambs, but the effectiveness is exceptional. The continuous layer of foam works better than insulation added between studs, since studs and plates constitute about 20% of the surface of a wall yet deliver only about R5 of insulation.
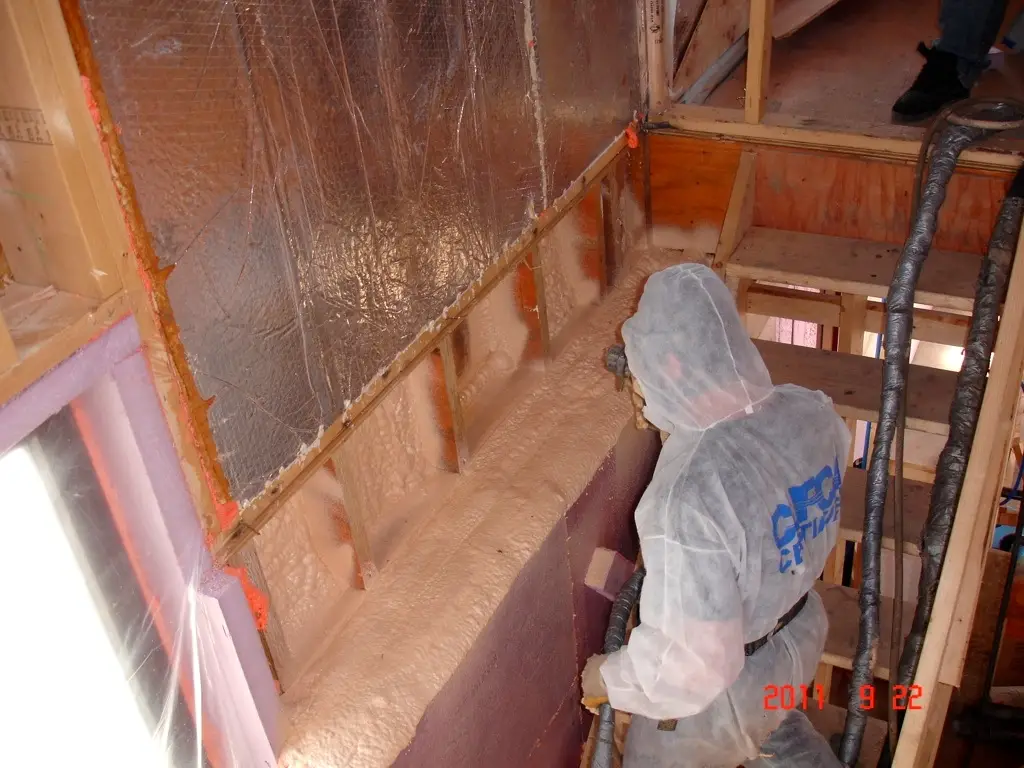
Application#5: Insulating a cathedral ceiling with spray foam
Every winter I get calls from distressed homeowners with severe “roof leaks” that mysteriously happen on sunny, warm days after long cold spells. More often than not these folks have an unventilated cathedral roof where the bottom of the rafters form the ceiling and the dripping water isn’t coming from a roof leak at all.
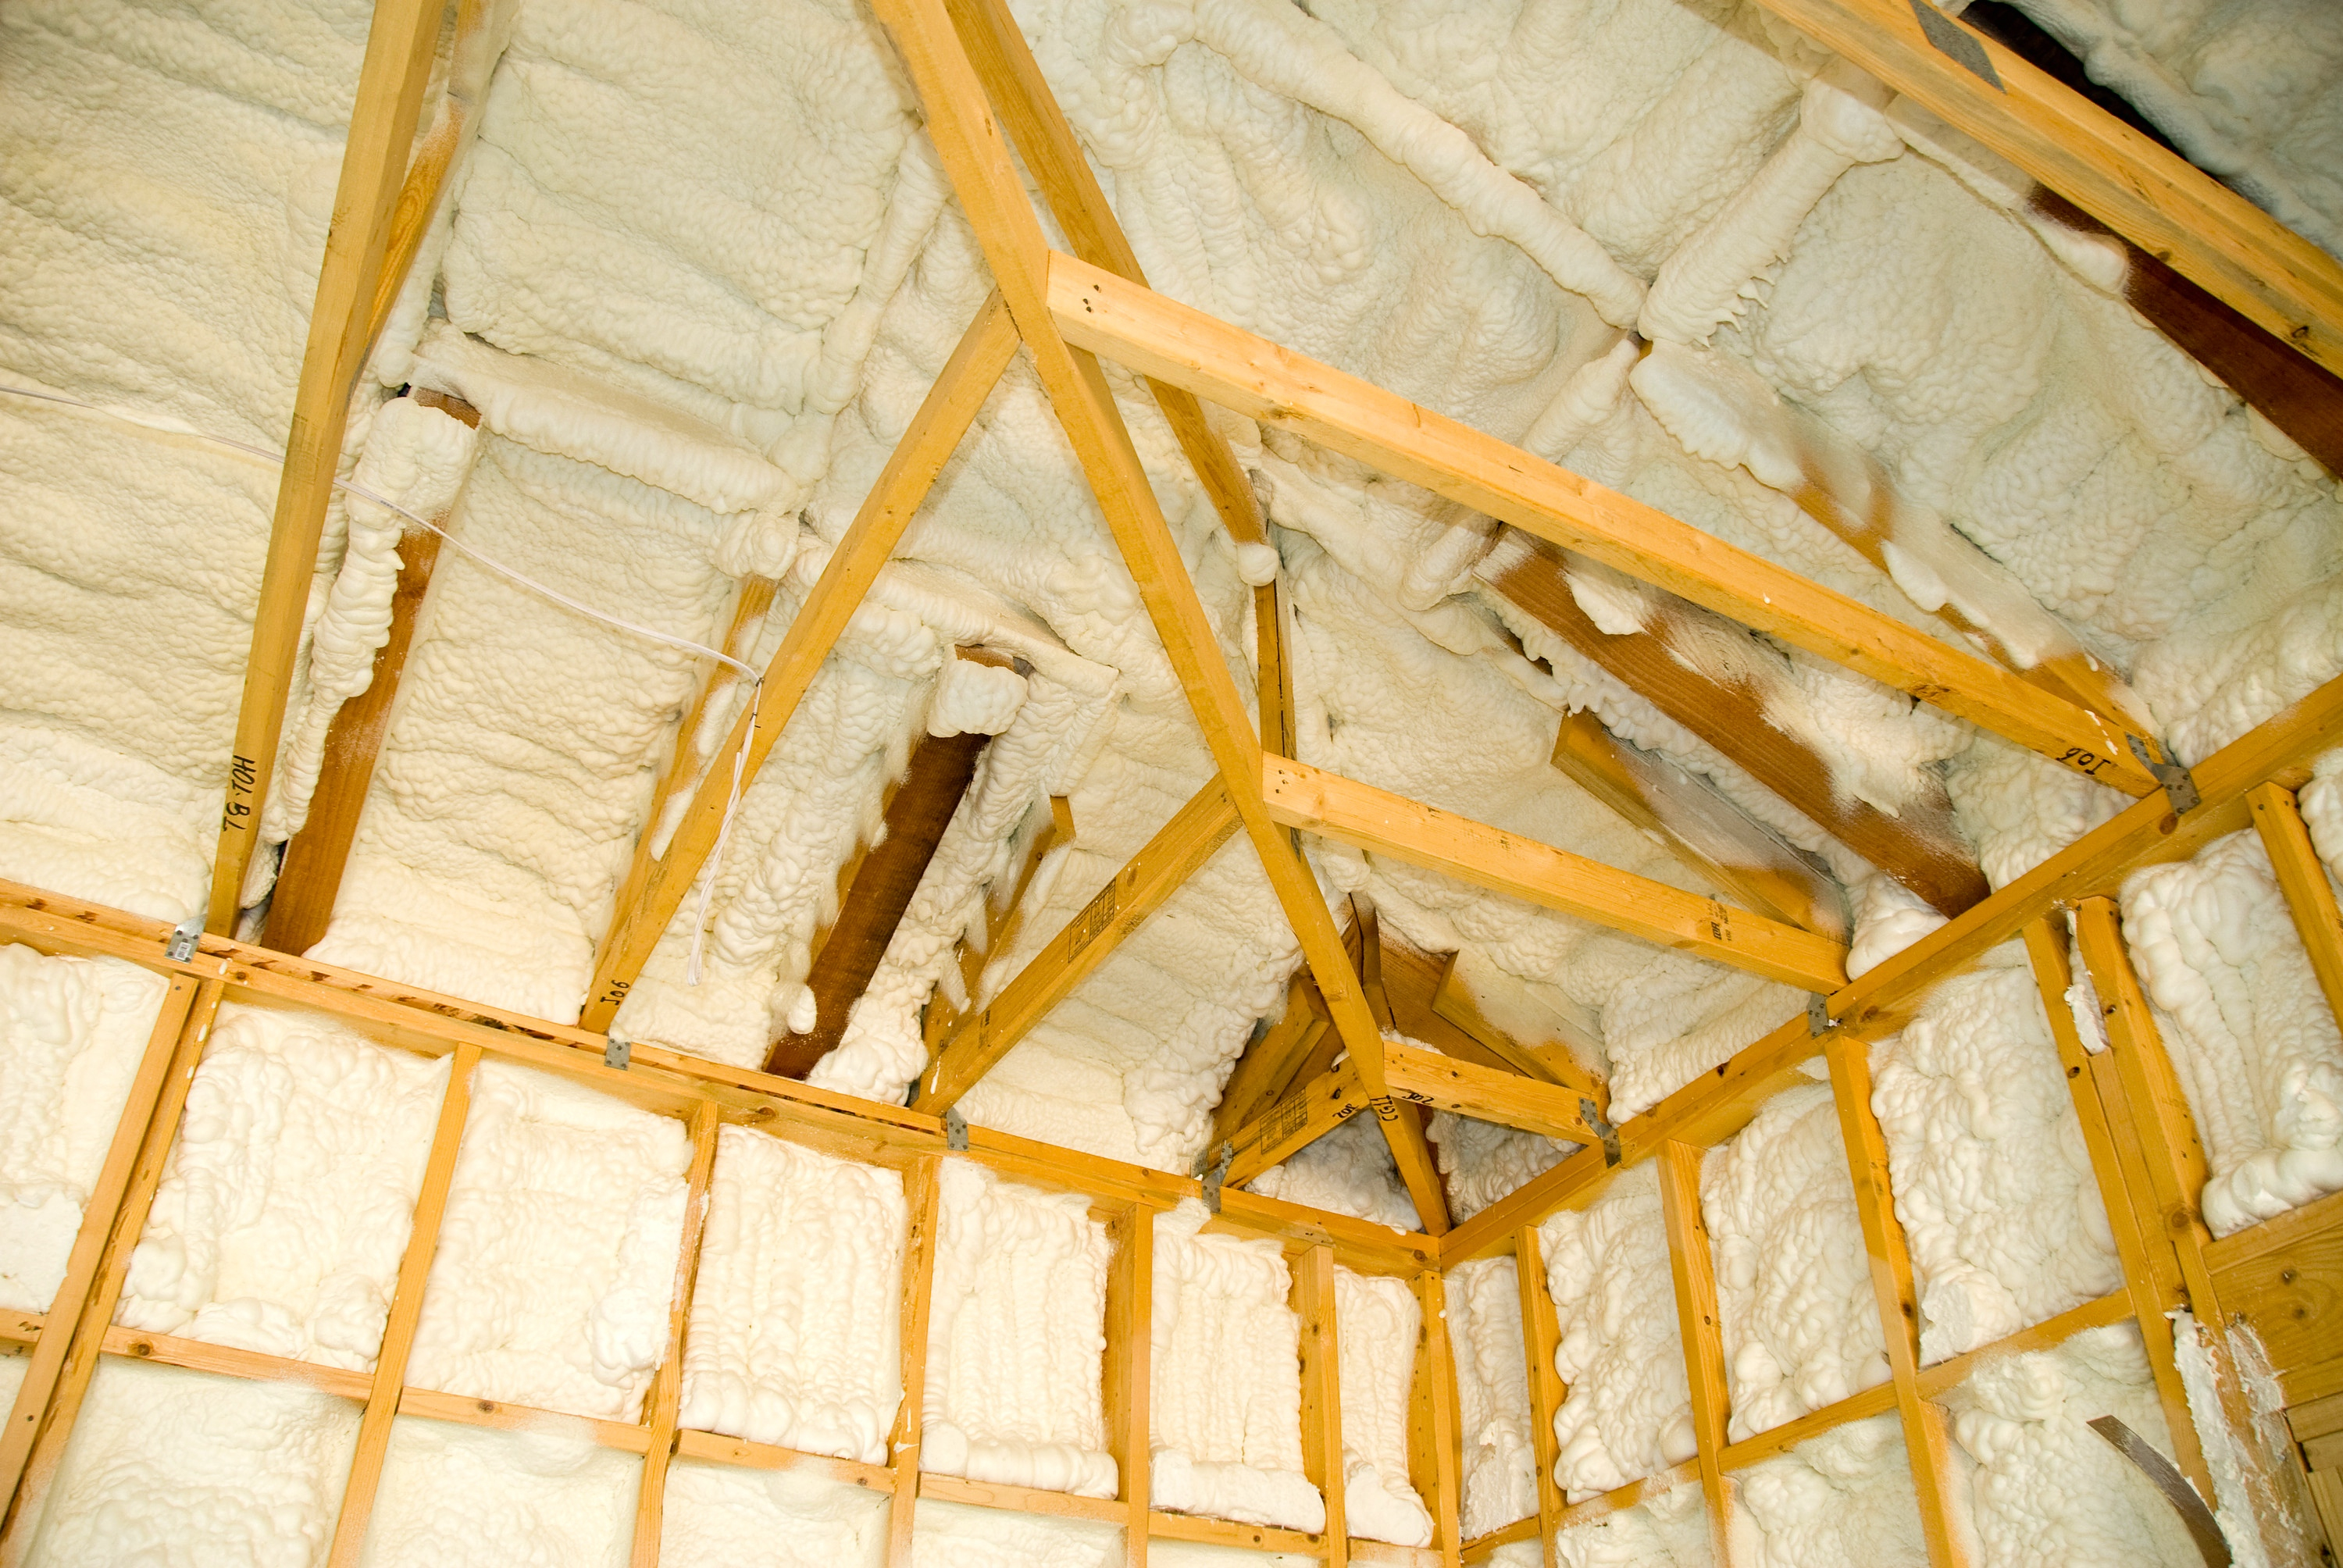 It’s virtually impossible to reliably seal an unventilated, fiber-insulated roof structure effectively enough to prevent internal condensation during cold weather. Warm, moist, indoor air makes it’s way into the structure through light fixture boxes or other flaws, then cools enough that liquid moisture appears within the insulation and forms frost. The longer the cold spell the more frost develops. The day it warms up enough to melt the frost, a “roof leak” happens.
Closed cell spray foam doesn’t let air pass through it, so it acts as its own vapour barrier and won’t allow condensation to develop inside cathedral ceilings. Retrofitting a structure like this with spray foam is troublesome and messy, but then again so is annual water damage and mold growth from melting internal frost.
Building in a cold climate is never as simple as it seems. And while foam isn’t always the best choice for every application, there are some situations where it just can’t be beat.
Beware the Condensation Hazard
Expanded polystyrene and extruded polystyrene are the two most common types of rigid foam you’ll find at building supply outlets, and though they have similar insulation values, they’re definitely not the same in the field. Expanded polystyrene is the white, beady stuff, and since it’s cheaper than the smooth-textured pink or blue expanded polystyrene, some people choose expanded when they shouldn’t. It all comes down to condensation.
Expanded polystyrene can’t function as it’s own vapour barrier because it allows air to pass through it. If expanded poly remains unprotected on a surface that gets cold during winter, liquid condensation will almost certainly form on the cold side of the foam, even if the edges are sealed. The result is almost certainly a sopping wet surface on the cold side of the expanded poly foam, and the headaches that always come with moisture where it shouldn’t exist.
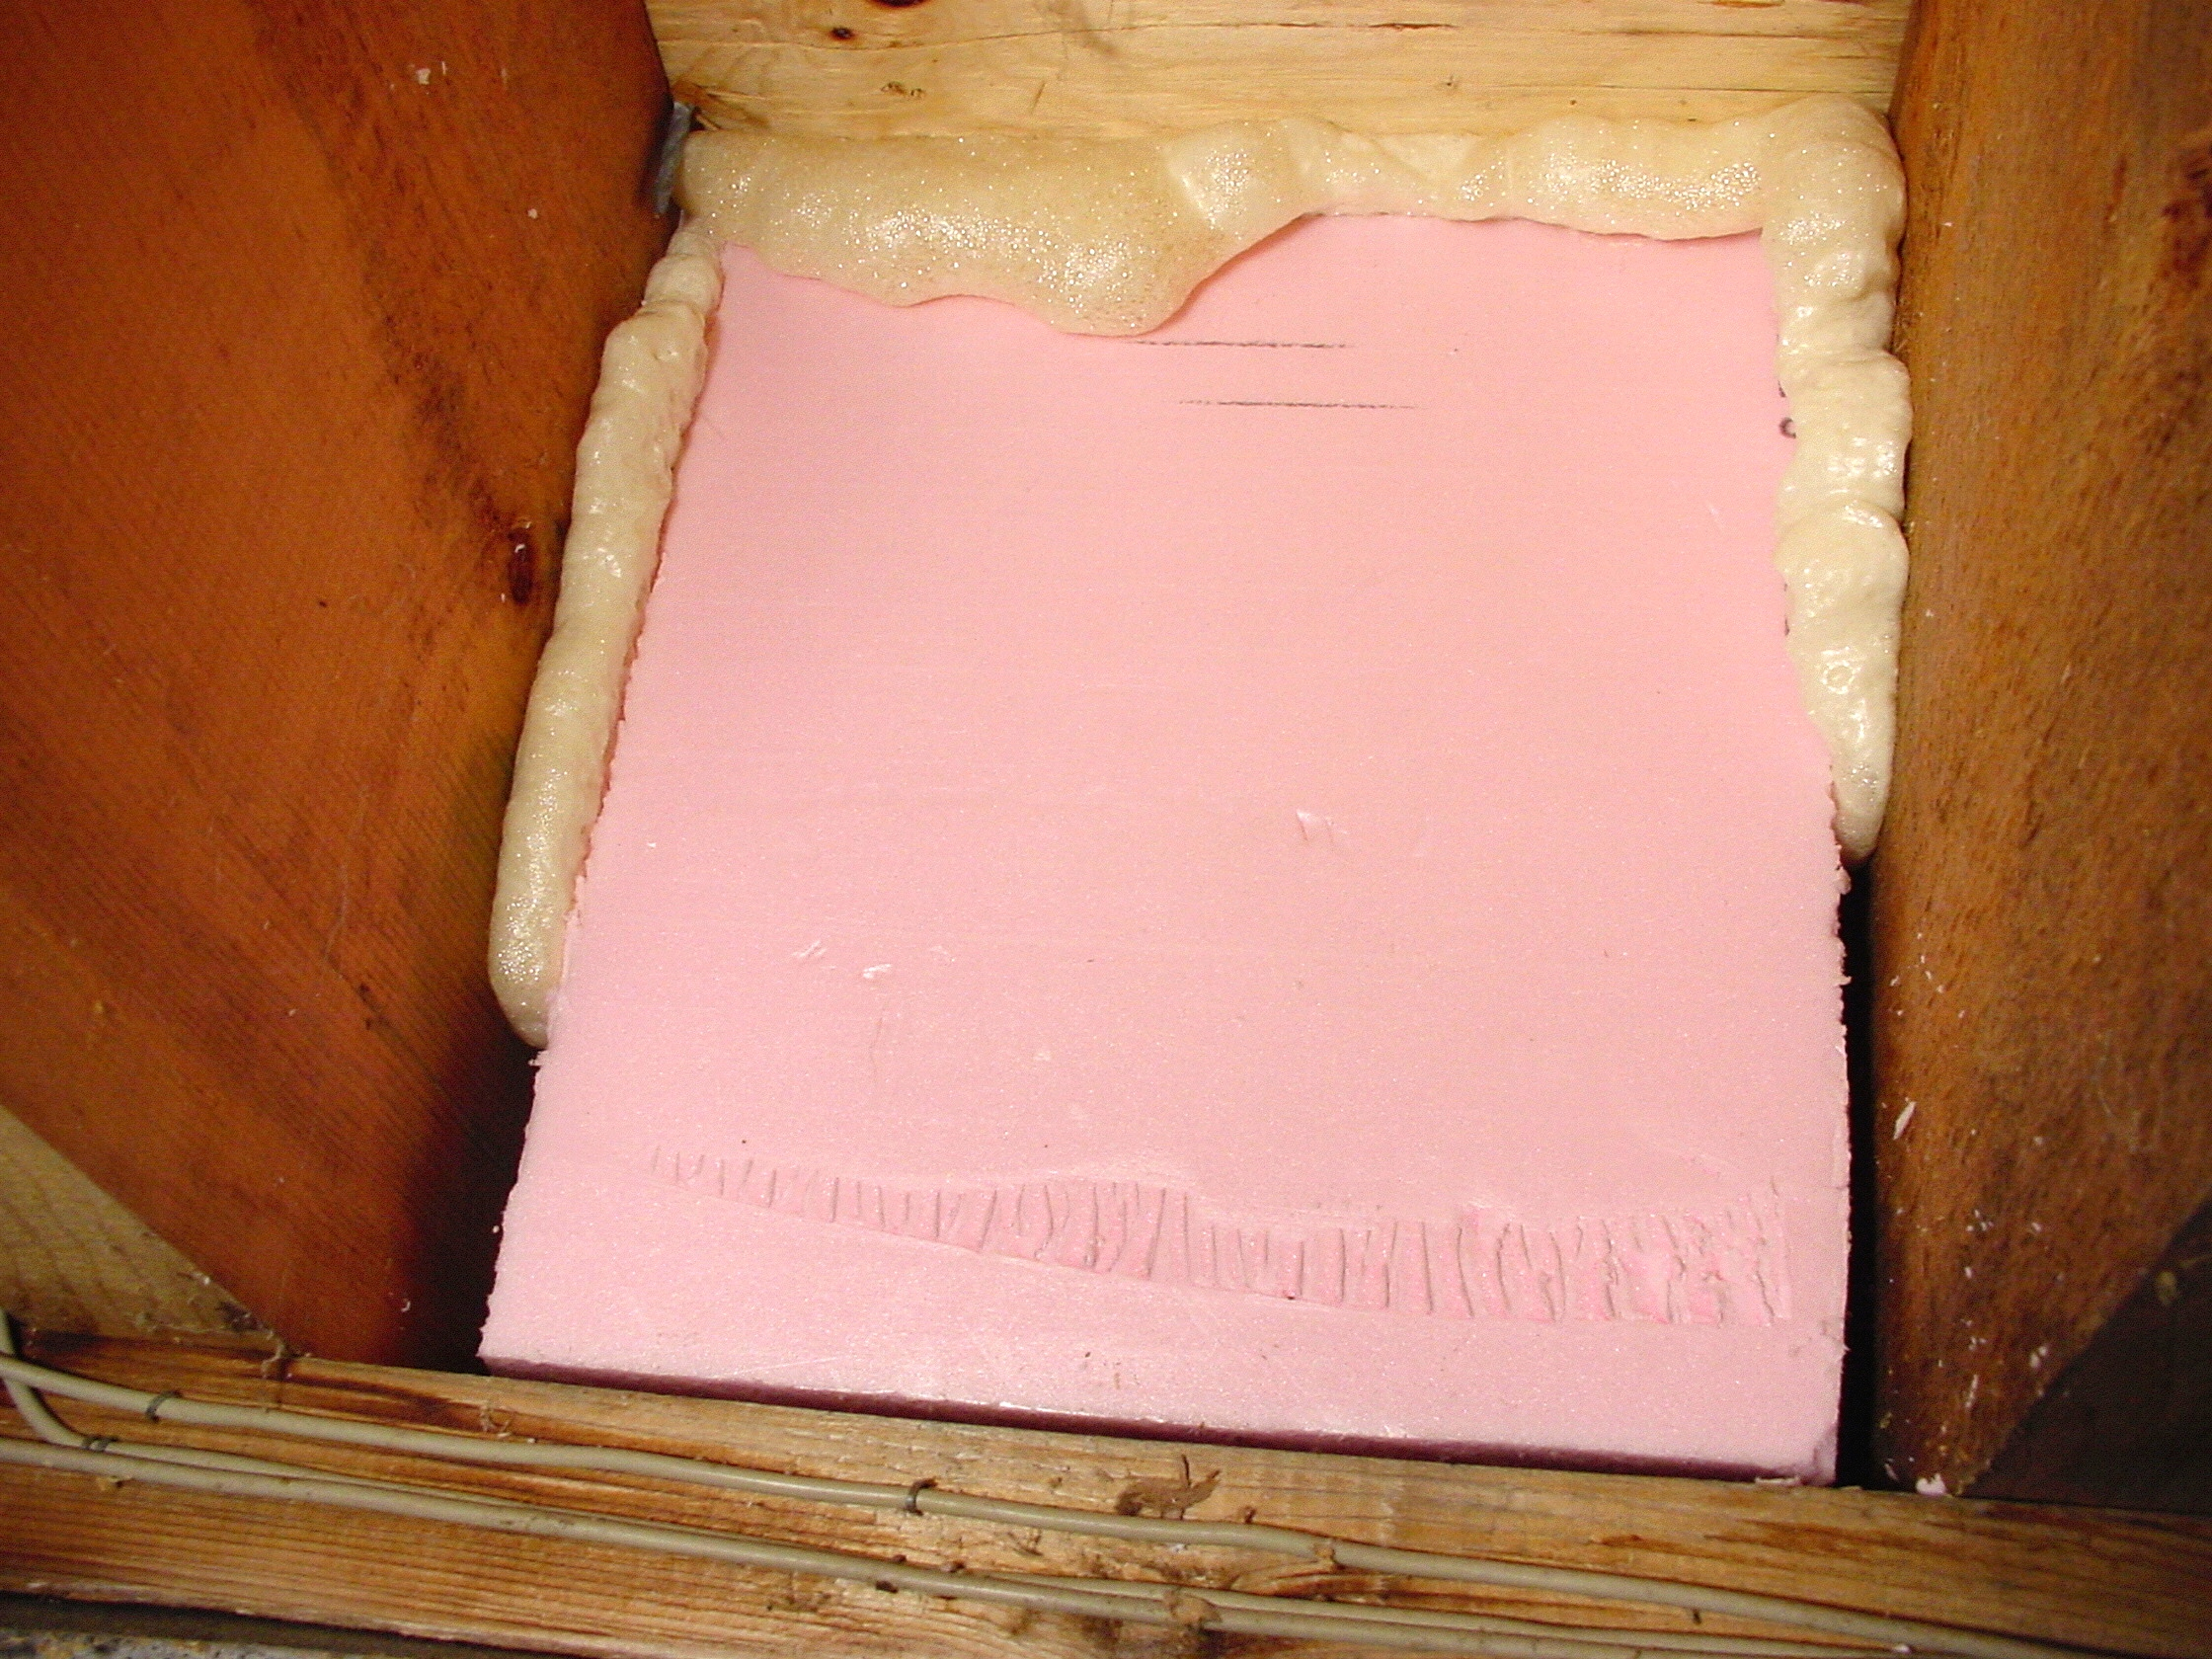
Poor Man’s Foam
You can save money on effective rim joist insulation by spending more time cutting and fitting 2”-thick piece of rigid foam insulation to fit between the joists. Use a handsaw to custom-cut each piece of foam so there’s a 1/2” to 3/4” gap all around when the foam is sitting between the joists. Cut and number each piece, then go back and use a hot melt glue gun to secure the foam to the rim joist so there’s a consistent gap around the perimeter. Finish up by injecting spray foam from a can into the gap, sealing the foam and wood. An air seal around the rigid foam is key, so don’t get lazy and side-step the spray foam injection.