Up next in 10


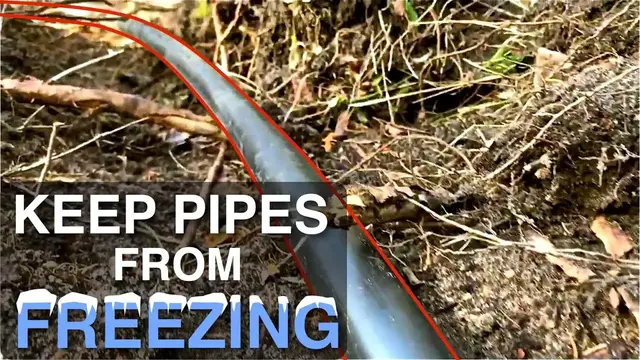
Here's the best system I know of for preventing frozen water pipes in winter.
FREE WEEKLY NEWSLETTER: https://bit.ly/2T3USuy
WATCH MORE BAILEY LINE ROAD:
Winter Tips - https://bit.ly/2rpnUcm
Product Tours - https://bit.ly/2L2H54Q
Woodworking - https://bit.ly/2RN83jC
Real Rural Life - https://bit.ly/2RI5dvY
CHECK OUT MY WEBSITE: https://baileylineroad.com/
My Cabin Building Course: https://baileylineroad.com/cozy-cabin/
How-To & DIY eBooks: https://baileylineroad.com/shop/
SOCIAL MEDIA:
https://www.instagram.com/baileylineroad/
http://bit.ly/BLRfacebook
https://twitter.com/baileylineroad
https://www.pinterest.ca/Canadashandyman/pins/
Show More Show Less View Video Transcript
0:00
In this video, I'm going to bring you along on a challenging plumbing installation job
0:05
We're installing a water intake line in a setting that has pretty much no soil
0:10
There's a little bit of soil, but most of it's bedrock. We're going from an existing well to a new building, and we're using a kind of electric heating cable called RetroLine
0:21
This is meant to go inside of existing water pipes. In this particular installation, we're putting in some new pipes too
0:27
So you'll get a better look at how retroline works and how the pipe is going to be insulated
0:32
and how that insulation is protected and things. But for now, just take a look at this overview of how the retroline system works
0:42
Keep it in mind as you see us installing the different parts of the system
0:47
And maybe something like this makes sense for you, where you are. One thing to understand is that all of this hardware is drinking water safe
0:55
so it's certified for potable water use. The system we're installing, as I mentioned
1:00
is called Retro Line by a Canadian company called Heat Line. This is the inch and a quarter black poly pipe
1:07
that runs from the well to the building, and it's going to have a heating cable inside
1:12
but there's also going to be some pipe insulation on the outside
1:17
and that's what this stuff is here. It's a foam sleeve with some adhesive on the joining
1:25
parts here so that the strips get pulled back during installation and then the adhesive is forced
1:32
together and it kind of seals together into a circle. So here I am putting on the pipe insulation
1:39
There's nothing complicated about it. You just want to make sure that the pipe is fairly clean
1:42
and then you open up the seam on the foam and surround the pipe before pulling off all of the
1:51
yellow tape that covers up the adhesive. Here I am pulling off those yellow strips and I'm going to be bringing the adhesive surfaces together to unite the foam and
2:03
then I'll be pushing the foam all the way into that white PVC pipe you see to the left
2:09
Eventually that outer white pipe will continue all the way to the well and casing the foam and pipe as we go But it got to go on one length at a time
2:19
because we can't slide the PVC over all of the foam. So we do a couple of lengths of foam and then a length of PVC
2:28
and then more foam eventually until we get to the well. But right now, I'm slipping that foam into a chunk of PVC
2:37
that's going underneath the air. edge of the foundation. This is actually a great spot to show how shallow the soil is here. That footing
2:46
is right on top of bedrock and there just happened to be a crack in the rock that we're using
2:52
to actually get inside the building. Here you can see the pipe and the insulation. Now we're on the
2:58
inside of the footing on the inside of the building. So here we are sliding on a full length of 4 inch PVC
3:14
It's going to be going over the insulation and the pipe. And the trick with something like this is to get the joints secure and waterproof
3:22
There'll be some PVC cement on the end. My friend Brad, this is his place
3:27
He's using a sledgehammer and a little block of wood to tap the end of the pipe so that we get a nice complete connection
3:34
or everything's strong and waterproof. So it's more of the same. So it's more of the same as far as insulation goes
3:41
We're putting on another section here, doing up the joints, sliding another piece of PVC over, just until we get to the well
3:49
Everything will be insulated, encased, and protected. I should mention that the retro-line system comes with some heavy black tape
3:55
for sealing the joints from one piece of foam to the other, and anywhere along the foam where that self-adhesive joint is opening up
4:08
Now it's the fun part
4:20
We installing the electric heating cable inside the water intake line So this puts it in a really good position to keep the water from freezing This is the same pipe that you saw outside with the insulation and the encasing white pipe on the outer side
4:37
And this cable goes all the way through to the well. And it actually is going to come out of the pipe and then go down the well for some distance
4:47
This cable is unique too in that it provides more or less heat along its length depending on the surrounding temperature
4:53
So if there's a cold spot, the cable's going to put out more heat in that area
4:57
And if there's a warm spot, it'll put out less. Now, it's not able to completely shut itself off
5:03
So there's also thermostatic control here, which I'm going to be showing you about soon
5:09
This is the end of the water line. We're not connected to the well yet, but you can see the end of the heating cable coming through
5:16
There's probably enough to go down the well three or four feet. This particular well, I don't think it's going to freeze very far down, even though the front
5:23
cross line is about four feet below the surface. This well is full of water and the well
5:29
actually flows so it's probably not going to need three or four feet of protection
5:33
Now it's time to start rounding the bend from horizontal pipe down into the well and
5:41
as you can see here we're using two 45 degree galvanized steel elbows with a
5:48
nipple in between. That makes the bend easier and it makes it possible
5:53
for the cable to round that bend. Anything tighter, a 90-degree elbow would be too tight
6:00
So we're doing the operation with 245s, and now we're tightening that elbow onto the end of the
6:08
water line that we've been working on with insulation so far. In the background, you can see the
6:14
actual well we're connecting to, and it's a flowing well. Back in the 1980s, that 4-inch diameter
6:20
hole was drilled into the rock for geological. survey to take out core samples it actually turned into a be a fantastic well and
6:29
there's already a cap that seals into the well properly we're going to be
6:33
tightening this elbow into a pipe that goes through the cap now it's time to put
6:38
the retro line in the vertical pipe that goes down into the well as I said three or four feet down We won have any trouble with that And then we going to make the connection There
6:50
already a threaded fitting on the vertical pipe. So we just need to goop that up and to thread
6:58
the vertical pipe onto the elbow. And then we're pretty much done with the well end of the
7:03
installation. Looks like success. Looks like success. If you remember, Earlier we threaded in the heating cable into the pipe and now I'm installing a T that allows that heating cable to exit the pipe without any water leaking out
7:21
So this T came as part of the kit. It was already on the cable and it's just near the end that you plug in
7:30
The fittings go together like this. That's the heating cable there and the water flows through the fitting
7:35
You do need to tighten these up with a wrench. I mean, they're all plastic, so you need to be careful about it, but slip-lock pliers like these do a good job tightening
7:45
So this is the thermostatic control that heats things, or keeps things going properly
7:52
This plugs into a wall outlet, and then this cable here plugs in here
8:00
And this can be set to come on and off at different temperatures. And over here is the temperature sensing
8:08
probe that will go down into the casing to measure the temperature inside the pipe
8:16
The temperature probe here needs to be located in what you expect to be the coldest part of the system
8:22
So I'm threading it down into the outer PVC, past the footing, and into the cold zone outside the building
8:28
This will provide information to the thermostat so it can do its thing, shutting the power off, turning it back on
8:35
according to your settings of the thermostat itself. So it's been more than a week since we started the project, and everything's in place now
8:44
We've had some really cold weather, some snow. All that remains now is to rebary the line, but even without being buried, the water's been flowing perfectly
8:53
and Brad can expect running water year-round without any freezing hassles
#Home Improvement
#Plumbing
#HVAC & Climate Control