Up next in 10

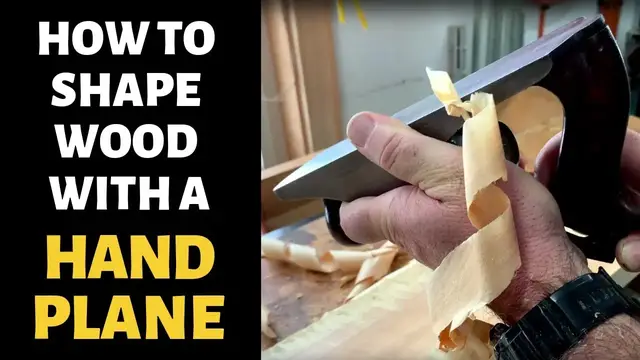
HAND PLANING ROUGH LUMBER: See How It's Done With An Old Bailey Plane - Bailey Line Life #11
Feb 22, 2024

Learn how to plane rough lumber by hand
FREE WEEKLY NEWSLETTER: https://bit.ly/2T3USuy
PREVIOUS EPISODES: https://bit.ly/2EVDuFg
WATCH MORE BAILEY LINE ROAD:
Winter Tips - https://bit.ly/2rpnUcm
Product Tours - https://bit.ly/2L2H54Q
Woodworking - https://bit.ly/2RN83jC
Real Rural Life - https://bit.ly/2RI5dvY
CHECK OUT MY WEBSITE: https://baileylineroad.com/
My Cabin Building Course: https://baileylineroad.com/cozy-cabin/
How-To & DIY eBooks: https://baileylineroad.com/shop/
SOCIAL MEDIA:
https://www.instagram.com/baileylineroad/
http://bit.ly/BLRfacebook
Show More Show Less View Video Transcript
0:00
In this video, I want to show you how you can plane rough lumber by hand using a hand plane
0:09
This is a technique that I started to use back when I was a teenager. That's about 40 years ago now, and I got very interested in woodworking because of a great industrial arts program at high school
0:22
But there was no way I could afford a thickness planer. I didn't have the money
0:27
I didn't have the money for very many tools. at all, but I didn't have the space either. I didn't have a place where I could make lots of noise
0:35
and lots of shavings. I was just working in my parents' basement at the time. So I started
0:40
using a simple handplane to let me use rough lumber to build furniture that I made for sale
0:48
for people while I was going to high school and university. At the time, I didn't know of anyone else
0:53
planing rough lumber by hand with a hand plane. It was a lot harder to figure out what other people
0:59
we're doing back then without the internet. But I did lots of planing like this. Now right now
1:04
I have a nice shop with a thickness planer, and that's what I use most of the time. But if you're
1:10
just starting out and you don't have the money or the space to do anything fancy, or maybe you do
1:16
have money in space and you just want the experience of quiet, simple woodworking that does
1:23
give you a little bit of exercise too, then you'll want to watch this because this is kind of neat
1:29
you'll enjoy. This is the board that I'm going to be planing for you. It's a piece of
1:34
bass wood. Technically, passwood is a hardwood because it has leaves. The tree has leaves and not
1:40
needles. But as hardwoods go, basswood is fairly soft. I would recommend you start with something
1:46
soft. Pines perfect. As long as it's rough, then this technique applies. Now, the first thing you
1:52
need to do is to assess the shape of the board. I mean, this looks pretty good. It's a pretty decent
1:58
board but the job of planing is not just about making something smooth it's also about making it
2:07
true and true by true i mean flat and free of twists so just a nice flat surface that's what we're aiming
2:15
for i've never seen a piece of rough lumber that didn't have some deviation from flatness
2:21
the lumber lumber is usually pretty true when it comes off the sawmill but when it dries it
2:28
does some funny things and so I want to point these out now because this is the time to
2:34
identify where your board deviates from true and so that you can work towards making it true
2:40
as you make the wood smooth as well so this board is is pretty typical in that it's it's
2:46
cupped a little bit this way and you can see with this level that I'm using as a straight
2:54
edge we've got a we've got a crown running down the middle and also the
2:58
there's something of a twist to it. You can see this corner here is a bit low. It's not a
3:03
perfectly flat plane. This is very common to find boards like this. And I'll be keeping that in
3:10
mind as I do planing because we want to end up with a flat surface as well as being smooth
3:17
So I just going to start some initial planing in the areas that I know are high So I going to concentrate on the middle and I going to concentrate on on this side here and this quarter here And that be steering me towards the flat surface that I want
3:36
There's going to, I'm going to show you how you can use things like this to highlight
3:41
imperfections as you go along because you're always going to have to be making a decision
3:46
Okay, where should I plane more or less in order to get the results I want
3:51
But right now, just to start making some shavings. So besides not having a thickness planer in the olden days, my olden days
4:02
I didn't have a workbench like this either. I built this when I was in my 20s. So I just used a workmate
4:10
I used a workmate to hold the wood I was planing, and you can too
4:13
So this is really a technique where you don't need a lot of fancy equipment
4:18
You do need a plane that works very well. So this is a Bailey-type plane made by Stanley
4:27
As far as I can tell, I think this was new in the 1920s. I know they made planes like this back in the 1800s too
4:34
I don't think it's quite that old. I haven't positively identified it yet, but the blade has to be razor-sharp
4:40
and there needs to be a few other details tuned in order to get a plane to work properly
4:46
And I'll make another video about that later. But for now, it's just a matter of starting to make some shaving
4:52
So I mean, okay, now that's not, that's not cutting enough. So I'm going to, I'm going to make the blade stick out a little bit more
5:02
And we'll see what happens. It's a little bit better, but still, we're not
5:08
I'm not cooking with gas yet. This is better. And if you remember, the board's crowned in the middle, and it's high here and here
5:24
So I'm going to be focusing on that. A bit more. When I get past this rough area and I start encountering just smooth wood
5:37
there'll be really nice, thin curls of wood coming off. Now, I'm certainly not finished yet, but I've got enough of a flat surface that I can use what are called winding sticks
6:18
I mean it can be any piece of wood. I just happen to be using these two levels here
6:23
But the purpose of the one leaf sticks is to highlight any twist in the board
6:31
If I look down here from the end, I can see that the surface of the board is twisted because the twist is magnified because of the length of the level
6:44
So it as I thought before This corner is low and that high So I going to start focusing on that as I continue playing it Before I plane any more I also want to check the length of the board to make sure that it not cupped this way So this four foot level is a handy straight edge And you know it pretty flat
7:08
It's a little bit low here. So I'm going to watch out for that. If anything, it might be a little high here. So I'm going to keep that in mind. I'm also going to use the pencil
7:21
to just draw areas that I know if I those pencil marks are going to disappear pretty quickly
7:32
but just a reminder where I need to actually take some wood off
7:37
So more of the same. At this stage, I want to explain a few things
7:49
boards usually plane better in one direction than the other. And you can sometimes tell what that nice direction will be
8:00
if you can see some wood drain and if it kind of trails off like this
8:08
then planing in this direction will yield smoother results than planing the other way, which is kind of going against the grain
8:17
But you know, many times you can't really tell. and sometimes the grain will change direction, different places on the board
8:24
So the best way to go about it is just to start planing and see which direction gives you smoother results
8:31
So I've guessed right for this board as far as planing direction goes
8:37
But look at here. Can you see there's some ridges here? That's because one corner of my plane blade is dragging
8:46
so one corner is sticking out a little bit more than the other
8:53
Now actually too, what I normally like to do is to sharpen this plane blade
8:59
so it's a little more curved than it is. So the corners are actually out of the way
9:05
So we get a bit of a very slightly scalloped shape when we're planing
9:10
This blade isn't like that. So let me see if I can figure out which side of the plane is dragging
9:16
It's this side here. So I'm going to adjust that. The lever here allows you to change the angle of the blade
9:31
That might solve the problem. Let's see. It's not much of a problem because you can get rid of those ridges by sanding if you want
9:39
Now my other side's dragging. So it's a little bit too much
9:46
Let's see how that works. That's better
10:14
One other things to notice here is. When you planing you have to go down a sufficient depth to get rid of the remainder of the saw marks So this board was caught in a circular sawmill You can see the slightly curved lines but you can see the shadow marks here
10:36
It's smooth, but there's still some staining left over from the plane marks
10:42
So you want to make sure you get rid of that completely
10:46
I'll do a little more planing on this side and then we'll try the winding sticks again
10:55
So I think I finish planing this board right now. Total planing time is less than 10 minutes
11:03
It doesn't actually take as long as you'd think when the plane's working properly. I think I'm ready to go as a final check
11:11
I'm just going to put on my levels again and yeah. That is spot on flat. There's no more twist. There's no more crown. And I'm pretty sure it's straight. This is true too
11:28
There's a little bit of a low spot here. Well, actually, it's a little bit of a high spot here. So we'll concentrate on that for the final step, which is what I want to show you now. You see, there are some edges here, some ridges
11:45
I wasn't concerned about that as I was shaping and smoothening the wood in general
11:51
but now I want to finish up. So I'm going to pull the blade back a little bit
11:56
So I'm just going to be taking off thin cuts. I wish you could feel this because the thing to understand about a plain surface
12:03
is that it's always smoother than the smoothest you can get with sandpaper
12:08
because it smoothens the wood in a different process. It's a slicing action, not an abrasion
12:15
So a very, very smooth result. And let me just, I'm just taking a really light cut here
12:25
I'm also angling the blade a bit. So you notice I'm not pushing it straight forward
12:30
I'm holding it in an angle. I'm pushing it because that gives the blade more of a slicing action on the wood
12:45
So that's what the finish board looks like
12:56
This board here was kind of the companion to this. I'd cut it off before
13:04
So that's the kind of thing we started with. And in about 10 minutes, got this nice flat board, no noise
13:14
sawdust in the air and not a lot of expense. In a future video I'll show you how I
13:20
sharpen a plane so that it can do stuff like that and I'll also give you a tour of
13:25
this Severitus plane. These are made new, made in Canada, extremely well done. I'm
13:33
constantly amazed how good they are and I'll give you a detailed tour of this. We'll see how it
13:36
works and you can check things out for yourself. So subscribe, like, hit the
13:41
the notifications bell for my channel and be sure to check out my website in the
13:45
description box is a great newsletter comes out every Saturday morning I'm sure
13:48
you'll love it
#Arts & Entertainment
#Online Media
#Crafts