Up next in 10

How to Change a Car Tire Properly (Torque Wrench and Oil Spraying Behind Wheel)
Jan 25, 2024

Learn how to change a car tire fast and well using the correct tools, including a torque wrench for precise tightening.
SUBSCRIBE: http://bit.ly/BLRchannel
WATCH MY POPULAR VIDEO: How to Cut Perfect Miter Joints
https://youtu.be/0wnjJ-Xi5FU
WATCH MORE BAILEY LINE ROAD:
Winter Tips - https://bit.ly/2rpnUcm
Product Tours - https://bit.ly/2L2H54Q
Woodworking - https://bit.ly/2RN83jC
Real Rural Life - https://bit.ly/2RI5dvY
CHECK OUT MY WEBSITE: https://baileylineroad.com/
My Cabin Building Course: https://baileylineroad.com/cozy-cabin/
How-To & DIY eBooks: https://baileylineroad.com/shop/
SOCIAL MEDIA:
http://bit.ly/STEVEMyoutube
Show More Show Less View Video Transcript
0:00
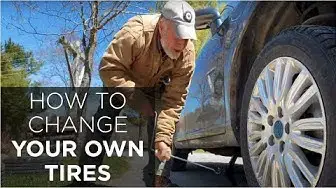
In this video I want to explain how to do your seasonal tire changes. So that's
0:05
from winter tires to summer tires, which is what I'm going to show you here now
0:08
Also from summer to winter again, same procedure. I really like to do this in my
0:15
driveway and I recommend you do as well. It's faster than going to the garage and
0:21
waiting around and having them doing it and it also builds your capabilities and
0:26
your self-reliance and it'll give you a chance to just take a quick look at your
0:30
brakes and look under the vehicle and maybe spot things that need some repairs
0:34
So let's get started. I want to talk about some of the tools I have here. Some
0:38
you'll need, some are optional. It makes the job easier. I guess the first thing
0:44
to look at is a jack. This is just the regular car jack. I have other jacks I
0:49
could use them too but I recommend that you use your your car's own jack so that
0:55
you get practice using it. So that you know that it works properly and you
0:59
know how to use it under the vehicle so that if you ever have to change a tire out on the road you're not lost. You're not bumbling around fooling around with
1:07
this for the first time. So that's the car jack and it comes with a handle too
1:11
I'll show you this in a minute as we use it. Another tool that comes with the car
1:16
is something to remove the wheel nuts. You can use this if you like but it's
1:21
fairly short which means that you have to pull in it harder to loosen off the
1:25
nuts. So what I like to use is a long bar like this. This car takes requires a 21
1:34
millimeter socket to fit the nuts so that's what I've got on here. You won't
1:38
have this out on the road if you have to change a tire. You'll have that shorter
1:42
wrench which can work but this is just a little more comfortable. Now you're also
1:47
going to need a torque wrench. A torque wrench is something that allows you to
1:54
precisely tighten nuts and bolts to a certain predetermined level. When I was
2:01
growing up everybody changed from summer to winter tires and back again and that's
2:07
because summer tires were so bad back then. There was a time beginning in the
2:13
1980s when all-season radials kicked in and I didn't know anybody who changed
2:21
their tires seasonally for about a 20-year period of time. Everyone kind of
2:26
relied on these all-season radials even here in Canada with lots of snow. That's
2:31
changed slowly and it's gathering steam. I think it's a good idea for most
2:35
vehicles because even the all-season radials aren't nearly as good as snow
2:39
tires. Another change that's happened in the time that I've been driving and
2:44
working on cars is the use of torque wrenches to precisely tighten the wheel
2:48
nuts. That started about 20 years ago or so maybe around 2000 a little bit
2:55
earlier. There was a spate of truck tires that came off and injured people on the
3:01
road and so authorities got a little more stringent about mechanics using
3:06
torque wrenches to properly tighten the wheel nuts. So it's a great idea for
3:10
anyone. They're not that expensive and they just make sure you're doing a
3:13
really good job. This is my socket set here. This is where I got that 21
3:18
millimeter socket from. This is just a great set to have around for all kinds
3:23
of applications. And one other thing before we get busy is this stuff here
3:29
I'm a big fan of oil spraying vehicles annually. I live in the Rust Belt. My old
3:36
vehicle is a 31 year old Ford pickup truck. Those things were not known for
3:41
their rust resistance but mine has no rust on it because of annual oil spray
3:45
Which I do with a big sprayer and that's a topic for a whole other video. But when
3:50
I have the wheel off I like to use one of these spray cans to get into areas
3:55
that would be difficult to get into when I'm doing the big job which I usually do
3:59
in the fall. So I'll show you how I use this. Strictly speaking this is not an
4:04
essential part of changing your tires and maybe where you live and there's
4:07
some nice warm place where it doesn't really matter. You don't need to think about this but I'll mention it in passing. So step one the jack. This is
4:16
what you call a scissor jack. This handle will go in here when I put it under the
4:22
vehicle and allow me to turn the jack and raise it. Now your owner's manual
4:29
will show you where the manufacturer's jack needs to go. But typically and I'll
4:35
show you this close up in a minute. But typically there's a spot on the side of
4:39
the body. In this case we're working on the front wheel. It would be a little bit
4:43
behind the front wheel and there's a slot here. The slot engages a kind of a
4:49
tab that you'll see in a second and that stops the jack from from moving
4:54
around and allows you to to raise the car. So let's head on underneath and I'll
4:58
show you where this jack goes on this vehicle. So lying on the ground is a big
5:02
part of this operation and I'm here ready to position the jack. If you look
5:08
here you can see this kind of a tab I was talking about. This this little thing
5:13
here that's designed to go into the slot of the jack. You don't want to use the
5:21
jack in other places because it's not necessarily strong enough. So I'm turning
5:30
it by hand just to get it up to the height I need. Look at that! Jacks are
5:34
amazing. I'm just turning it with my fingers and I'm already starting to lift
5:38
up the vehicle. So let me get the handle and we'll raise it up a little bit more
5:45
but not quite as far as you might think. At least not for this initial part of
5:52
the job. So I'm taking some of the weight off the wheel because my next step after
5:57
this is to start loosening the wheel nuts and I don't want to have the full
6:02
weight of the vehicle on those studs where the nuts are. But by the same token
6:08
I don't want the wheel completely in the air either because having the wheel on
6:12
the ground stops it from rotating when I'm undoing the nuts. Now I should
6:19
mention too that you'll want to set the parking brake before you do this
6:23
operation and you want to work on a flat surface. At this stage I've taken
6:28
enough weight off that wheel that I'm going to grab that wrench and loosen the
6:34
nuts. So my job right now is just to loosen them a bit. I'm not going to take
6:40
them right off yet. There we go. Now I'm going to jack the vehicle up further to get that
7:02
wheel right off the ground. I'm going to do something else before I actually take that wheel off and that's blocking up the vehicle as a
7:17
kind of a second layer of safety in case it comes off the jack. So I've got a 6x6
7:24
here. I've placed it under that spot there. That's part of the frame
7:29
and these things are just going to sit here. They're not actually even going to
7:34
touch the vehicle necessarily but if this thing were ever to roll off the
7:40
jack it's going to hold these blocks are going to hold it up so it's not the end
7:44
of the world. I've never had a vehicle roll off the jack in 40 years of
7:50
doing this but it's a good safety precaution because once that wheel is
7:54
off if it were to fall down it'd be very hard to get the vehicle back up again
7:58
You'd never get the jack underneath of it. It'd be too close to the ground so that's just a little safety precaution. Just takes a second and there's no
8:06
reason not to do it. The vehicle and the wheel are now high enough that they're
8:12
off the ground and I can finish taking off these nuts. They're loose now so I'm
8:18
just taking them off all the way. I should mention too I've got this piece
8:23
of wood here, piece of plywood, wafer board. It's a good idea to have that
8:28
because it just helps you to not lose your tools and the parts. This video is
8:37
not about brake inspections. That's a topic for another video but since you
8:42
got the brakes staring you in the face you might as well do a superficial examination. There's not much to that really. This is a disc
8:50
brake. This disc rotates and when you put on the brakes this caliper here
8:58
squeezes some brake pads in on the rotor and that's what slows you down
9:03
Now I can tell this rotor is in good shape. These brakes aren't very old
9:09
I changed them six or seven thousand miles ago so lots of life left on them
9:13
I'd be surprised if there was any issue because I changed the rotors, the pads
9:17
and the caliper so there should be many many more miles of life but it's still
9:23
good to look at it and you can see there's nice even wear here. There's no chunky look to it. There's no pitting. These brakes are working just fine
9:34
As I said before it's difficult for me to rust proof this area when I'm doing the
9:40
main job in the fall. You want to keep that oil spray that I use away from the
9:47
brakes of course and that's hard to do with the big gun when you're doing it
9:51
the main job and that's why I like to use a spray can now and then. So I'm just
9:55
going to go over. I'm just going to give a little shot to everything that looks
10:01
like it could rust. Now's the time to do it. You don't necessarily have to do this
10:07
This is part of my rust proofing regime. It certainly served me well over the years
10:25
I should mention just emphasize again you don't want to get any of that spray
10:32
on the brake parts. This has to has to be dry in order to work properly and if you
10:39
get a lot of oil on there you could ruin your brake pads so you don't want to do
10:43
that but just a little shot here and there. This kind of oil spray I call it
10:47
an oil spray. It's not really an oil but it does creep which means you spray it
10:51
on one place over a period of months it's slowly going to work its way to dry
10:55
areas in nooks and crannies so this is why it works so well. Even in rust city
11:01
which is where I live structural body rust will be a non-issue if you if you
11:08
do the rust spray every year but topic for another video. Right now I want to
11:13
turn your attention to that wheel that I just took off which is here. There's a
11:21
couple of things I mentioned before about the need to make sure it's clean
11:26
inside here. This isn't too bad. I've changed tires sometimes and had you know
11:32
huge buildups of mud and not even either so it makes the tire unbalanced enough
11:38
that I have to wash it off but I'll just rub this off here and that'll that'll be
11:42
plenty clean. Now what I like to do at this stage is to get a white marker and
11:52
on the inside sidewall of the tire I'm gonna write where this tire needs to go
11:58
next time. So if you remember this is a unidirectional tire so I can't put it on
12:02
the diagonally opposite corner because then the tire would be rolling the wrong
12:07
way the way it was not designed to do to roll. So I'm just gonna put it
12:13
directly behind. So I'm gonna mark I'm gonna mark this with this white marker
12:19
I'm gonna write P for passenger and I'm gonna write rear. So I know in the fall
12:31
that this tire needs to go back there. There's no no question about that. I am
12:37
almost ready to put on the summer tire which is slated to go in this spot but
12:43
before I do I want to talk about these things. In the in the world of mechanics
12:49
these threaded bolt like things are called studs and it's part of the hub on
12:54
this particular vehicle. A lot of vehicles are like this and this is the
12:58
nut that goes on. So do you see how it's a little bit greasy looking? That's
13:05
because of a product I put on called anti-seize. Different companies make it
13:11
it's kind of like a grease but it's different than grease in that it's
13:16
designed to stop these threads from locking up from corrosion. Now I have
13:24
been using anti-seize on wheel studs for 40 years and I've never had a
13:29
problem and I've certainly seen the benefit. The benefit is that the nuts
13:35
come off more smoothly they tighten up more smoothly and there's never any
13:40
issue. I have seen vehicles where this has never been applied and the nuts come
13:45
off they make a big loud sound they're kind of stiff to get off because rust
13:51
is setting in. In the world of mechanics it's kind of 50-50 about whether you
13:57
should use anti-seize on wheel studs or not. I know some mechanics who swear by
14:02
it they use it all the time. Other mechanics say oh no no never put anti-seize
14:06
on studs it's dangerous it's gonna make the wheel nuts come off and all the rest of it. Well if that's true how come it hasn't happened in 40 years and many
14:14
many vehicles I've worked on. So I'm sold and I really don't think you have any
14:19
concerns whatsoever of wheel nuts coming off accidentally if you use a
14:24
torque wrench in the proper way which is what I'll show you in a minute or two
14:27
But for now we're all set to put the summer tire on and to to install these
14:33
wheel nuts. I don't need to put any more anti-seize on because there's enough
14:37
residual here. In practice I might put it on every two or three years and just a
14:42
little bit just enough to coat the surface and to do the job. So I'm ready
14:48
to put the wheel on. I've cleaned the inside of the rim. I've also cleaned this
14:53
surface here because this is the part that's gonna bolt tightly against the
14:57
hub and I don't want any grit or anything in here because that can cause
15:01
the wheel to work loose. So I've wiped this clean. I've also wiped clean the
15:07
area of the hub where the wheel is gonna rest. I want that to be nice and clean too
15:13
This wheel came from the driver's side rear and because it's a
15:20
bi-directional tire I can move it from one side of the vehicle to the other for
15:24
that whole rotation business. I've got a rubbing pad here I'm just gonna rub out
15:29
the marker notation that I did the last time so that I got a fresh slate come
15:35
fall when I'm taking this thing off. Right now I just you have to lift the
15:42
wheel up a little bit to get it on the studs. Okay now it comes time to put on
15:52
the nuts just finger tight. We're coming up to a bit of a critical point here
16:02
where it's possible for you to make a mistake if you don't know what to look
16:07
for. You definitely do not want to tighten up the wheel nuts all the way
16:17
just one at a time. Wheel nuts like this need to be tightened what they call
16:22
sequentially. I'll show you that in a minute but it's tightening them slowly
16:28
around the perimeter before you get down to the the final tightening. So I'm
16:40
going to use the wrench here but I'm not going to use it as a wrench I'm
16:43
basically just using it to help me tighten the wheel nuts by hand. Now
16:51
that's what you call finger tight. If I just reef that down and tightened it
16:57
quite tightly while all the others are loose it can cause the hub to warp it
17:04
can cause the rim to crack. You want to do it slowly and after finger tightening
17:12
So I can go from from one nut to the other around the perimeter for this
17:18
finger tight stage but the next stage of tightening after this I'm going to skip
17:26
every nut as I do an initial tightening as you'll see and that's to just that's
17:32
because I want to slowly tighten the nuts I don't want to I don't want to do
17:36
it all at once for one nut and then move on to the next one. There we go
17:41
We're finger tight. Things are looking good. I'm just going to tighten this a
17:46
bit not a whole lot. I'm talking a quarter of a rotation because there's an uneven
17:55
number of nuts in this vehicle. When I skip one I'm automatically kind of
18:02
getting in sync to properly snug them up just a little bit at a time. So there's
18:07
this one and I'm skipping there's this one I'm skipping that one I'm skipping
18:15
just making them a little bit tighter each time. Now at this stage the wheel
18:24
nuts are tight enough that I can lower the jack a little bit so that the tire
18:28
starts to rub on the ground so I get sufficient friction that the friction is
18:33
what's stopping the wheel from turning as I do the final tightening. Now before
18:37
I do that I need to pull out those blocks that I put underneath the safety
18:41
blocks just so I can get the tire down. I don't want full weight on the tire yet
18:45
until I get these things fully tightened but then again I also don't want it in
18:49
the air because I want the help of friction to aid in holding that tire
18:53
steady. So the wheel is starting to contact the ground now but a good part
19:09
of the weight is still on the jack. That should do it. I think we're on the
19:14
ground sufficiently. Now remember before I told you that we want to have the
19:22
wheel nuts precisely tightened not too little but also not too much and that's
19:30
where the torque wrench comes in. A torque wrench like this lets you know
19:36
when you've tightened to a certain tightness and the certain tightness can
19:43
be adjusted. Foot pounds foot pounds that's a description of torque or
19:51
twisting force and if you go online and you google wheel nut torque for your
20:01
vehicle it will come up with a figure. Check two or three places to make sure
20:06
that you've got it correct but it's pretty simple and this torque wrench can
20:13
be adjusted. You see the more I turn this handle it starts to go up starts to rise
20:20
on the body of the wrench. I mean for instance right there the top of this is
20:28
pretty much level with a 70 foot pounds torque rating. Now as I recall 70 foot
20:37
pounds is the correct torque for this vehicle but before I commit to that I'm
20:42
just going to pop over to my computer and double check. So wheel nut torque
20:46
2009 Lexus ES 350 that's the vehicle we're working on. What does that say? 76
20:52
foot pounds. Let's go down a little further. Is that confirmed? Yeah here's
21:00
another one 76 foot pounds. That sounds about right. Now as I said before it's
21:06
only been about 15 or 20 years that even licensed mechanics are using torque
21:11
wrenches to torque down wheel nuts so I mean it's not the end of the world if
21:16
you got it 80 or you know 65 psi or even 90 or sorry foot pounds 90 foot
21:22
pounds not that big of a deal but torque wrenches are widely available they're
21:26
inexpensive you should get one and look up your your vehicle and adjust things
21:33
appropriately. So I've got my torque wrench adjusted to the proper level 76
21:40
foot pounds and I've got my 21 millimeter socket the nuts are partially
21:47
tight now I'm just bringing them home to final tightness and this is how a torque
21:51
wrench tells you when you've reached the proper torque. Listen okay that's the
21:57
sound it makes when you've reached as tight as it should be. Now after the
22:02
click I could keep on tightening if I want but the click tells me not to go on
22:07
any further so I'm gonna skip one skip one skip one there we go now that should
22:26
be it I'm gonna take the jack right out and I'm gonna check it again but that's
22:36
not the last time I'm gonna check these wheel nuts either. I'm gonna give it
22:44
another check and then we're done we're done this wheel three more to go just
23:00
like that and and this is very important drive your vehicle for about
23:06
50 miles or so and then check the nuts again with the torque wrench. I have
23:13
never had wheel nuts come loose on me over the years but I have seen other
23:18
people and where the wheel nuts come loose you don't want that to happen and
23:22
double-checking after a little bit of driving giving things a chance to loosen
23:27
up if they're going to check it with the torque wrench and you're all ready
23:31
to roll so that's the process in a nutshell helps you to get a little bit
23:36
closer to your vehicle helps you to build up some skills and self-reliance
23:41
saves you some time and I think it's the way to go. So I forgot to mention two
23:47
things I finished all four wheels I've taken the car out for a test drive it
23:50
runs great it's all set to go but the torque wrench it's a precision
23:55
instrument this is a craftsman it's a really nice torque wrench I really like
24:03
it a lot it's certified to actually certified to be accurate you can see the
24:09
certification data calibration testing so it's accurate within a couple of percent of what it's supposed to be but when you store it back off on the
24:22
adjustment so you see I've backed off all the way the this collar here used to
24:27
be up at about 76 or so foot-pounds I've backed it all the way off for storage I
24:34
think it'll hold its calibration longer when you do take the time to do that now
24:39
another thing the seasonal changing of your tires is a great time to check the
24:46
air pressure and it's not unusual for tires that have been in storage for half
24:50
a year to have less air in them than they should even without an official
24:55
leak air leaves tires at about you know a pound one psi every month or two so
25:04
it's an important time now to check that pressure and top it up you probably will
25:09
have to top it up and here's what I like to do look on the sidewall here here we
25:16
are okay max pressure 44 psi so that's as much as this tire supposed to have
25:25
with that much air it can have the maximum load but what I like to do is to
25:31
fill my tires 10% less than the maximum a firm hard tire rolls easier and you
25:38
get better mileage and as long as you're below the maximum you're fine so you can
25:43
do this at a an auto garage that has publicly accessible compressed air I
25:50
live in the middle of nowhere the nearest publicly accessible compressed air around me is probably 25 or 30 miles away so I have this unit here I've got
26:01
other compressors too in the shop but this is a great little unit I've used it for maybe three years or so it's cordless uses the same battery as
26:09
cordless tools and it's a pretty smart little unit let me show you something so
26:16
you boot it up you power it on and it's showing zero zero okay so I hook it up
26:26
hook it up and that figure there is showing me how much air is in the tire
26:33
now 10% less than 44 is 40 so I'm turning this dial to the desired
26:42
pressure and now I hit the start button look at that it's rising
26:55
as the air fills with as the tire fills with air and when it reaches the 40
27:01
pound mark it's gonna automatically shut off so nothing could be easier it's very
27:07
foolproof I really like this because it's portable I mean I don't have to
27:13
drive the car over to my workshop where the compressor is I can do it here it'll
27:20
do big tires it'll pump up a lot of tires on a charge in fact I've never run
27:24
it down and I've pumped up four or five six tires at a time some big tractor
27:29
tires too it still does the job then you just take it off and away you go so
27:36
there you have it everything you need to know to be your own tire changing expert
#Autos & Vehicles
#Vehicle Parts & Services
#Vehicle Repair & Maintenance