Up next in 10


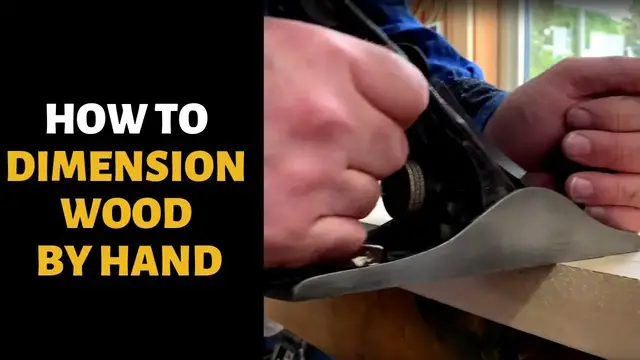
Learn to make rough lumber flat, true, and a consistent thickness using only a hand plane. Missed part 1? Watch it here:
https://youtu.be/jMPt1DkvjaU
FREE WEEKLY NEWSLETTER: https://bit.ly/2T3USuy
PREVIOUS EPISODES: https://bit.ly/2EVDuFg
WATCH MORE BAILEY LINE ROAD:
Winter Tips - https://bit.ly/2rpnUcm
Product Tours - https://bit.ly/2L2H54Q
Woodworking - https://bit.ly/2RN83jC
Real Rural Life - https://bit.ly/2RI5dvY
CHECK OUT MY WEBSITE: https://baileylineroad.com/
My Cabin Building Course: https://baileylineroad.com/cozy-cabin/
How-To & DIY eBooks: https://baileylineroad.com/shop/
SOCIAL MEDIA:
Show More Show Less View Video Transcript
0:00
In this video I want to answer some questions that a previous video have generated
0:05
and that's about getting boards to be the same sickness. So if you remember, I planned this rough board by hand, and I showed you how to make it flat and
0:17
true as well as smooth. This side used to look kind of like this side. I did that one
0:27
that transformation with this hand plane, and I'm going to use that plane. plane again. But if you want to plane both sides of the board, you want to do the same thing we did
0:39
before for measuring and assessing and making the rough face flat. But there's one other thing you
0:48
need to do because you'll want to have that board a consistent thickness all around. So a consistent
0:54
thickness from one end to the other on this board, and probably a consistent thickness with other
1:01
boards that you're going to be planning for the project. So the first thing to understand is that
1:07
rough lumber can be amazingly inconsistent in thickness. If you've ever seen a sawmill at work
1:15
you'll realize that it's a pretty coarse tool, a great big blade, you know, log going through
1:23
the carriage supporting the log can move. Maybe the blade doesn't run all that true
1:29
It is, as I said, a very coarse tool. And part of the coarseness shows up in inconsistent thickness
1:37
What I want to do is I want to plane this board as thick as I can
1:41
while retaining consistent thickness everywhere. So that means I have to find the thinnest part of the board and then work from that
1:50
For my initial measurements, I'm going to use. this six inch ruler here. This is a wonderful little ruler. I've had it for about 30 years
1:59
And look at how crisp those lines are. This is a machinist's tool. It's made in Japan
2:09
They're not fooling around and it's it's just been terrific. I'm just going to be
2:13
measuring the width of the board. So here that's one in 1516s. It's a pretty thick
2:19
Let's see here it's uh just a smidge under one in seven eighths i think this is the narrowest end the thinnest end
2:29
just from the looks of it and uh yeah it just one and three quarters so just flip this bark here I going to ignore I mean I not going to try to get plain this board down to the point where I get rid of the bark
2:45
because I would be planing off a good portion of the board. But if I was actually using this for a project, I'd plane it flat and true
2:52
and then I would cut it to width here, maybe not on its whole length, but just where I needed to
2:59
So let's just take a look here. This side is still thick, one in seven, eighths
3:08
And then over here. Ah, that's our magic number. This board is only one in five-eighths inches thick right at this spot
3:21
So if we want a consistent board thickness, we've got a plane down to the thick
3:29
thinnest part and that's one in five eighths. So my job now is to take this combination
3:37
square, set it to, set it to one in five eighths, and then use it to mark a line all around
3:51
the perimeter of the board. So on all four sides, that would be my guide
3:59
for planing. Actually, I'm going to make it just a smidge less than one in five-eighths
4:07
because it's only one in five-eighths there and I want the whole board to be nice and smooth
4:13
It's not just enough to make the board smooth. It's not just enough to make the board smooth, we need to make it true
4:25
So in addition to following these these lines, these lines, I'm going to be checking to make sure that the surface is not twisted and that it's not crowned
4:36
all the while as I bring it down to make things smooth
4:41
Now, unlike the last time I did this, I'm going to have to be removing a fair amount of wood
4:48
I mean, the reason I'm removing this much wood here is because I have to
4:52
because that's pretty much all I have at this far end. So that's kind of an added dimension to what we're working on
5:00
We're making it smooth. We're making it true. And in some cases, we're going to need to remove a lot of wood
5:06
in order to get the consistent thickness Now the main thing the main thing is that I do not plane off these lines because that the only reference I got So I going to be maintaining this pencil line
5:22
at all costs. So this operation is going to be a little bit more exercise than the last one
5:32
because I have to remove some substantial wood. And once again, because I'm starting with a rough surface
5:41
I need to increase the bite of the plane a little bit. This wheel is what does it here
5:47
I mean, if you use planes, you know all about this, but turning the wheel this way
5:52
pushes the blade out more, and turning it back, pulls it back in a bit
5:59
I think that's about right. Let's see. Yeah, that works pretty well
6:07
So as I work, I'm working to bring the wood down to the line, a little bit above the line, all around the perimeter
6:20
And that's going to leave some high spots in the middle. So I will plane those down to match what I've done on the sides
6:28
But right now, I'm just kind of respecting the pencil marks. and working my way down to the point
6:41
Getting pretty close to the line in this middle area. Yeah, that's about as close as I want to get there
6:51
So I notice you're looking down at the line pretty often every three or four strokes now
6:56
now that you're closer. Yeah, well, as I said before, I don't want to overshoot
7:02
and have a low spot. But I also have some work to do
7:08
For people less experienced too, might over two. I suppose they could just draw a new
7:16
slightly lower line. Yeah, you could do that. You'd be making more work for yourself
7:23
and you'd also be getting a thinner board, but it's not the end of the world, really
7:29
Coming down to the wire here, so... I don't really want to take out too much more
7:36
I'm working to the lines right now. I'm not too concerned about the middle
7:42
but if I get the lines all correct all the way around and then I bring the middle part down to the lines then everything should work fine especially considering that these lines are referenced from this
7:57
first face that I did which I know is true so I can kind of count on the lines not
8:03
just to give me a consistent thickness but also that they're truly flat looking pretty
8:13
pretty true in this area. Yeah, I'm getting down to the point where I'm not going to plan on the
8:20
perimeter anymore. I'm just going to see if I have any crowning to deal with. Do you? A little bit
8:30
there. Just a tiny bit. It's what I would expect, though, because if I'm playing into the line
8:35
and not paying too much attention to the center at this stage, eventually I'm going to have to pay attention
8:40
to the center. And that's kind of the time now. So I'm almost done
8:51
So you're getting rid of those ridges that came from the more aggressive cuts
8:56
Right. I didn't care about them before, but I care about them now
9:01
I want to get rid of the next. Let's take a look. See how I've done
9:09
So, mention 5'8s. was what I was shooting for. Yeah
9:20
There's about maybe a 30 second of an inch of deviation. That's not bad
9:27
It's not bad. I could get it closer, though. If you look here, you see, I can take a little bit more off there
9:34
There's a little bit too much pencil line. Here the pencil line is about split
9:39
That's what I want. here it's just a smidge high yet over here it's pretty close so
9:47
it's quite close I think if I was using this for a piece of furniture I'd go over it again with a very light cut
9:53
just to refine it a little bit more I also have to cut this board to wood
9:58
to remove the bark edge but there you have it a hand-plane board of consistent thickness
10:06
and ready to use in the project Well, thank you for joining me with this video
10:11
I hope you've found it useful. Like, subscribe, hit the notifications bell so you know when I put out new videos
10:18
And check out my website. It's in the description box. I have a newsletter
10:21
I think you'll love it. Lots of people do
#Home Improvement
#Construction & Power Tools