Up next in 10

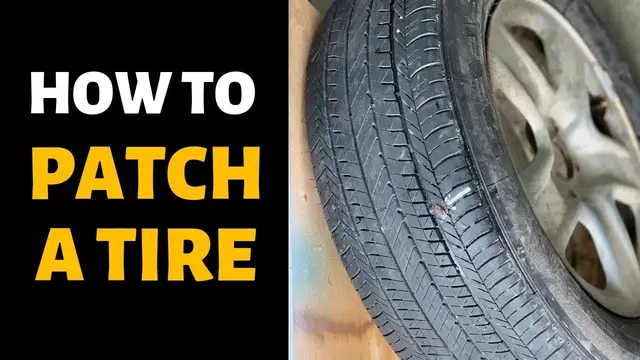
How to Patch a Flat Tire (Fast & Easy)
Jan 25, 2024

In this video I demonstrate how to patch a hole in a flat car tire yourself quickly and easily.
FREE WEEKLY NEWSLETTER: https://bit.ly/2T3USuy
PREVIOUS EPISODES: https://bit.ly/2EVDuFg
WATCH MORE BAILEY LINE ROAD:
Winter Tips - https://bit.ly/2rpnUcm
Product Tours - https://bit.ly/2L2H54Q
Woodworking - https://bit.ly/2RN83jC
Real Rural Life - https://bit.ly/2RI5dvY
CHECK OUT MY WEBSITE: https://baileylineroad.com/
My Cabin Building Course: https://baileylineroad.com/cozy-cabin/
How-To & DIY eBooks: https://baileylineroad.com/shop/
SOCIAL MEDIA:
https://www.instagram.com/baileylineroad/
http://bit.ly/BLRfacebook
Show More Show Less View Video Transcript
0:00
So last weekend Edita and I were out on a little date and my tire went flat and I had a spare
0:07
luckily was able to change it and full size spare full size spare yeah I don't want to have to
0:12
hobble to a service station and you know deal with that but in the interest of keeping entropy
0:18
at bay we got to get the flat tire patched as soon as possible so I can continue having a spare so
0:24
and you've come to dad's garage dad's garage yeah okay so I'm gonna tell you all about this
0:31
and explain how this works if you've done this before I'm probably not going to tell you anything
0:34
you don't know already but maybe this is new to you so the first thing to understand is that all
0:41
motor vehicle tires these days are tubeless so wheelbarrows long tractors stuff like that they
0:48
still have tubes but not things like on cars and trucks a tube is that that rubber donut that holds
0:55
the air inside now this is a tubeless tire like pretty well every other car truck there in the
1:02
world and that means that the connection between the rubber and the rim needs to be airtight because
1:11
there's nothing else in there to hold the air except that connection and this area it's called
1:17
the bead area where the interface between the rubber and the rim happens it's the bead interestingly
1:23
enough last week or so this tire went flat and I was going to do this repair with Robert I thought
1:32
well let's see if we can find the problem we couldn't find a nail or anything in the tread
1:36
area so we tested for a bead leak so that's a leak of air between the rim and the tire what's that
1:44
you've got there this is a 50-50 blend of well it's actually more like 80 80 20 blend of water
1:49
and dishwashing liquid we squirted this all around and we found that there there was a bead leak right
1:55
here actually the water was bubbling the soap makes it bubbly and you know we spread this on
2:02
and and it bubbled now it's not bubbling now it's just kind of being foamy but it's not bubbling up
2:10
we couldn't fix that here a bead leak because you really need to dismount the tire clean the bead
2:16
put some bead sealing compound on button it all up again rebalance the tire so we sent this off
2:22
to my friend Al he's a mechanic he runs a shop did a great job bead leak solved Robert and the family
2:29
is out this past Sunday they come out the tires flat I knew it wasn't the bead leaking Al had
2:35
fixed that properly so there must be some other kind of leak that's always the first step with
2:40
these things you have to find out what the problem is if you want to fix it and that's can be more
2:44
difficult than you might think in this case we could find no nails or staples or anything that's
2:52
damaged the tire there was nothing obvious nothing obvious sometimes it is obvious sometimes it is
2:58
but that's the first step when you have a leaky car tire to go around use your hand look everywhere
3:04
you're looking for a nail or a staple or something that has punctured the tire and very often it's
3:10
worn right off from from travel so it can be hard to see your fingers are a good indication
3:17
in this case we found nothing now by the way we did all this well the thing was or we could have
3:22
done this well the tire was still in the vehicle because this tire had left Robert Stratton equal
3:28
one on this has come off but we could be doing this whole procedure on the vehicle and that's
3:32
what I usually like to do because it's just faster you just don't have to take the thing off
3:37
you have to jack it up and get to the repair which is what I'm going to show you here
3:42
so that's if just to clarify that's if you have a a puncture or a leak on the tread area on the
3:49
tread area exactly you couldn't do a bead leak it's got to come off professional but in this
3:54
case we could find nothing but the tire was clearly going flat so we did use the liquid again
4:03
and we found a leak there was nothing there there's actually nothing visible to the naked eye
4:08
but you spread this stuff on and look at that it's bubbling up like crazy bubbling up like crazy now
4:13
that's a leak that we couldn't have discovered otherwise but the the soapy water really makes
4:19
an improvement it makes it very easy to see and in fact we we actually we hose down the whole
4:27
tube the whole tire with some water as well as this stuff because we really didn't know where
4:32
we were looking but clearly that's the problem even a really slow leak will show up with that
4:38
liquid test this is very slow it takes days for this tire to deflate and yet that's very obvious
4:45
yeah so i'm going to show you how we repair tubeless tires here and as i said most of the
4:50
time this happens right on the vehicle we don't actually drive a whole lot so when tires go flat
4:54
we're usually at home and we can fix them right there these problems are fixed with these
5:03
with this kind of sticky gummy piece of rope like stuff this is part of a tire repair kit
5:11
and it's for tubeless tires so it's very different than patching a tube which has a flat patch which
5:17
gets glued on this rope actually gets pushed into the hole along with a whole bunch of
5:24
rubber cement like this so in the end what you have are the the two ends of this rope kind of
5:30
sticking up out of the tire and then you snip it off and the whole thing's been saturated in
5:37
cement and eventually that patch you know the the nubbins of that rope gets worn off and that's
5:44
your fix so that's what we're going to do now and these are the two tools that you use for doing
5:50
this now this is kind of a reaming and roughening tool because this hole is is very small there's
5:57
there's no way we would get one of these pieces of rope stuffed into that hole it's just way too
6:03
small so make the hole bigger you have to make the hole bigger it's like a lot of things in life
6:08
sometimes you have to make things worse before they can get better this is true in dentistry
6:12
filling a cavity and auto body work fixing a drywall hole whatever you often have to make
6:18
it worse before you can get it better and that's what this is now this is where you're going to
6:24
run into a problem if you try to do this yourself we know where the hole is there's no question
6:29
about that so it's right in here it's right in there something's happened so i now need to make
6:37
this bigger and i've got some air in here and let's just see well can i get it in oh i did
6:47
i actually got it in i didn't expect that because many times you try to poke this thing in
6:53
and the hole's too small it just won't go in no matter what you do and and getting making the
6:58
hole larger and roughening the sides is an important part of the procedure so what do you
7:04
do if you can't get that well most times i can't get it i can't get it in at all so i drill out the
7:12
hole it seems kind of crazy you're going to feel quite strange drilling a hole in your perfectly
7:18
good tire but that's the thing to do and but you just want to drill it of just as large as necessary
7:25
and then no larger just to get the reaming just to get the reaming tool so you want to make a
7:31
whole fair bit smaller than the shaft of the reaming tool probably exactly like what half
7:36
the size maybe half the size to start and then you see when i'm jamming it in you're sort of
7:43
rotating and pulling down and roughening certainly air coming out of there now they're coming out of
7:49
there now and that's that's what we want i mean that's what we have to do so i'll just leave this
7:53
in here for now um yeah i've made my tire worse at this point well like i said often you have to
8:00
make things worse before they can get better yeah now if you wanted to play a nasty joke on me okay
8:04
video over thanks for watching subscribe yeah this tire cannot be repaired you'll need to do it robert
8:11
the holes this hole is way too big to be hatched yeah well luckily that's not the case but you
8:17
know on the topic though there are situations where you can't safely patch a tire uh and one
8:23
of them is if there's a hole in the sidewall i mean there are people that'll do that and let's
8:27
say we had a hole on the sidewall we could do the same thing we're doing now and it would it would
8:32
hold air but the question is what's going to happen at speed you know you're screaming down
8:37
the highway there's cars and trucks all around you a blowout that is a very serious issue
8:42
couldn't lose control of the vehicle you lose control of your life actually in a situation
8:46
like that so why is it less effective in the sidewall the i've been told what i understand
8:53
is that it can weaken the sidewall it can hold air but it can weaken the sidewall to the point where
8:59
you could have a catastrophic rupture oh i see because you're sort of relying on the rigidity
9:04
of the rubber yeah you know i don't know i don't know how true it is i just know
9:09
that every class a mechanic i know will not repair a sidewall puncture so that's so if you get a
9:16
sidewall puncture you just need a new tire you just need a new tire yeah so this puncture is
9:20
actually pretty good it's in a reasonable place what we want to do now is we want to peel off
9:27
one of these things look kind of like rubbery pipe cleaners yeah they're sticky too
9:40
that's like when you're trying to open your the wrapper of your favorite snack food
9:45
the more desperate you are to eat it the harder it is to open right this is the tool that we're
9:52
going to use to push this thing in so that's different than the reaming tool well yes it's
9:58
entirely different the reaming tool is rough and pointy it's started to poke enlarge the hole and
10:07
rough on the side this is more like a sewing needle and that i'm going to be threading the
10:17
plug into here and i'm going to be equalizing the length now look at the end look at the end
10:22
it's not actually closed it's open so you hold that still for a second oh yeah yeah it isn't
10:29
connected so that lets me push the plug in but then if i carefully remove it it's the the tool
10:38
is going to come off the plug and the loop will be inside the tire pretty sure i mean yep that's
10:44
the way that works so i just have to get this in here now there it comes here it goes in here we go
10:54
okay so you pull it halfway through more or less yep both sides are going to go in
11:01
and when we're finished there's going to be two ends sticking out a little bit and then we're going to trim that off work this a little bit more
11:11
the idea with roughening it is you just get more friction and better engagement with the plug
11:20
now we also want to make this make sure this hole is big enough that the plug is going to be able to go in
11:29
i guess we'll find out we will and we might have to take another round of
11:33
reaming if it isn't yeah more reaming now this is this is just a
11:41
universal cement true flat so what you can use it for patches
11:46
patching a tube is an entirely different process or you can use it for these these plug endings
11:52
so this is a universal cement true flat so you can use it for patches
11:57
patching a tube is an entirely different process or you can use it for these these plug things
12:04
so you basically want to just slather the plug with this cement
12:11
lots of stuff because it helps it to slip into the thing
12:26
it looks like it looks like a little kid when they have a cold
12:33
okay let's see if this works we've lost a fair amount of air there but
12:43
okay here we go that's it that's it that's it really now we're going to trim that off
12:59
um let's put some more air in here make sure there's nothing leaking your handy
13:05
dwelt portable battery operated compressor there hey it's been a great tool i've been using this
13:11
for some cedar sidewall shingling i did a video about that not too long ago
13:21
so are you going to fill it up to full capacity around 40 psi at this point or
13:26
yeah what we're going to do is we're going to fill it up to a known a known pressure
13:32
and then after we trim this off and you're going to be able to monitor it make sure we actually did fix the problem
13:45
so you're wiping off the excess cement first i think yeah and then
14:06
it wasn't hard was it no so you don't need to nip it off any closer than that i guess
14:10
it'll wear off yeah now some guys some guys like to to burn that they like to put a torch on it and they call it vulcanizing it
14:24
after the kind of the process that turns like mr spocker well no it turns latex rubber into
14:30
hard tough rubber that you can use for things um i don't know how important that is now this
14:37
this you've never done that well i don't generally because the cement is non-flammable
14:45
but i don't suppose it would hurt just to touch the torch to that nubbin and see what happens so
15:00
so i don't know if that did any good or not i kind of think it's not necessary but
15:12
in case it is we're done okay so that's done now we're about to do a final test with the spray
15:18
bottle on the spot again but yeah you have to wait no you don't you can start driving on that right
15:24
away this is one of this is one of the few things in life you don't have to wait for it to dry when
15:29
this is you saying that too this is me saying the guy who says well robert you better wait 21 full
15:34
days for five minute epoxy so right so let's just see i haven't sprayed this yet maybe it's going
15:38
to leak again maybe maybe the whole video has been useless i don't know i can see any bubbles it
15:45
hasn't been useless yeah yeah that's holding there and it's not going to start to leak either but
15:51
just to be safe just to make sure there isn't another leak somewhere and whatever caused this
15:55
maybe it was a i don't know nail on a board sticking up or something it punctured the tire
15:59
once and it punctured it again as you rolled over it i don't know so we don't want to put this back
16:04
into service until it's really proven itself over a few days but just filled it up to 42 psi so
16:09
that's that's the magic number then so anyway thanks for joining me again this week i hope
16:14
i've delivered something of value something that you can help to improve your life if you're
16:19
watching this video on youtube please give me a thumbs up if you don't subscribe yet subscribe
16:24
and hit the notification spell so you know when i put up new videos and especially check out my
16:28
websites in the description box you can sign up for my weekly newsletter there more than 28 000
16:36
people get that every saturday morning and they they love it they keep wanting more and i keep
16:40
writing more so come and join me and have a great day
#Vehicle Repair & Maintenance