- Video Watch Time = 2 1/2 minutes
Laminate flooring offers speedy installation, a tough surface and freedom from finishing fumes in your home, but this stuff isn’t completely foolproof. There are tricks you need to know and apply for long lasting results, especially if you choose laminates that click together. These have taken over the market from glue-together laminates because click flooring is so easy to use. That said, some brands and batches have one particular hidden weakness. The problem looks like shrinkage of the flooring, but actually turns out to be something entirely different. As with anything in life, if you want to fix something, you first need to know what the real problem is.
Click below for a video tour of the process of end-gluing laminate flooring to eliminate gaps, with more information and details below.
Why Laminate Gaps Happen
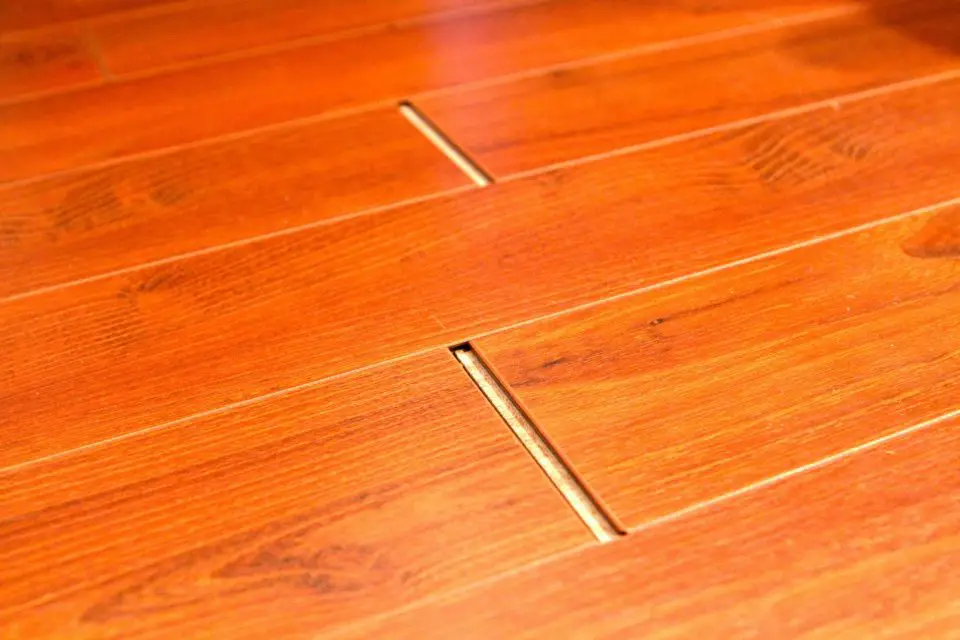
Every laminate manufacturer recommends that their product sit inside its new home for a week or so to acclimatize to the humidity there. And while this is reasonable advice, it’s not going to stop something that looks like shrinkage but isn’t. It’s not unusual for gaps to develop between the ends of laminate flooring pieces months or years after installation, and the result looks like exactly like shrinkage. Gaps form where the end of one board meets another, and these gaps can vary in size. Despite appearances, the issue is actually caused by individual pieces of laminate sliding away from neighbouring pieces along the ends under foot traffic, not gaps caused by drying.
Most laminates these days click together on their long edges during installation, but on some designs the end joints are just ordinary tongue and groove connections. No clicking, no locking action to prevent pieces from sliding next to each other and pulling apart on the ends. The boards are free to slide apart, at least in theory. If the click joints along the edges of boards don’t offer enough friction, pieces of laminate can slide relative to each other, moving into the clearance gap intentionally left between the flooring and the walls at the perimeter of each room. This gap is covered by baseboards, so you can’t see it, but the laminate is still free to slide underneath the trim. End-gap openings on laminate floors happen most often in high traffic areas during winter, when the air is driest, the click joints are loosest, and foot traffic is free to cause little bits of movement that add up.
Glue for Fixing Laminate Gaps
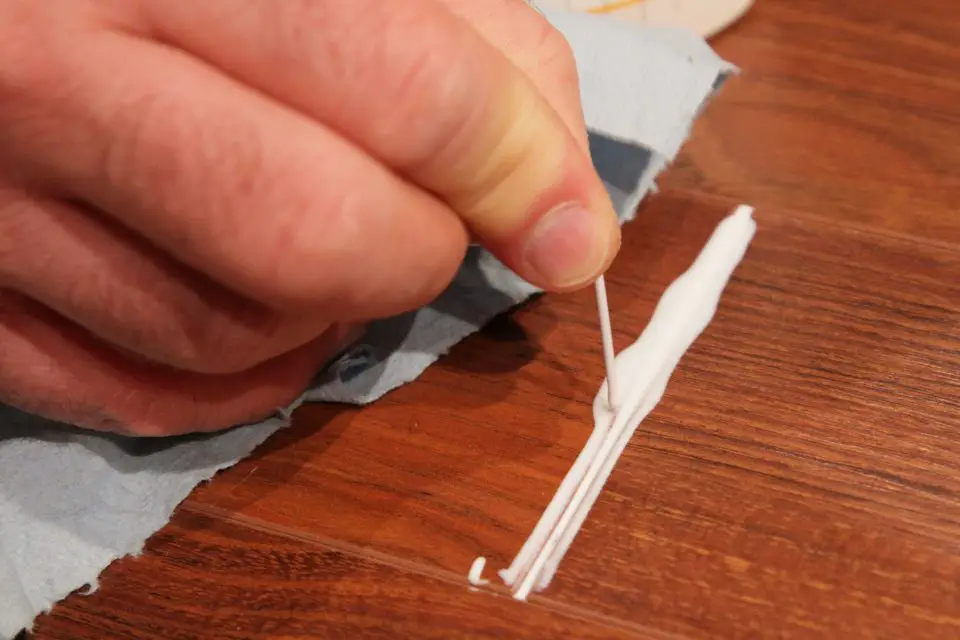
If you’ve already got an existing laminate floor showing end gaps, the fix involves applying a tiny bit of wood glue in the open tongue and groove gaps as they emerge, before sliding the flooring together with your hand. I find a toothpick works well for getting the glue down where it needs to be on the exposed tongue itself. Regular white or yellow wood glue is fine if the gaps are wide and you can get in with a toothpick. But if the gap is small, I prefer a low-viscosity glue called Chair Doctor (www.leevalley.com; 800-267-8767). It’s as thin as water, allowing it to wick deep into the joint.
Before you apply glue, however, make a dry run, experimenting to discover the best way to move your flooring and close the gap. I find a sharp, angled blow from the palm of my hand works best for driving pieces of flooring back together again. If this approach works for you, open the gap up again (as wide as it will go), then apply glue. If the palm-of-the-hand method doesn’t work, you may find it necessary to use a hooked metal tool of the kind used to close end joints during laminate floor installation. Remove the baseboard, hook the end of the tool over the end of the floor board at the wall, then use a hammer to drive the other end of the tool before replacing the baseboard. Sounds like trouble, but don’t worry. If laminate flooring gaps have appeared, chances are excellent that you can push the gap closed by hand without resorting to a tool. If the boards came apart, then the will go back together.
As soon as you’ve glued and closed the board-to-board gap, wipe off any glue that squeezed out onto the surface using a damp rag. You should also take a look at other boards along the same row. Sometimes closing one gap opens another, but that’s okay. Simply glue and close new gaps the same way.
If you’re putting down a new click laminate floor that does not click together on the ends, then it makes sense to apply a small blob of glue to the tongue on the end of the board after clicking but before bringing the ends together. The friction of the click joints on your flooring might be enough to stop boards from moving apart later without help, but maybe not. It’s much easier and more effective to apply a little glue during assembly than it is afterwards, when furniture and baseboard get in the way. Believe me, I’ve learned this lesson the hard way.


