 If ever there was an ideal Canadian walkway and driveway paving product, interlocking concrete paving bricks must be it. They’re called pavers in the trade, and besides looking great, the factory-cured concrete they’re made from is almost as indestructible as granite. What other masonry product can stand up to years of our brutal, ground-level freeze/thaw cycles without crumbling? And if the earth beneath the installation heaves a bit during the spring, as often happens, interlocking pavers take it all in stride. Since they’re relatively small, the sand-filled gaps between each brick lends an inherent flexibility to the installation that prevents cracking of the bricks themselves. But all of this isn’t to say that interlocking walkways and driveways are fool proof. The weak link in the paver equation is installation. You’ve got to do things right or settling and brick misalignment will turn all this great potential into an ugly mess.
There are three things that go into any durable, attractive paver installation: a solid, mechanically-compacted base; a smooth, 1-inch deep layer of moist bedding sand right under the pavers; and orderly brick installation with mechanical side support. The techniques you’ll learn about here put all three of these features into practice, creating durable, field-tested results that have proven successful under the harsh challenges of the Canadian climate.
Features Of Success
Installing brick pavers isn’t cheap or easy, so you’ll want to protect your investment of sweat and dollars with a foundation base you can count on. And that means different things in different applications. Foot paths that won’t be driven on, for instance, age gracefully atop a 6-inch deep layer of fine, mechanically compacted aggregate in a trench that puts the top of the pavers about 1/4-inch above the surrounding grade. Driveways need at least a 12-inch deep compacted layer in the same sort of trench because of the extra weight of vehicles they’ll bear.
Depending on where you live, the composition of available aggregate will vary, though you’ll always be able to find something suitable. Where I live, limestone screenings are plentiful, so that’s what I use. This is a crushed stone product with the largest particles no bigger than about 1/4-inch across. Screenings also include very fine limestone dust in the mix. This helps ensure a rock-solid result by encouraging compaction. Whatever you use, the purpose of the compacted base layer isn’t to get down below the frost line and prevent heaving. It would take at least a 3 or 4-foot deep trench for that, and since pavers can handle some seasonal frost movement, there’s no need to go to that extent. The role of the foundation layer is to prevent settling and shifting of the bricks, and that’s why it must be mechanically compacted. Don’t even think about installing pavers without a gas-powered compactor at your disposal. Settling will occur for sure on any kind of fresh fill.
Another key feature of the best paver installations is plastic edge guides. These support the outer bricks invisibly after backfilling, keeping them tightly packed. Edge guides also make it easy to smooth the bedding sand evenly before setting the pavers in place. Some people install pavers without edging, but the benefits are so great, and cost so low, that there’s no reason to omit them. More on this later.
Getting Down to Business
The first part of the job is marking the location of your future path or driveway on the ground with spray paint. Strings tied to 12-inch long spikes hammered into the earth do a good job guiding you along straight lines; a stiff garden hose laid on the ground is the best way to mark curves. Since the purpose of these painted lines is only to guide the excavation of the foundation trench, spray painted marks need to be about a foot farther apart than your final project size. This creates a foundation wide enough to support those all-important plastic edge guides. Lay some pavers out on the ground temporarily in the pattern you want, then measure the group to determine the width of the finished project for layout purposes.
Unless your installation is tiny and the soil light, you’ll probably need mechanical help digging the foundation trench. And the best machine to hire for this is a micro-excavator. These small work horses look like their full-size cousins, but are highly maneuverable in tight quarters. They also have rubber tracks that don’t mar lawns or driveways. Ask your operator if the excavator can be fitted with a toothless bucket . This is better than the standard toothed bucket, which loosens the soil at the bottom of the trench, yet is unable to scoop it all out cleanly.
As the foundation trench reaches final depth, move in with wheelbarrow loads of fine aggregate for the foundation layer. Rake it around, but apply no more than a 4 inch depth of aggregate before mechanical compaction. Ignore this advice and you could still have settling since the compaction action might not penetrate all the way through the loose layer if it’s too thick. Four passes of the compactor — two each way — does a good job. Keep adding, raking and compacting aggregate until you’re within an inch of the finished height of the foundation layer. This is when it pays to install strings and spikes along the insides of the foundation trench, to act as a visual guide while you bring the aggregate layer up to final height. Although the surface of the foundation layer doesn’t dictate the lay of the pavers entirely, it’s good to get it as smooth and even as possible. You’ll find it useful to get on your hands and knees, using a 24 or 48-inch long aluminum level as a screed to smooth the final layers of aggregate as you add them. Keep your eye on the bubble as you work, making the installation level from side to side, or slightly sloped away from any building it might run next to.
Install the Edging
There are several brands of plastic paver edging. Most are secured with 10 or 12-inch spikes driven into the soil. Begin by installing edging along one side of your project, following a taut string to ensure the edging is straight where it should be. Hammer in only every third spike so you’ve got some leeway to adjust the edging strips after pavers are sitting between them. Although you could use a measuring tape to position the second edging side, there’s a better way. Cut a 1×2 piece of wood to the same length as the width of the group of pavers you test-fitted earlier. This is your measuring stick. Just lay it on the ground, one end tight to the already-installed edging. Then lay down edging on the second side, bring it tight to the other end of the measuring stick, then spike it down in every third hole.
As you install the edging strips, place a level across the two sides to make sure you’re maintaining an even keel. For reasons you’ll see, the up-and-down position of the edging translates directly into the position of the pavers. A dip or rise on one side of the edging means a dip or rise in the bricks. You can fine-tune edging altitude by adding or removing small amounts of fine aggregate directly underneath. Tweak, check and re-tweak until the edging is perfect. Next comes the fun part.
Screeding Sand and Setting Pavers
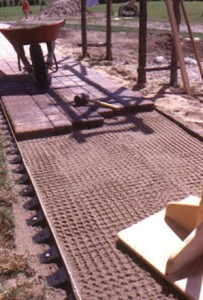
Clean mortar sand is ideal as the bedding layer under brick pavers, and application of this sand comes next. Most plastic edging is designed to accommodate a 1-inch deep layer of sand, while still sticking up high enough to support the outer edges of pavers. When you’re dealing with installations less than 10 feet wide, the secret at this stage is a wooden tool you make yourself. Grab a 2×4 and cut it 3 inches longer than the distance between the plastic edging strips. Notch the ends of the stick so it’s bottom edge nestles down between the edging, about 1/2-inch lower than the top. This is the tool that makes smoothing the bedding sand a breeze. Since it rides along the plastic edging, you’ll find it quite easy to achieve very smooth results. Shovel small amounts of sand between the plastic edging strips, level it with several passes of your 2×4, then add and smooth again until you’ve got a level layer. For best results, moisten this sand, then hand-tamp it with a shop-built wooden tool, like the one shown here. This will lower the level of sand, so add, smooth and tamp some more.
Installation of the pavers comes next and the job goes quickly. Set some bricks along both sides of the installation, tamp them in place with a few whacks from a rubber mallet, then fill in the space between with more pavers. As you work, you’ll usually find the edging slightly too tight or too loose around the pavers. That’s okay, though, because you can fine-tune the location of edging around the pavers as you add the anchoring spikes you left out earlier.
Complete your work by covering the edging with top soil almost up to the top of the pavers. All that remains now is to sprinkle sand all over the installation (the drier the better), then fire up the compactor again and take several passes over the whole thing. This firms the pavers by nestling them further into the bedding sand and by jiggling the loose sand down into the cracks.


