- Video watch time = 2 minutes
How do you hide the edges of veneered plywood or particleboard in furniture and cabinets you make? Solid wood edging is the answer. The best way I know of to show you how to apply solid wood edging accurately is what the video above is all about. This technique is by-far the most reliable option (much better than iron-on tape) and it’s easy to do when you know the tricks. Scroll down after you’ve watched the video to learn more and review the details.
Hiding Ugly Edges
Sheet materials such as veneered plywood and particleboard get the maximum beauty from precious, high-grade logs because it takes that beauty of the entire log and spreads it over a large area in the form of veneer. This also reduces the cost of woodworking compared with using solid wood, too. I love working with solid wood, but veneered sheet goods are a great deal, but only if you know how to conceal the less-than-beautiful exposed edges found on plywood and particleboard.
Gap-riddled layers of softwood that form the core of most veneered ply, or the sawdust that’s glued together to form particleboard, look unredeemably terrible in most cases. That’s why learning to cover these eyesores with solid wood strips is such an essential woodworking skill.
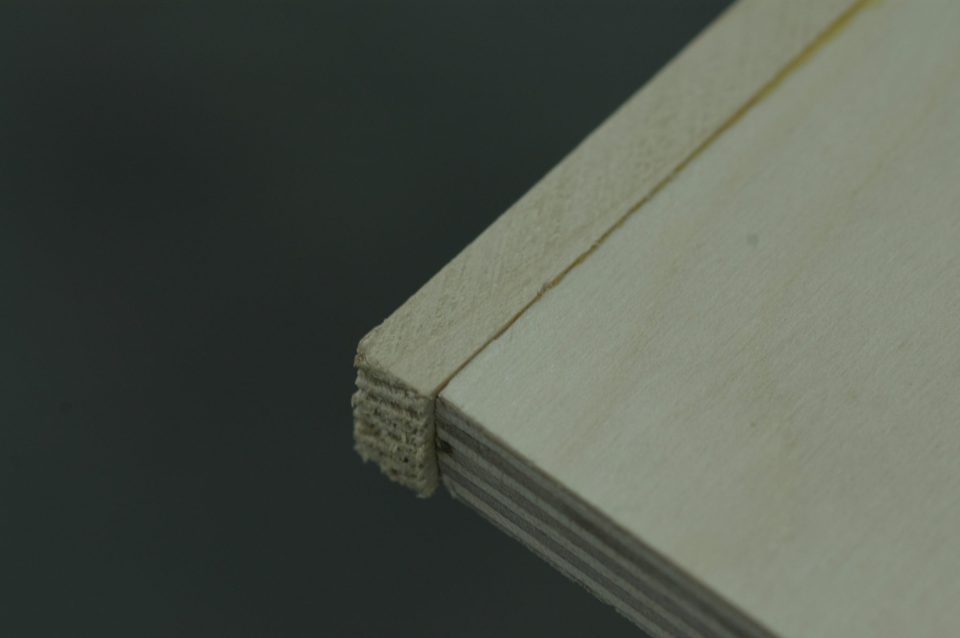
Sounds simple enough, but there are tricks behind completing this work efficiently, while also avoiding hidden dangers that can ruin an entire piece of veneered material if you’re not careful. The solid pine strip has been glued to the edge of Baltic birch plywood. Sanding smooth and trimming to final length has yet to come.
Meeting the Challenge
Your main challenge involves creating gap-free joints, plus a smooth transition where strips of solid wood edging meets veneer. This depends on both edging strips and sheet goods that have smooth, crisp mating surfaces. There’s simply no substitute for a good tablesaw blade when cutting veneer, but sometimes even this isn’t enough to prevent chipped surfaces. A few light passes over a jointer refines the edges of veneered sheet goods very well. Particleboard and veneered ply are harder on jointer knives than solid wood, but occasional use like this is fine. So yes, you can refine the edges of sheet goods on a jointer, making them straight and smooth.
As for preparing strips, you’ll find a thickness planer ideal if you have access to one. Rough-cut some solid wood edging on your table saw, then plane multiple strips to create one smooth face. No need to worry about the other faces or sides. They’ll be cut and sanded later. Don’t have a planer? Tablesaw blades rated for veneer often create surprisingly smooth wood strips without the need for a planer at all. The smoothest cutting blade I’ve ever seen for ripping solid wood is Diablo’s Fusion blade.
Most of the parts you’ll be gluing edging to need to be a specific width, but you shouldn’t cut veneered parts to final size until after the edging process is nearly complete. Cut the width of your ply or particleboard, but leave them a half-inch or so longer than final length. Saw and plane solid wood edging strips 1/2” wide (wider if you plan to rout decorative edges), and 1/16” thicker than the sheet goods you’re using. Later you’ll cut the edged part to final length and width after the edging is fastened, sawing off the excess plywood as you do. This way you’ll end up with perfectly sized parts, with edging that meets the sheet goods perfectly on the ends.
When it comes time to glue and clamp edging strips, place pairs of parts together in the clamps at the same time, strip to strip. This doubles output, while ensuring consistent clamping pressure across the entire length of each strip. Even when you’ve only got one piece of plywood to edge, lay a piece of scrap wood against the clamp jaws to spread pressure along the whole strip. Either way, use your fingers to make sure there’s at least a little bit of solid edging overhanging the top and bottom faces of both the sheet goods along the entire length of the part before setting it aside to dry.
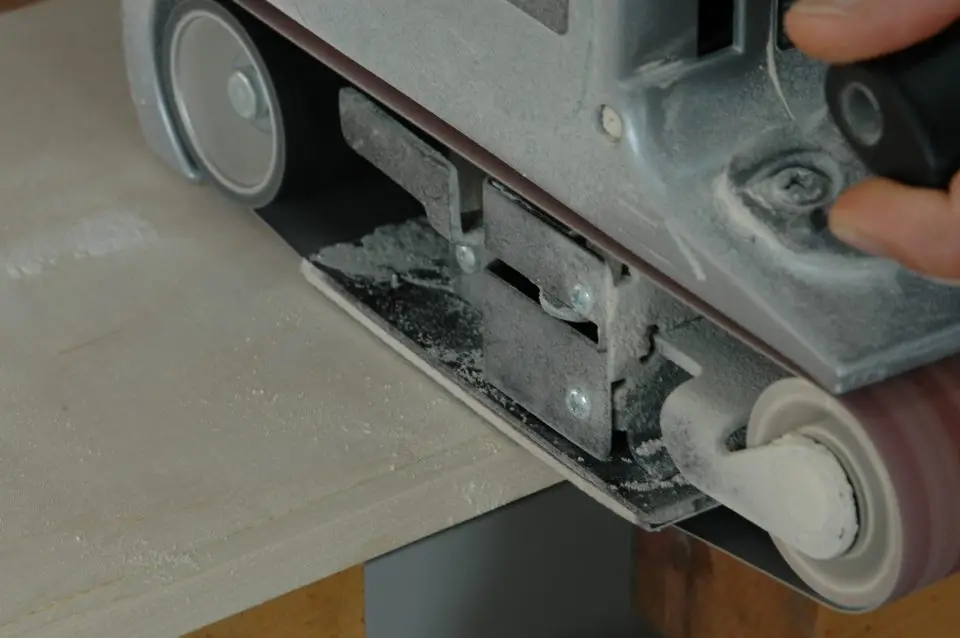
Sanding cross-grain with a belt sander and a 100-grit abrasive to level the edging strip with the plywood. Sanding along the grain is the step that comes next.
Careful Sanding
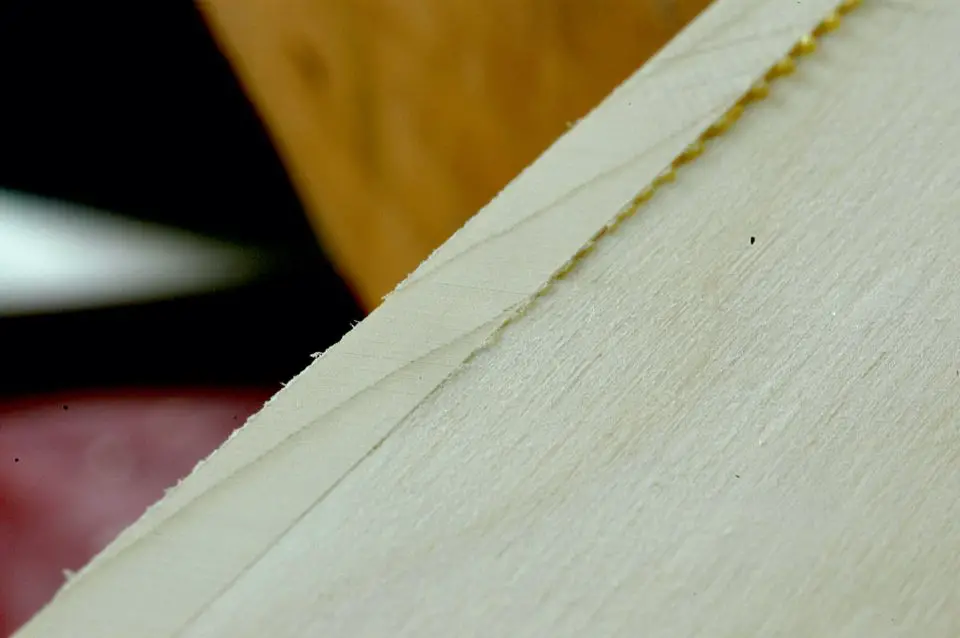
The riskiest part of edging sheet goods comes next. Most factory veneers are less than 1/32” thick, and it’s easy to sand through while you’re leveling the edging joint. When this happens, dark glue becomes visible, ruining the effort and material you’ve invested so far. If the veneer starts to go slightly dark in the area where you’re sanding, you’re beginning to go through. Stop immediately and you might still be able to use the part with the dark face turned down and out of sight. The video at the top of this article shows how I like to sand solid wood edging.
Working with veneered sheet goods saves money and maximizes the beauty locked up in the best logs. Master the skill of edging and you’ll also enjoy the chance to build bigger and better projects, even if you don’t have all the tools you’d need to pull off the same work in solid wood.
One more thing after watching the how-to video on edging. Baltic birch plywood is the king of sheet goods. It’s strong, solid and offers a unique option. Baltic birch is made entirely of thin, almost-gap-free hardwood that can be made to look good without additional edging. The tight, exposed layers look great on informal furniture, shelves, storage boxes and workshop fixtures. It lends a kind of modern look to projects.
My favourite way of dealing with Baltic birch edges involves milling them with a bullnose router bit in a table-mounted router with a fence. Choose a bit with a diameter that’s twice as large as the thickness of the ply you’re using. This yields a smooth, gentle curve with crisp edges where the shape meets each plywood face. It’s far more attractive than a full bullnose profile or simply rounding edges with a typical roundover router bit.


I hope you found this content useful!
Your generous support helps me produce more practical, hands-on content that I hope you’ll find useful.
Steve Maxwell