 Chances are good that if you’re in the middle of a do-it-yourself home renovation right now, it probably involves your basement. Finishing basements is the number one wintertime DIY project with us Canadians, and every basement reno from St. Johns to Victoria involves window and door trim of one kind or another. So do major renovations in all other parts of a home. Mitre joints create the 90º corner connections you see everywhere between pieces of trim, and the ability to cut tight mitres is a key DIY skill. That’s because the results – good or bad – are so plain to see.
Tip #1 – It Starts with the Mitre Saw
The chopsaw (also called a mitre saw ) is the power tool of choice for making mitres happen. I’ve been using chopsaws for more than 20 years, but as useful as they are, they’re only the start. You also need good mitering technique, and this involves the way you mark your trim.
Tip #2 – Forget the Pencil
Start by forgetting your pencil. That’s rule number one in my book because a pencil line is too fat. A little nick in the wood from a utility knife does much better, but depending on your situation, marking trim probably won’t be your first step.
 Tip #3 – Postpone the Second Mitre Cut
Typical mitres are made in pairs, each half cut to 45º and meeting together to form a 90º corner. As you cut 45ºs on the ends of mating pieces of wood, leave at least one of the pieces of trim an inch or so longer than needed for now. This allows additional wood for cutting again, if the joint doesn’t fit right the first time. You’ll cut that piece of trim to final length when you do the last 45º cut on the other end.
How does your first mitre joint look as you hold it up to a door or window frame? If there’s a gap along one side of the joint or the other, tweak your chopsaw angle a tiny bit from 45º, then cut the end of at least one piece of trim again before bringing the wood together for another try. A shim of wood or cardboard placed behind one edge of the trim to angle it outwards as it sits on the saw is often a more accurate way to tweak mitres than the tricky job of swiveling the chop saw table a degree or two.
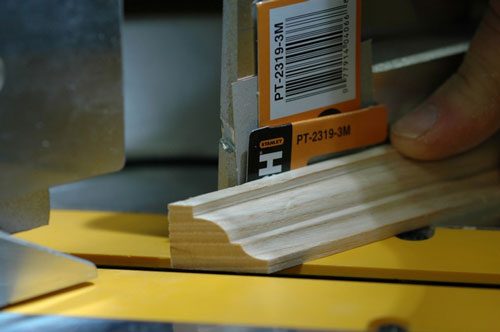
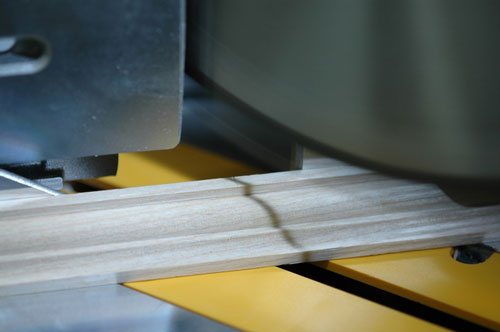
Tip #4 – Check with a Test Cut
Here’s another mitre trick you’ll find useful. As you place your trim on the saw, take the smallest of initial cuts onto the waste side of your knife mark, to show exactly where the blade is cutting. Raise the blade, move the wood over slightly with your fingers, then take another little nibbling, reconnaissance cut. Continue to nibble and move your way up to the mark. Only when the edge of the cut lands in the middle of your knife mark do you chop down all the way and complete the cut.
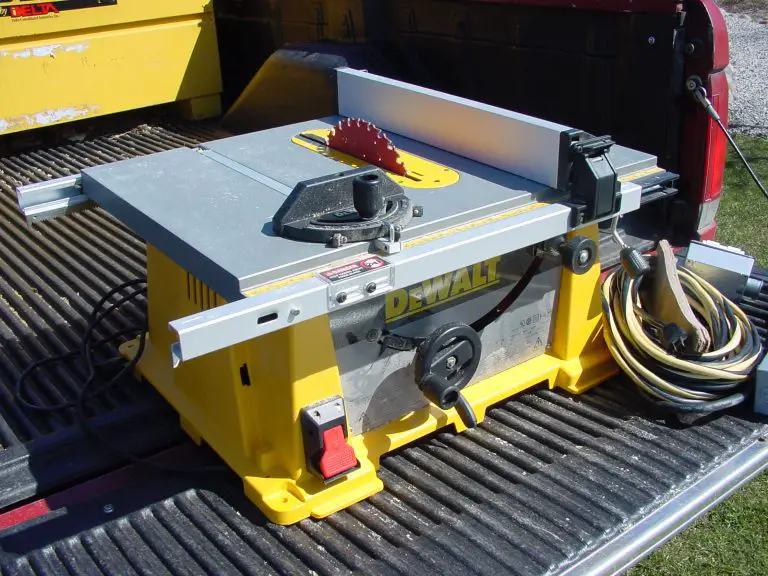
I recommend a simple mitre saw spinning a 10-inch diameter blade for ultimate accuracy on small to medium-sized trim work. There are many good chopsaws on the market, but my current favourite small model is the DeWALT DW713, fitted an accessory LED lighting system. This light casts a shadow off the spinning blade, and it’s this shadow on your wood that shows exactly where teeth will touch down. While many chopsaws use a laser system to approximate where the blade will cut, this LED system is much more accurate and unique in the industry. The light also illuminates the entire cut area, making it easier to see and mitre accurately.
Don’t pass judgement on your mitre cutting skills until you’ve tackled at least fifty mitres. Even with all the right techniques in your head, like so many things it takes experience for the know-how to trickle down to your hands. Check out my video on how mitering is done.


I hope you found this content useful!
Your generous support helps me produce more practical, hands-on content that I hope you’ll find useful.
Steve Maxwell