- Video#1 Watch Time = 4 minutes
- Video#2 Watch Time = 4 1/2 minutes
Properly air-drying wood for woodworking requires reducing moisture content in two stages. First, stack lumber with spacers and airflow to bring moisture down to around 12–16%. Then move it into a heated space to reach 7–9% moisture content before final use. Taking time between cutting steps and exposing all surfaces to air helps prevent warping and cracking.
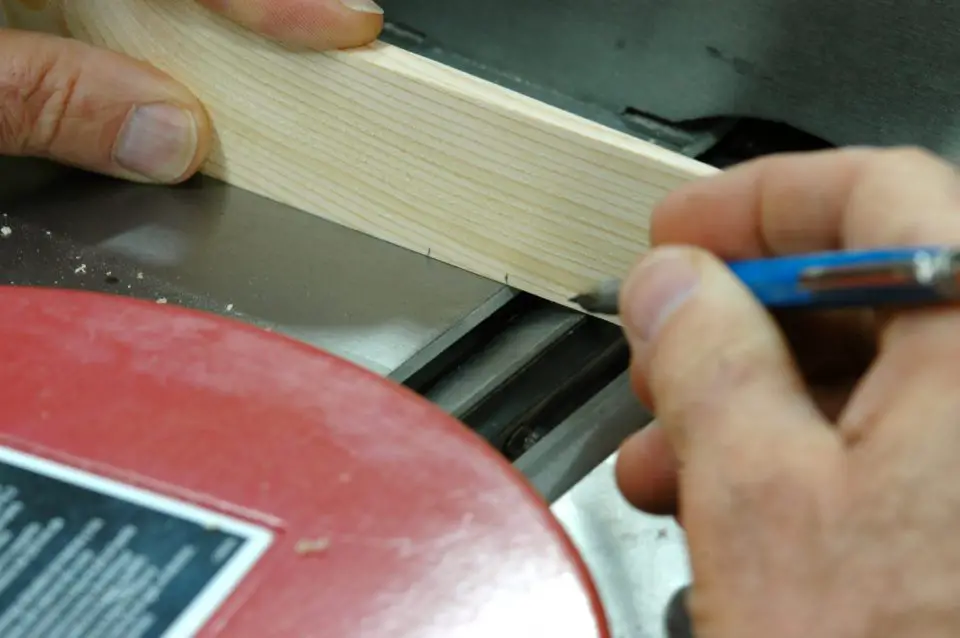
Do you need to dry lumber for woodworking and making furniture? Want to learn how to air-dry furniture wood properly so you avoid the misery of warping, twisting and ruined woodworking projects? You’ve come to the right place. I’ve been a cabinetmaker since the mid-1980s, and drying green lumber for furniture is something I do all the time. That’s me working with some rough cherry in my shop in the photo below.
Drying wood is important because big things go wrong if you don’t do it right. There’s a lot of misunderstanding about air-drying furniture wood, too. It all comes down to moisture. Even kiln-dried lumber that’s supposed to be “dry” often isn’t dry enough.
“Be sure to check out the wood drying Frequently Asked Questions section at the end of this post. Send your own questions to [email protected]” – Steve Maxwell

Working with wood that’s too wet is like falling into a pit. By the time your plight is obvious, it’s usually too late. Assembled parts warp, glue joints crack, and a rising sense of panic takes hold. I know because I’ve felt it. I also know it doesn’t have to be this way. An understanding of the wily ways of wet wood can keep you one step ahead of trouble while letting you enjoy success using all kinds of inexpensive and interesting lumber that might otherwise cause you grief. I’ve been working with wood for fun and professionally for 30+ years, so you can trust what you’ll read here.
What Is Equilibrium Moisture Content (EMC) in Wood?
The first thing to understand is that wood is a moisture sponge. It slowly loses or absorbs moisture from its surroundings. When a piece of wood is in balance with the moisture of the air around it, the wood is said to have reached equilibrium moisture content (EMC).
Kiln-dried or air-dried, it’s all the same as far as absorbing moisture goes. Wood stored in a damp place gets wetter and bigger. Dry air makes wood drier and smaller. The key is ensuring that your wood has a moisture content in balance with the driest indoor conditions your finished project will face.
The Two Stages of Drying Wood for Furniture
Drying lumber for woodworking usually happens in two stages. The first stage takes very wet, freshly sawn boards and brings them down to a safer moisture level using spacers, airflow and time. The second stage brings that partially dried wood down further so it’s ready for indoor furniture, cabinets and shelves. This second stage usually needs some heat and good air circulation. A lot of trouble starts when woodworkers stop after the first stage and assume the lumber is dry enough when it isn’t.
Common Wood Drying Mistakes
One of the biggest mistakes is trusting how wood feels instead of checking how much moisture it actually contains. Another is storing wood in an unheated space for months or years and assuming it will eventually be ready for furniture making. It won’t. Cutting parts to final size too early is another common problem because wood often twists or shrinks after rough milling. The safest approach is to dry patiently, measure when possible, and let the wood settle between major machining steps.
Air-Drying Wood Step #1: Stack with Spacers and a Light Breeze
As wood comes off the sawmill, it’s at its wettest, with a moisture content that can be higher than 30%. It’s like a slice of celery. If you drive a nail into it, water will appear.
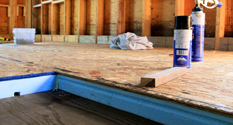
And if you’ll be air-drying your own lumber (my personal preference), you’ll need to stack that wet wood with spacers between each layer, in a location with at least a little breeze to prevent mold growth. A shady outdoor spot is good, and so is an airy shed or hayloft. A garage probably doesn’t have enough airflow, and a basement certainly doesn’t.
This is phase #1 of the drying process and it’ll bring wood moisture content down to 12% to 16% tops, depending on the climate in your part of the world. Just be careful. Wood feels ready to use after phase #1 drying is complete, but it’s not nearly dry enough to prevent trouble. Ask me how I know this and you’ll hear some sad stories.
Air-Drying Wood Step #2: Target 7-9% Moisture Content
In regions with some kind of a heating climate (as I do), wood needs to have a 7% to 9% moisture content to prevent projects from warping and cracking during the driest part of the heating season.
This requires a second drying phase, and skipping this step is where most moisture-related trouble starts. You can store lumber in a barn or unheated garage or shed for a hundred years and it’ll never get dry enough for indoor furniture, cabinets or shelves.
For this you need a little heat, air and time. How much depends on the thickness of the wood, how wet it is, and the temperature and humidity of your heated space.
Air-Drying Wood Step #3: Stack Wood with all Sides Exposed
Fall and winter is a great time to dry wood because homes and heated workshops everywhere become ideal phase #2 drying spaces. And the process doesn’t take long if you apply three tricks.
Begin by allowing at least a couple of days drying time after each major cutting and planing step as you build projects. Freshly exposed wood surfaces need the most drying, and you want this to happen before critical joinery stages.
Also, to make the most of this rough-cut drying time, be sure to stack project parts with all sides exposed between work sessions. This could mean standing them up, or stacking with spacer strips between each layer. Whatever it takes to get air around each piece is what you want.
To further speed phase #2 drying, point an electric household fan on your wood between work sessions. The added air circulation makes wood dry at least twice as fast. It’s amazing.
Air-Drying Wood Step #4: Wait as Long as Possible Before Cutting Final Parts
As you build, don’t cut parts down to final size immediately. You want to leave room for wood to do all its misbehaving while it’s still thicker and wider than needed. You want to joint, trim and plane each part only after the wood has fully stabilized. So how do you know when this has happened?
Why a Moisture Meter Helps
A moisture meter isn’t absolutely essential for taking guesswork out of the wood/moisture equation, but it sure does help. All models work on the same principle. You can see me using my old, trusty moisture meter in the video above. Click the box to watch.
The tool induces a small electric current through the wood and measures electrical resistance. The lower the resistance, the higher the moisture content. Percentage figures are shown with an analog needle or digital readout.
Be sure to measure freshly cut surfaces to get an accurate reading of internal moisture content. Surfaces of boards that have been exposed to the air for a while could be substantially drier than wood deep within the board.
As you see how fast wood dries during construction, you’ll develop a sense of how long it takes wood to dry enough, and you’ll need the meter less and less.
Learning to dry wood properly isn’t the most glamorous workshop skill, but I know for sure that a few moisture-related wood disasters go a long way to making you an enthusiastic learner.
Air-Drying Wood Bonus Info: Make Your Jointer Cut Sweetly
Want to get the most out of your jointer? It’s an essential tool for fine woodworking using solid wood. Check out this video on how I change and adjust jointer knives so they cut perfectly, without the need for special tools of any kind. All you need is a small chunk of wood. The trick is getting all the knives so they’re exactly the same height. That’s what lets any jointer cut smoothly.
Key Takeaways
- Air-drying wood happens in two stages: initial airflow drying, then indoor drying to reach final moisture levels
- Aim for 7–9% moisture content for indoor woodworking projects
- Always allow time between cutting and machining steps so wood can stabilize
- Stack wood with spacers and expose all sides to air for even drying
- Avoid cutting final parts until the wood has fully settled
Frequently Asked Questions
For indoor furniture and cabinetry in a heating climate, wood often needs to reach about 7% to 9% moisture content before final use. The article specifically recommends 7% to 9% for heated regions.
Yes, but only if it has dried far enough. The article explains that initial outdoor air drying may bring lumber down to about 12% to 16%, but that is still not dry enough for indoor furniture in a heated climate.
A garage usually does not have enough airflow for the first stage of drying fresh lumber, according to the article. And even long-term storage in an unheated garage will not make lumber dry enough for indoor furniture by itself in a heating climate.
Not absolutely, but it helps a great deal and they’re not expensive. The article above explains that a moisture meter is not essential, but it removes guesswork and is especially useful when you’re learning how wood dries.
Measure freshly cut surfaces. The article warns that exposed surfaces may be much drier than the wood deeper inside.
Expose all sides of the wood to the air, stack parts with spacers if needed, and use a household fan between work sessions. I’ve found that airflow can make wood dry at least twice as fast.
Because wood often shrinks and warps soon after milling. I recommend leaving parts oversized until the wood has stabilized so any warping happens before final joinery and fitting.
It is the point where the wood is in balance with the moisture in the surrounding air. The article explains EMC as the condition where wood no longer gains or loses moisture because it has matched its environment.
The safest approach, especially when you’re starting out with this whole wood drying thing, is to get a moisture meter so you can monitor things as you go along. Eventually you won’t need the meter much, but for now it’s a powerful learning tool. Two months is definitely long enough if drying conditions are right.
Bottom line: Successful woodworking depends on properly dried wood—aim for 7–9% moisture content and give wood time to stabilize between steps to avoid costly mistakes.
Want more practical home improvement ideas like this?
Join the Bailey Line Road newsletter for weekly DIY tips, building advice and real-world solutions for homeowners.


I hope you found this content useful!
Your generous support helps me produce more practical, hands-on content that I hope you’ll find useful.
Steve Maxwell