J.R.R. Tolkien is one of Britian’s most famous authors, and he’ll always be remembered for the fictional world he created in a series of fantasy books beginning with one called The Hobbit. Early in this story we’re introduced to the main character, a small human-like creature named Bilbo Baggins. As Tolkien explains, Bilbo lives in a comfortable hole in the ground, “not a nasty, dirty, wet hole, filled with the ends of worms and an oozy smell, nor yet a dry, bare, sandy hole with nothing in it to sit down on or to eat: it was a hobbit-hole, and that means comfort.”
Everyone who sets out to finish their basement envisions the beauty and peace of a good hobbit hole. But sadly, far too few achieve that goal. Increasing the odds of your success in this venture involves understanding that first things must come first in the basement finishing game. And as simple as that sounds, it’s a detail that’s often overlooked.
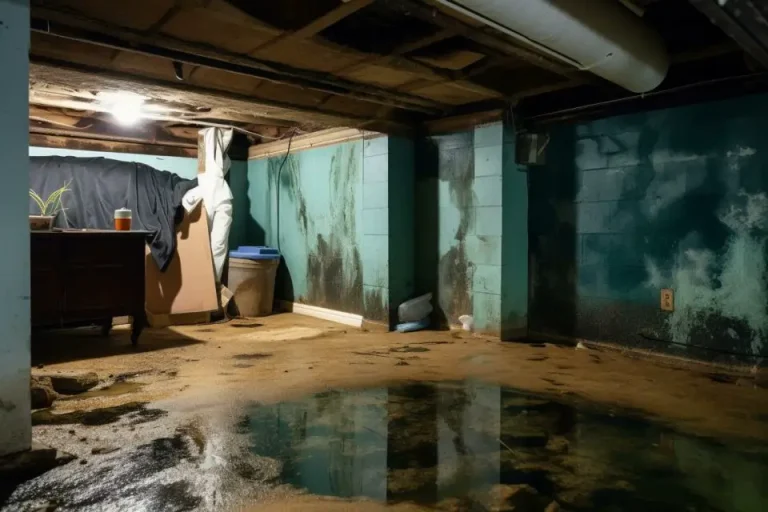
This past August, a reader asked me for suggestions about his basement. He was part way through finishing it, but was concerned about a new wave of musty smells that had begun to waft upstairs from down below. Could it have something to do with the liquid water that had started spouting up through the wooden subfloor he’d fastened to the concrete? But the really surprising thing about this situation is that it’s also disappointingly common. With several hundred dollars invested in the new subfloor, the reader was reluctant to face the unsavoury fact that his basement couldn’t be finished properly in it’s present state. The water issue had to be dealt with first, as unglamourous and mundane as that sounds. And that job might even involve ripping out the new work he’d just accomplished.
The main thing to understand about finishing a basement is that success depends on playing by a unique set of rules, and playing in a very specific order. If your goal is to turn a dark, potentially-damp area of subterranean landscape into something warm and dry and bright, you’re facing a set of sometimes-obscure challenges that are different than almost any other building situation. And meeting those unusual challenges, in the correct order, is what a successful finished basement depends upon.
Three Kinds of Moisture
Every project has a foundation of sorts, some primary condition that must be present beforehand for success to happen in the end. And when it comes to finishing a basement, the fundamental feature is freedom from water in all it’s forms. This may seem too simple to mention, but judging by all the musty, mouldy and wet finished basements I’ve seen, it’s a founding condition that’s misunderstood all too often. In fact, absolutely dry conditions are a make-or-break feature of any basement-finishing project. It’s not too much to say that you’re better off with an unfinished basement than a finished-but-wet one. Mould, mildew and compromised indoor air quality are more of a health problem than meets the casual glance, a problem that often originates from basement moisture.
Freedom from liquid water is what most people envision when they think of a dry basement, and of course this is important. As expectations for comfortable hobbit-like basements become commonplace, new homebuilders everywhere are pulling out all the stops when it comes to moisture control. And the successes they’re achieving warrant a closer look, even if you’re not building from scratch. All the leading-edge water control strategies are worth knowing about for retrofit situations, too.
If you walk around the open foundations of new home subdivisions, you’ll usually see more than just the traditional around-the-wall network of weeping tile. Fabric-shrouded flexible tiles now routinely extend into rigid drainage pipes that carry water away more effectively underneath basement floors. And, even more importantly, this system is designed to work in tandem with a product that’s generically called an air-gap membrane. This dimpled sheet of flexible, synthetic material is fastened to the outside of damp-proofed foundation walls, creating free vertical channels for liquid water to run downwards into the drainage tile at the bottom of the footings. This free space greatly reduces the amount of water pressure that can build up against the wall in wet weather, making it much more likely your basement will stay dry, even when it pours for days. If you ever have occasion to dig down to the footings around your basement wall, don’t backfill without first installing an air gap membrane.
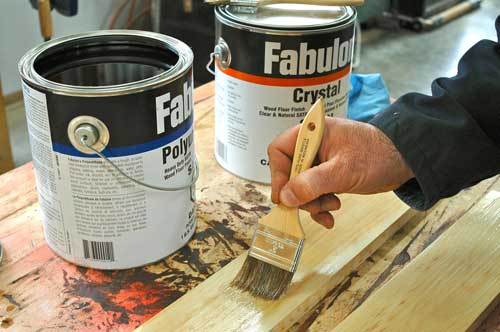
You should also guard against being fooled by the fact that concrete is bulletproof. It may be tough, but water vapour just laughs. Since concrete is very porous, it regularly allows substantial inflows of moisture to pass into your basement from water held in the earth. Sure, the damp-proofing applied to the outside of foundation walls before backfilling is designed to control that, but for how long? That’s why it’s important to add another layer of damproofing protection on the inside of all concrete floor and wall surfaces. Once they’re covered with finished wall and floor coverings, you’ll never get a chance to coat them again. There are many products around. One that’s worked well for me personally is called Xypex.
There’s one more thing you need to understand about basement moisture control. Humid, summertime air can be a potent source of moisture, triggering the formation of mould and mildew even if all other moisture channels have been blocked. That’s why it’s important to keep basement windows shut during hot weather. A dehumidifier is the best way to keep basement moisture levels down between 65% to 80% R. H. at a time of the year when open windows will let relative humidity skyrocket to 100%.
You can diligently apply all the waterproofing strategies you want, but there still can be no absolute guarantee that, say, a week of torrential downpours won’t overwhelm your bulwarks. And since that possibility looms over every basement, you should consider adopting what I call moisture-tolerant finishing strategies.
Keeping Warm
Maintaining warmth in a finished basement during a Canadian winter is a unique insulating and heating challenge that demands different strategies than what makes sense above ground. And the first thing to consider is the floor treatment. In most situations, above-ground floors aren’t insulated at all. They don’t have to be because both their top and bottom surfaces are warm. But not so with your basement. Although you could install a traditional wooden subfloor on the concrete slab, that’s not the best option for two reasons. First, it uses more wood than necessary, even if you only use 2x3s on edge for the sleepers. Second, and perhaps most important, any kind of wood sitting against a concrete basement floor is vulnerable to moisture damage and rot.
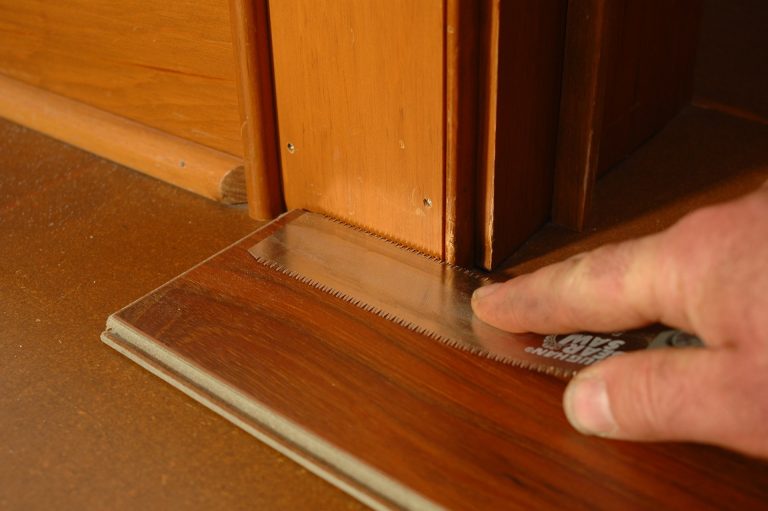
The best basement floor insulating strategy uses a layer of 1 1/2 or 2-inch thick extruded polystyrene foam placed against the concrete, with a layer of 5/8-inch plywood on top. The whole thing is secured with Tapcon screws torqued directly into pre-drilled holes in the concrete. Here’s a tip for creating maximum moisture resistance within the foam layer. Secure each piece of foam to the concrete with several swipes of construction adhesive, leaving about 1/2-inch of space between each sheet. When the glue has dried, fill the sheet-to-sheet gaps with spray polyurethane foam. A hacksaw blade (without the handle) makes it easy to slice off the berms of hardened foam that rose above the surface as it cured. You’ve now got a continuous, impervious layer to apply your subfloor to. Interested in the look of wood on your finished basement floors? Consider laminate flooring instead of solid wood. Laminates are much more moisture-resistant, especially if you choose edge-glued styles.
The same advantages that apply to foam floor insulation also apply to basement walls. A rigid foam product called Styrofoam Wallmate includes channels for 2x lumber that serves two purposes. First, the wood acts as a big washer, allowing the foam to be held to the wall with screws or concrete nails. And since the wood sits proud of the inside face of the walls, it serves as an effective nailing surface for interior wallboard.
One more thing about basement heating comfort. If you’ve got a forced air system, go to the trouble of extending cold air return ducts to the finished basement area. This creates the necessary air flow required for even heating.
Good Light
In what has become a classic work of architectural literature, the six authors of a book called A Pattern Language describe 253 different parameters they discovered in a world-wide search for communities, neighbourhoods and buildings that work well on all levels. And pattern #159 has something important to say about your plans for a finished basement. It shows how and why it’s so important to have light coming into a room from at least two sides, and explains that “perhaps more than any other single pattern, [this] determines the success or failure of a room.” Those are pretty strong words, especially when you consider the limited possibilities for bringing natural light into the average basement.
I know from experience that the light-on-two-sides principle makes a big enough difference that it’s worth pursuing, however troublesome. And the first step towards that goal is a floor plan that makes such a thing possible, at least for some rooms. That’s why it’s important to try and avoid long hallways that don’t touch exterior walls and windows. Also, consider deepening and widening existing basement windows, and building new concrete window wells with flared sides to admit more light. Yes, it’s a lot of trouble, but who wants to live in a dark hole, illuminated only by artificial lights?
Another lighting option to consider are Solatubes. This Australian invention uses a round, rooftop lens to direct daylight into a reflective metal tube that can be directed anywhere underneath. If you’ve got a storage area above a spot in your basement where you’d like to have light, consider piping some down from the roof. I know from experience that Solatubes are very effective. You can even fit them with internal light fixtures wired to come on when neighbouring lights are switched on.
With all the practical reasons in favour of finished basements, it’s no wonder the feature is so popular. Just be sure to do first things first, always respect the hazards posed by water and moisture vapour, and think like a hobbit.


I hope you found this content useful!
Your generous support helps me produce more practical, hands-on content that I hope you’ll find useful.
Steve Maxwell