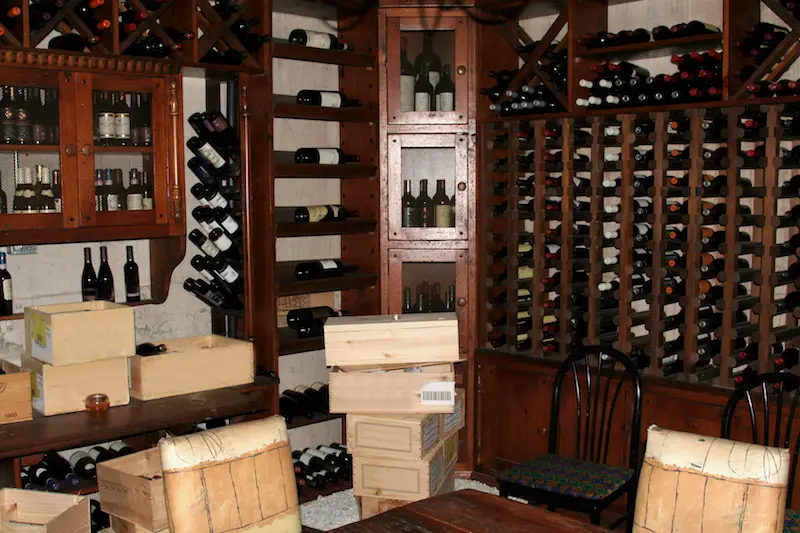
A while back a reader asked me about an insulation strategy for a wine cellar he’s building, and my advice applies to people looking to build root cellars for storing produce, too. The best approach involves insulation and, perhaps, a couple of pieces of obscure but useful hardware if you really want to go all out. Here’s the original question:
“How should I insulate a 10 x 14-foot basement space for a wine cellar I’m building? Three walls face soil and a rec room is outside the fourth. All walls are currently insulated. The door is hollow wood and I’m aiming for a 13ºC (55ºF) temperature year round.”
- Reading Time = 3 1/2 minutes

As many people know, storing wines optimally involves not only the correct temperature, but also a stable temperature. Ideally you don’t want temperatures to rise and fall beyond a few degrees of variation. It’s this need for stability that ultimately leads to the need for some kind of energy input for your wine cellar. Seasonal outdoor temperatures vary so much in most places that you’ll either need to add a little heat in the winter or a little cooling action in the summer, depending on the insulation strategy you follow. Let me explain how all this works in a real-world example.
To Insulate or Not?
I use my unheated, stone basement as a root cellar and its masonry walls are completely uninsulated. There’s 24 inches of stone, then soil. Even in the hottest summer weather, temperatures down there never get warmer than 15ºC (59ºF). That said, temperatures in the basement regularly sink to 2ºC or 3ºC (35ºF to 37ºF) during the coldest winter weather. That’s close to ideal for storing root vegetables, but too cold for wines. Adding insulation to the exterior walls of a basement cellar will boost wintertime temperatures closer to ideal, but it also means that summertime temps will probably be too warm.
If you’ve got the patience, an excellent option now is to watch temperatures next time winter unfolds. Plot cellar and outdoor temperatures on a graph until the end of spring and you’ll learn a lot. I suspect that your best option will be to remove the insulation on exterior walls, adding the little bit of heat necessary to bring the temperatures up during winter. The other alternative is to retain the insulation and use electricity to cool the cellar in summer.
Two Pieces of Key Hardware
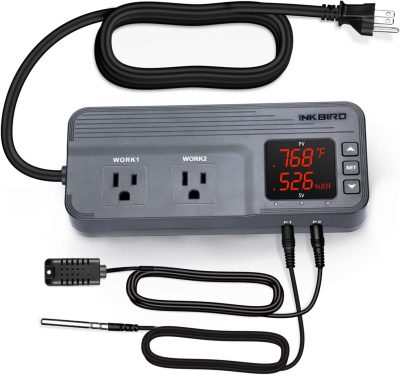
Adding heat or cooling to control a cellar space to a narrow temperature range is much easier with two pieces of hardware. Something called an Ink Bird is one. This is a precise temperature control device that works with any portable electric heater. Plug the heater into the Ink Bird, and then the Ink Bird into an outlet, then you’re done. The Ink Bird has a digital readout that’s graduated in tenths of a degree so it affords much more precise temperature control than any built-in heater thermostat could deliver. That’s an Ink Bird that you see below, and this particular model can handle up to 1800 watts – more than enough for any standard plug-in electric heater. Most Ink Bird models only handle up to 1100 or 1200 watts, so make sure you get the ITC-608T model.

As for cooling, consider something called a CoolBot. This is a control device that’s made especially for fooling a window air conditioner so it can cool down to temperatures not normally attainable by window air conditioners. The Coolbot line is excellent, with a long track record of reliability. It doesn’t work with all window air conditioners, so check out the compatibility chart before counting on a particular AC unit to work. That’s the simplest CoolBot you see below. There’s a fancier one that allows WIFI monitoring of temperatures with your phone.

Regardless of the equipment you choose, it’s essential to have a good, prehung, insulated exterior residential door for any basement cellar – for wine or produce. These seal exceptionally well, and that’s vital. It’s always an advantage to keep basement air out of any cellar you take seriously.
 I hope you found the information here useful. Please consider helping me cover the cost of creating and publishing content like this. Click the “buy me a coffee” button below for a safe, simple and fast way to make a contribution. Thank you for helping to keep this website up and running.
– Steve Maxwell


