In at least one way, wooden residential fences are like most other home improvement projects. The more you put into design and construction details, the more you get back. This article is for people who want a lot from their new fence. So if you’re satisfied with the standard designs common everywhere, there’s not much point in reading further. You’ll be well served by the how-to pamphlets stacked near bins of galvanized fence clips at lumberyards everywhere.
If you’d like a distinctive, beautiful and long lasting fence — either built yourself or hired-out — then I have things to show you. None of these will save you time or money, but they will point you towards a great fence. And in the long run, that’s often the most economical approach when satisfaction, durability and property values are factored into the equation.
Ideas about Fencing Durability
No matter how beautiful a fence is, if it leans, sags or rots, it’s a failure. There’s almost nothing you can do to fix these problems once they emerge. That’s why durability is crucial and must be incorporated into fence design from the ground up. Here’s what I recommend:
Set the Fence Posts
![]()
- Start from below the ground. One of the main durability factors is how you set fence posts into the ground. Although not all fences need to be anchored in concrete, load-bearing ones — like those on each side of a gate or at corners — should be.
- But even this isn’t necessarily enough to stop frost-induced heaving posts. This distinctly cold-climate hazard can even raise posts that extend down below the frost line through a process known as frost jacking. If the outer edges of the concrete are rough, or if the top of the concrete plug is larger in diameter than the bottom, frost around the surface of the soil can grip posts and raise them incrementally, a little each year, eventually making your fence really wonky. Avoid problems by digging the fence post hole slightly wider at the bottom than the top, with sides that are as smooth as possible. If you really want to be sure nothing moves, wrap black poly plastic sheets around that part of the post that will be below ground. This makes the posts too slippery to be gripped on the sides by frost.
Treat Regularly with Wood Preservatives
- Pressure-treated lumber is a popular fence-building material. Be sure the use posts rated for ground contact. Not all pressure-treated lumber is.
- Regardless of whether pressure-treated posts are set in concrete or dry-packed soil, consider coat below-ground parts with an addition coat of liquid wood preservative before installation.
- Choose a design approach that allows preservative to be re-applied around concrete-encased posts every few years. This maintenance routine takes a few minutes work once a year, but it yields longer fence life. In posts below ground that I never want to rot, I fasten a length of copper water pipe along the sides with holes drilled in the side before pipe installation. The top of the pipe extends above ground with a cap on it. I pull the cap off, pour preservative down the hole, then replace the cap.
Corrosion-Proof Hardware
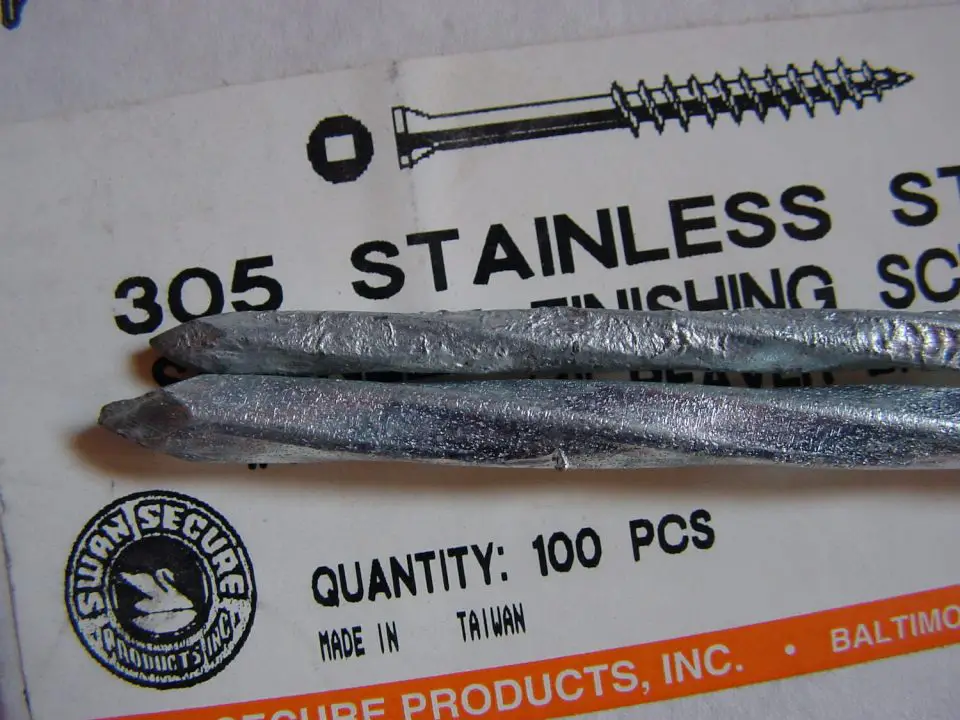
The durability of fasteners like nails and screws are another thing to think about, and there’s more here than meets the eye.
- Stainless steel versions are the best, although they’re not cheap, the good news is that they’re more readily available now than they were just a few years ago. One Canadian retailer that offers stainless steel nails and screws by mail order is Lee Valley Tools (800-267-8767).
- Why not go with the old standby, hot-dipped galvanized? These are less expensive than stainless, and they do endure the elements well, but only if their brittle zinc coating doesn’t get chipped off under hammer blows. Wherever this happens you’re no better off than if you’d used plain steel nails. Not only does this raise the possibility of ugly rust streaks, but it can also reduce fence life if nails and screws corrode enough to break.
- Recommendations released by the American Plywood Association (253-565-6600) show that preservatives in treated lumber can have a highly corrosive effect on non-stainless steel fasteners in high moisture applications. Why take the chance just to save a few bucks?
A Few Ideas about Fencing Style

Great fences can look quite different from one another, yet they have one thing in common. Even though they’re typically made from standard construction lumber, they don’t look like it. And this visual trick springs from tasteful application of details like curves, trim and post caps. Think of your fence as a permanently-rooted piece of furniture for your lawn and you’ll get the picture.
Plan Ahead
You’ve got to be a very experience fence builder to improvise a beautiful design on site. That’s why you need to sit down with a pad of graph paper or a graphics program on your PC and settle on details using scale drawings. The greatest advantage of this is the piece of mind it instills. If your fence looks good on paper, you can build with confidence. Start by deciding on the big things like:
- Fence height
- Post height
- Post spacing
After these are settled, refine ideas for:
- Post design
- Picket shape
- Gate styles
Premium Visual Details
- One of the best places to add visual detail is on corner posts and posts flanking gates.
- Many traditional cabinetmaking details, like flutes, crown mouldings and caps, can be applied here, helping vault your fence to premium status.
- And even if you do nothing else, the tops of posts absolutely demand attention. You just can’t leave them cut off square. One simple, yet elegant approach is the pyramid top. Four angled cuts, 25 degrees from square, converging at a centre point makes an attractive finale.
- The sliding compound mitre saw is an ideal tool for cutting these facets, but you’ll still need to fine tune the cuts with a belt sander.
- For more ideas, check out www.gardenstructure.com, the best online source of fence, gazebo and arbour plans that I’ve seen. It’s also Canadian. Wooden Fences by George Nash (Taunton Press 1999), is another valuable design resource.
Fastening Rails to Posts
As you decide on fence design, there comes a point when horizontal rails must fasten to the vertical posts you’ve installed.
- The quick-and-dirty approach to this challenge involves toe-nailing the rails, or securing them to posts with metal clips.
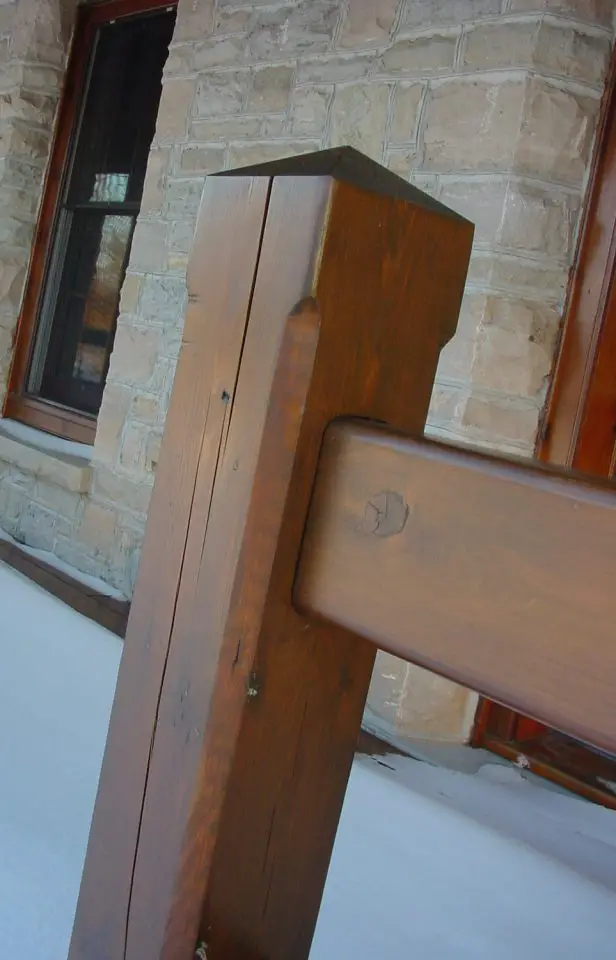
- An elegant alternative uses routed pockets that surround the ends of the rails and hold them in place. A shop-built plywood routing pattern makes quick work of this operation. That’s what you see above, and though it’s part of a deck railing, the same approach works well for fences.
Proven Outdoor Wood Finishing Recipe
Finishing outdoor wood has a pretty low success rate. Most efforts result in peeling, grey surfaces in just a few years. But if you’re looking for a durable, cinnamon-brown outdoor wood finish with a proven track record, here’s one that’s worked well for me since 1991.
- Sand all surfaces using a random orbit sander spinning an 80-grit abrasive.
- Apply one coat of Sikkens Cetol 1 in the dark oak colour and let dry for at least 24 hours.
- Apply two coats of Cetol 23 in the natural colour, allowing 24 hours between coats.
- Examine the surface in about a year, looking for areas of finish failure, especially around knots and corners. Every 18 to 36 months, depending on finish condition, lightly sand the entire fence with a variable-speed, random orbit sander (at medium revs) and a 220-grit abrasive. Wipe dust from the surface, then apply a single, maintenance coat of Cetol 23.
Fence Tools You’ll Need
Premium fence building is more like cabinetmaking than rough carpentry, so you’ll need tools up to the challenge of delivering precise, stylish results. Here are some of the less obvious choices and how they’re useful for building fences:
A 2 1/2 to 3 1/4 hp plunge router: A full-featured router that takes bits with 1/2-inch shanks allows you to create mortises and add important edge details using the bits mentioned below. One of the best ways to dress up ordinary construction lumber is by edge routing.
Big router bits: Wooden fences are enhanced by the same routed details that cabinets are, but since fences are bigger, you need bigger bits to do the work. Especially useful bits include:
- 2 1/4-inch diameter chamfer bit for angling the edges of 6×6 and 8×8 posts.
- 1 1/8-inch diameter flush-trimming bit (with bearing on the shank) for routing mortises following a shop-cut pattern
- 3/4-inch radius roundover bit allows a full bullnose profile to be put on standard, 1 1/2-inch thick lumber for caps and post trim.
- 5/8-inch core box bit puts large flutes down the face of posts. Works especially well with an edge guide-equipped router.
- 1/2-inch diameter flush-trimming bit with bearing on end. The best tool for shaping curved pickets using a table-mounted router following a pattern.
Sliding compound mitre saw: This makes it fast and easy to prepare square or angled cuts with great precision. The best models include a blade that tilts both left and right, with a crosscutting capacity of 12 inches. Can be used for precision trimming of multiple parts with stop block arrangement.
Large random orbit sander: All outdoor wood finishes need to be applied to sanded lumber for longest life. Premature peeling is often the fate of finishes applied to unsanded lumber, especially if it’s pressure-treated. And since the scale of fences is large, you need an aggressive sander to cover all the ground in a reasonable time. Random orbit sanders based on angle grinder-style motors work best in this application. An 80-grit abrasive is the only one you need to use. Anything finer will reduce absorption of finishing liquid into the wood surface.
Spring mitre clamps: These are C-shaped pieces of spring steel with sharp ends. They’re designed to hold the ends of mitred trim joints tight.
Thickness planer: Even though you probably won’t be building a fence out of rough lumber, a portable thickness planer is still useful. It can boost the quality of your work by allowing precise control over stock thickness.
Consider quality and ever step, and you’ll be surprised how good your fence looks, and how long it stays looking great.


I hope you found this content useful!
Your generous support helps me produce more practical, hands-on content that I hope you’ll find useful.
Steve Maxwell