Back in 1990, I prepared my first outdoor wood finishing sample to see how a particular product actually performed in the sun, rain and weather over the long haul. Since then I’ve tested many other finishes in the same way, but that first product – something called Cetol – is still my favourite of its kind. When I want a rich, dark exterior finish that lets wood grain show through on non-deck surfaces, I open a can of Sikkens Cetol. The name is actually slightly different these day – Sico Proluxe Cetol – but the product is the same. This article explains why I like it and how to use it successfully.
I was reminded of Cetol as I set up one of my sons to use this same stuff to finish some outdoor wood at our place a few summers ago. Joseph was home from university in Tennessee, and he’s taken on the challenging job of finishing the underside of a verandah roof. It’s a nasty, dirty job because it’s all overhead work. We were originally going to finish this part of our verandah as indoor space with a finished ceiling, so I didn’t prefinish the rafters and roof boards before construction, as I did for other sides of the house. But we recently changed our minds about closing this area, and that’s why the rafters and underside of the roof boards need to look good now that they’ll remain fully exposed.
Furniture-Grade Results
There are longer lasting opaque outdoor products available than Cetol, but nothing I know of lasts as well while also letting wood grain show through. Cetol is not for decks, but it is designed for every other kind of outdoor wood application — fences, siding, windows, railings and trim – and the underside of verandah roofs. Although this product isn’t perfect, Cetol has a lot going for it when it comes to specific applications.
I’m always wary when products are promoted as simple and easy to use. In my experience, the necessary price you pay for quality and success in the real world is a certain degree of complication. Cetol is a case in point. It’s not a one coat product either, but rather a process that involves two different and related products applied in a specific way over specifically prepared wood.
The Cetol Process

Pre-application sanding is key with Cetol, but more on that later. The first application step involves brushing on a base coat of Cetol 1. This is a very thin viscosity formulation that’s designed to soak into the wood and get a good grip on fibers. Subsequent coats –either one or two more – are completed with the companion product called Cetol 23 Plus. What you get is a furniture-grade finish that lasts at least three years in full sun. After that you need to strip, sand and reapply. The underside of the verandah roof I finished with Cetol during construction still looks brand new after 20+ years in the shade. It’s the sun that really ruins outdoor finishes.
My relationship with Cetol has not been without problems, and one of the first and most annoying had to do with the gorgeous, dark colors that this product is available in. You can buy Cetol in a range of shades from an antiquey yellow (they call this Natural) right through to a chestnut brown (called Dark Oak). Being partial to dark wood, I applied multiple coats of the Dark Oak on two exterior pine doors I’d built – the first real projects I finished with Cetol. The initial coat looked great, the second began showing less than pleasant brushstrokes, the third was goopy looking enough that I ended up stripping all three doors and starting from fresh.
The problem, as I eventually realized, was simple. Multiple coats of any dark, translucent product shows brush strokes like crazy where thicker and thinner applications meet side-by-side. Though frustrating at the time, this trouble led me to discover a process that yields the richest looking outdoor wood finish I’ve ever seen. And as you’d expect, it does involve a small amount of complication.
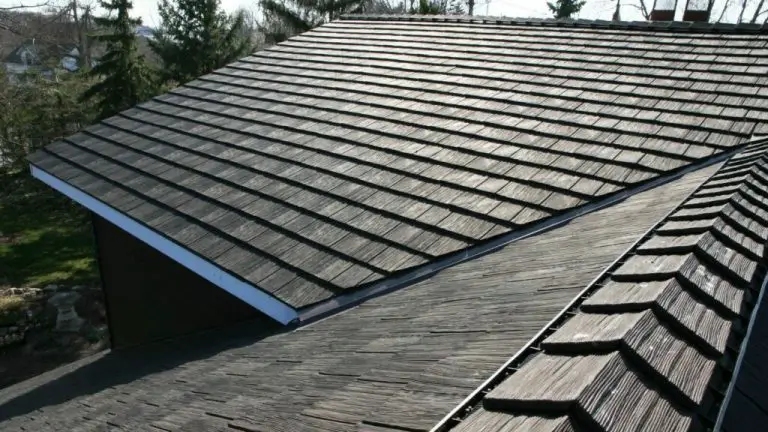
These days my favorite Cetol procedure involves applying the first coat of Cetol 1 in Dark Oak, with another coat or two of Cetol 23 in what’s called the Cedar colour. Since this first coat soaks completely into the wood, there are no areas of dark and light streaking because there is no surface film to vary in thickness. The cedar colour does have pigment, but not enough to create streaking. The result is a stunning cinnamon brown colour that gets a lot of attention. That’s what you see here in the photo above.
Pre-Application Sanding Is Key

There’s one more thing you need to understand about Cetol. Sanding wood surfaces is essential for success, both on new wood and before applying maintenance coats on oldeer wood. Sand with an 80-grit abrasive in a random orbit (or detail sander in nooks and crannies) to open wood pores and allow the product to soak in as far as possible. Later, at the first signs of finish failure after a few years, sand the area lightly with a 120-grit abrasive to remove any loose finish and scuff up the remaining old stuff before freshening up the surface with a single coat of Cetol 23. You can extend the time between stripping and a complete refinishing job this way.
These days few consumer products remain available for more than a few years, let alone more than 30. Good thing there’s at least one corporation out there that knows enough to keep a good thing going.


I hope you found this content useful!
Your generous support helps me produce more practical, hands-on content that I hope you’ll find useful.
Steve Maxwell