If you’d like to install crown molding at your place, this article and video can help you do it better and faster. You’ll learn tips that I’ve found helpful over four decades of working with wood, including a recent innovation that solves one of the main challenges of installing crown molding well especially if you’re doing the work by yourself. After reading the crown installation tips below, check out the Q&A’s later in the article.
Crown Molding Installation Tip#1: Decide on crown molding width

This might seem obvious, but no one can accurately decide on the ideal width of crown for a given room without trying samples in place. As you’re shopping for crown, buy one length of several widths and styles, then have someone hold them up at the ceiling back home while you see what it looks like. Besides varying widths, the different profiles of crown can have a big effect on the look of your room. Don’t cut these test pieces and you’ll be able to return them to the store later, when you pick up all the crown you’ll need for the entire job. You’ll find 5-1/4″ width crown molding makes a dramatic change to rooms with 8′ to 10′ ceilings. For ceilings 10′ to 12′ you may want to consider crown molding with a 6-1/4″ width
Crown Installation Tip#2: Decide on painted or stained crown molding
Choosing a finishing approach might seem like a strange thing to think about early on like this, but it’s essential. That’s because it’s much more challenging to install stained crown rather than painted crown. Filler is one reason. Paint-grade crown allows the use of latex caulking to fill gaps invisibly before painting, so a tight fit on joints is much less critical than with stained trim. No filling is possible with stained trim of any kind, so you’ve got to be spot-on with all joints. Cost of materials is another issue. Crown molding destined to be stained needs to be milled from high-quality solid wood, which is much more expensive than the MDF or lower-grade woods that paint-grade crown is made from.
Crown Installation Tip#3: Obtain two essential tools

A miter saw (also called a chopsaw), offers the single biggest advantage you can give yourself when tooling up for crown installation. The ability to accurately cut trim at precise angles is key. Unless you like frustration, don’t even attempt to install crown without a big miter saw at your disposal.
Some kind of cordless nailer is a huge advantage when installing crown, too. Sure, you could secure crown with hammer driven nails, but that’s a lot harder than it looks. Why? The simple reason is that it takes two hands to drive a nail, leaving no hands to hold up the crown conveniently. Air nailers of the sort you’d use for crown installation are not made because it’s physically tiring to drive such small nails, but rather that an air nailer needs only one hand to operate. In addition, air-driven nails don’t knock the crown around like hammer blows do, so accurate joint alignment is much easier.
Crown Installation Tip#4: Mark walls for nail location ahead of time
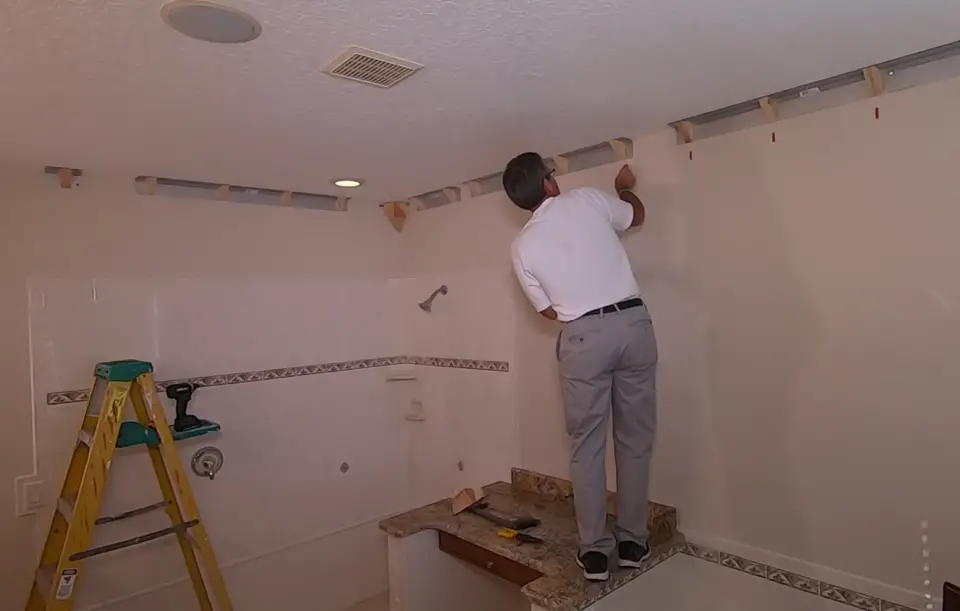
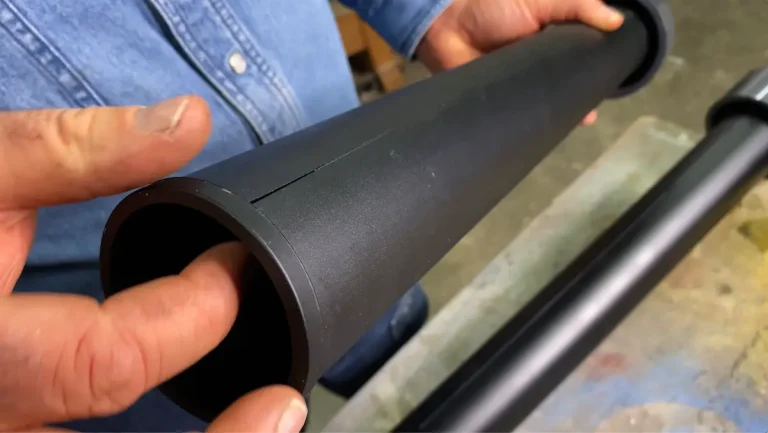
Marking for nail locations sounds simple enough, but it rarely is simple without help. That’s because underlying residential wall frames rarely offer all the wood you need for securing crown with nails. Sure, there will probably be some hidden framing wood available for nailing into, and this should be marked and made use of whenever possible. But since all crown is held in place with finishing nails or brads driven into the underlying wood frame underneath the drywall, drywall alone can’t help. That’s where an invention by a Florida dentist named Athas Kometas helps a lot.
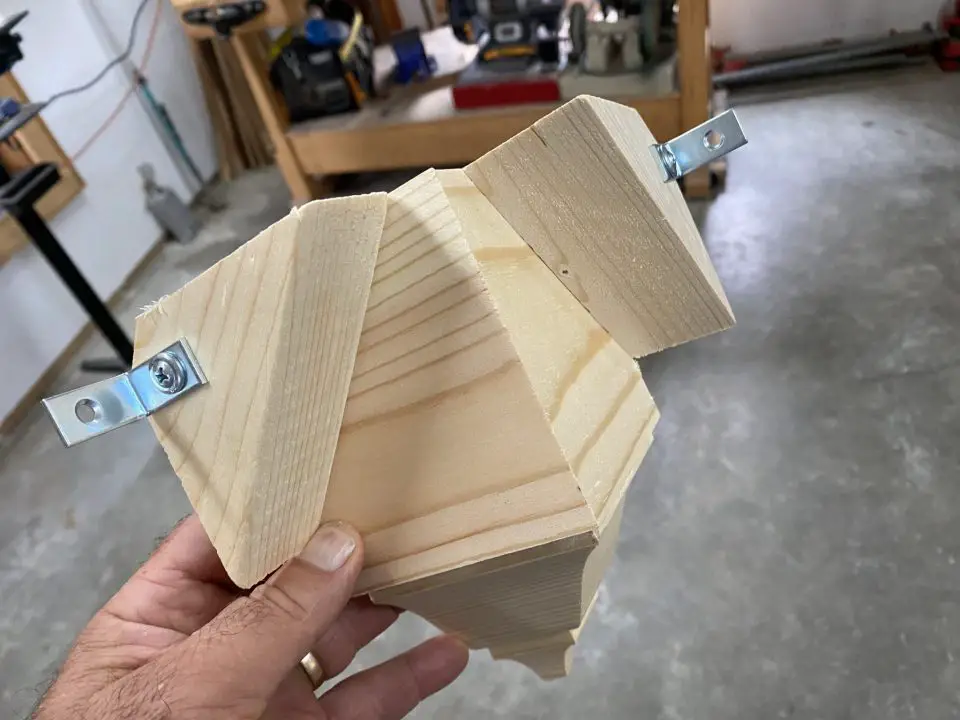
Athas didn’t like the way crown molding installations were often a hit-and-miss affair, all for lack of underlying nailing surfaces. That’s why he invented something called EZCrown. It’s strips of bent sheet metal backing that holds angled wooden nailing blocks. The sheet metal is easy to anchor to the wall, in turn making it easy to nail the crown molding to the angled blocks. Click below to meet Athas by video (he’s an interesting guy), and to see EZCrown in action. Athas’s favorite method of marking block locations are those narrow sticky notes made to mark specific spots in books. These stickies cling well to the wall, but peel off easily without leaving marks behind. Pencil marks work well also and can be painted over. Do not use pen.
Click below for a video about how EZCrown works and greatly simplifies the installation of crown molding.
- Video Watch Time = 5 1/2 minutes
Crown Installation Tip#5: Consider corner blocks
The trickiest part of crown molding installation is getting the joints tight, and this is why corner blocks were invented. They sit in the corners, eliminating the need to make angled cuts on trim. Simple square cuts are all that’s required. Sure, you still need to get the length of a given piece of crown correct, but this is a lot easier than getting a complicated compound angle correct as well as overall length.
Frequently Asked Questions
If you’re new to crown molding, learn some useful basics with the most common crown molding questions people ask.
What is the purpose of crown molding?
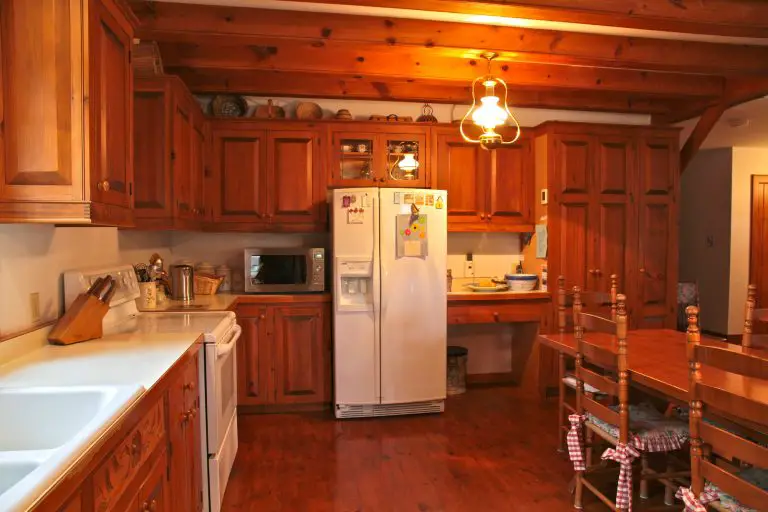
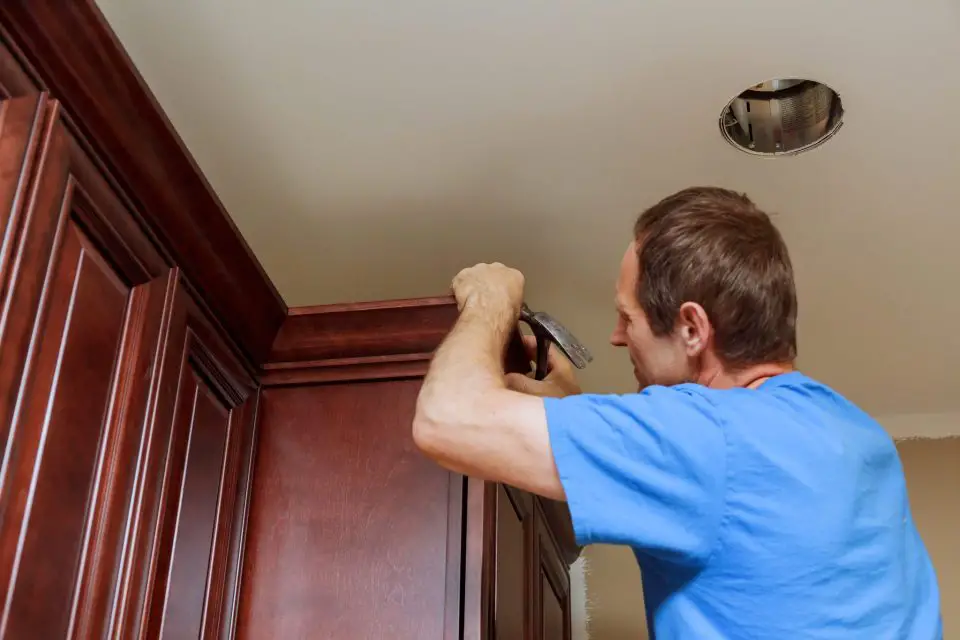
Crown molding (also spelled “moulding”) is a specific type of interior trim that’s typically found where ceilings meet walls or on the top end of cabinets. Crown molding adds a lot of elegance and refinement to any room. It gets its name from the fact that it’s always installed up high in a room or on top of elegant furniture. Crown molding is always angled, too. This makes the profile details easier to see and appreciate while standing on the floor.
Is crown molding outdated?
No, far from it. Crown molding is a classic trim detail that’s been used for centuries in many parts of the world. And though crown fell out of favor in most places during the 1960s and 70s, it began to come back in the 80s. Crown molding may be more commonly used today than at any other time in history. It’s easier and cheaper to install and looks fabulous.
What is the average cost of crown molding?
This varies a lot depending on the width and shape of the crown chosen, and whether or not the installation is made to be painted or stained. You can expect to pay $5 to $25 per running foot of crown molding installed.
What is the difference between molding and crown molding?
Crown molding is just one specific type of molding used inside homes and buildings to make the space look better. There are hundreds of different kinds of moldings in the world. Crown is just one. Molding like this is also sometimes called “trim”.


I hope you found this content useful!
Your generous support helps me produce more practical, hands-on content that I hope you’ll find useful.
Steve Maxwell