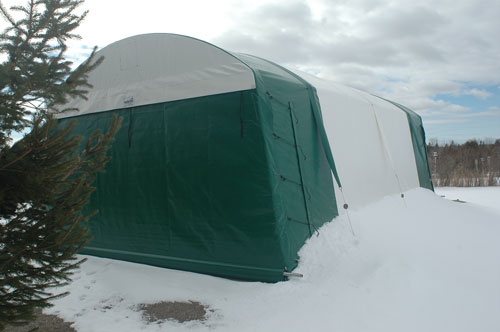
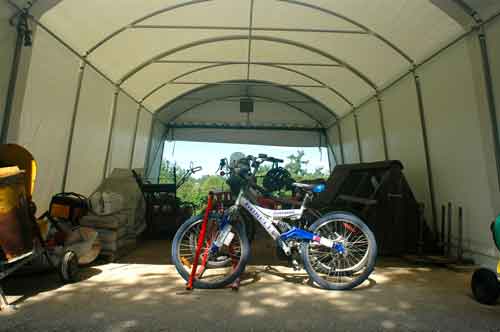
In 2010 I bought and installed a 16′ x 30′ fabric shelter at my place and it’s still working perfectly. I’m sure you’ve seen the kind of thing I’m talking about. Whether they’re called portable garages or temporary shelters, all follow the same design concept. A series of inverted, U-shaped metal frames bolt together to form a skeleton that holds up a cover to keep out rain, snow and sun. It’s still working well for me.
 Besides being a lot less expensive than rigid storage buildings, fabric shelters need no fancy foundation. They’re also quick to put up (mine took two days working on my own) and can be taken down and reassembled at a new location fairly easily. The Canadian-made unit I bought cost about $8 per square foot.
Designs come in sizes as small as 12-feet x 16-feet or as large as 100 feet wide and as long as you can pay for. But choosing from this range of sizes is only the smallest of the decisions you need to make if you think a fabric shelter might be for you. There are several other issues that are more important, and more difficult to see ahead of time.
Most of the advertisements for fabric shelters show them installed on a nice, flat, green lawn, and while this setting makes for a good photo session, it’s not practical in the real world. Besides the fact that shelter locations are rarely level and well drained on their own, there’s also the issue of traffic. Moving in and out of the shelter turns grass into a muddy, bald mess.
All this is why I put down a level base of compacted fill – in my case limestone screenings. This is as economical as aggregate gets in my area, it resists settling, and packs down into something that’s almost as solid as concrete. If you do bring in fill to refine your shelter location, take the trouble to level it properly using a laser level or builder’s transit.
Probably the most challenging issue is dealing with the range of shelter qualities offered by various manufacturers. I could have paid less for a shelter than I did, but I ended up choosing a product by an east coast company called Cover-Tech (888.325.5757). Their units impressed me with large diameter frame tubes and, most importantly, the heaviest fabric covering I could find – 14 ounce.

I ended up special-ordering two other features that have proven especially valuable. I paid a little extra for a system of ratchets for tightening the tarp onto the bottom edges of the frame, instead of the standard system of nylon laces woven through grommets along the bottom of the tarp. A rollup door at each end of the shelter (the one door system is standard), makes it easy to access stuff, without shuffling everything else around to get at it. I really wouldn’t know what I’d do without doors at both ends. I consider this essential. There’s no other convenient way to get to stuff at both ends of the shelter otherwise.
The Cover-Tech shelter was quick to put up, economical to buy compared with a frame building, shows only minimal deterioration over the last seven years. It even looks pretty good, too. The only issues so far has been the seam on the bottom of one of the roll-up doors. It let go, probably because of the steady winds we get here on Manitoulin Island, where I live. I got that fixed by a sail repair shop, and all is good.
Click below to watch a video I made about the shelter a short while after I put it up.


