Cutting, shaping and joining. These are the three basic woodworking operations, and I often find myself extending them beyond wood to metal. Materials like mild steel, brass, copper and aluminum offer practical and creative possibilities that wood can’t match. Looking back over the last year, I’ve cleared my workshop to make room for fabricating metal brackets for hydronic heating pumps, I’ve modified the metal frame of a fabric shelter, made metal benches and fixtures for woodworking machines, modified metal rods for supporting a sliding video camera set-up, re-machined the worn edges on a chainsaw bar and gave the exhaust system on my old F150 pickup a new lease on life right outside my workshop doors. In the time it would take me to drive to a muffler shop, I was enjoying that good old feeling of self-reliance that kicks in when you save money with your own hands.
Before I fill you in on the basics of how I work with metal, you need to think about safety. This is the first and most important thing to keep in mind when it comes to metalworking, and safety means three things: protect your eyes, protect your ears and never do any metalworking operation that generates heat or sparks near wood, finishing materials or anything flammable.
Simple Metal-Cutting Options
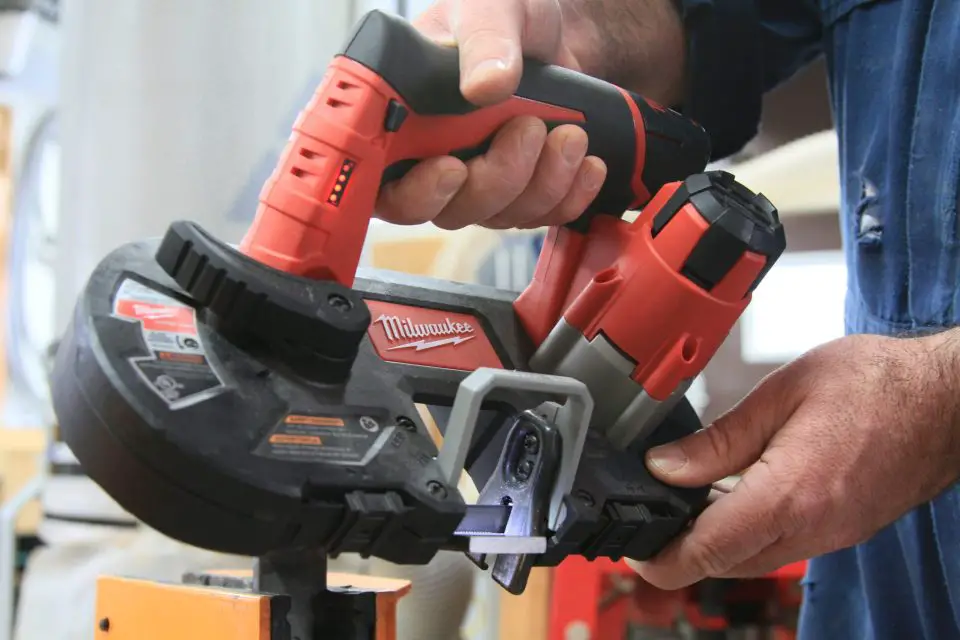
For years I used a hand-operated hacksaw for general cutting of metal rods, pipe, tubing and narrow pieces of steel, but a small, simple and highly effective power tool now allows me to work more accurately and effectively.
Portable, corded power hacksaws have been around for a while, but the little Milwaukee 2429-20 12V cordless model has become my tool of choice for crosscutting most metal parts up to 1 3/4” wide. It’s small, light, quiet and highly controllable. Most importantly, this tool lets me cut much more accurately than with any hand-held hacksaw.
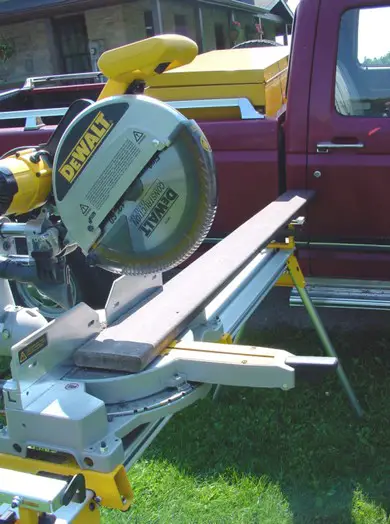
Cutting metal with a chopsaw is an option that too few workshoppers know about. Blades are made that allow ordinary chopsaws to crosscut thick, non-ferrous metals like aluminum and brass. A sliding compound mitre saw is also an excellent tool for cutting the thin aluminum used for soffit and fascia work. Specialized, slow-speed chopsaws are made to spin carbide blades that create cool, smooth, burr-free cuts on mild steel rods, tubing and pipe.
Is the job you have in mind more complicated than you can tackle with your tools and experience? You might consider farming the work out to a custom CNC services company. The letters CNC stand for “computer numeric control” and it allows computer-designed shapes to be rendered in metal by computer-controlled machines.
Shaping and Drilling
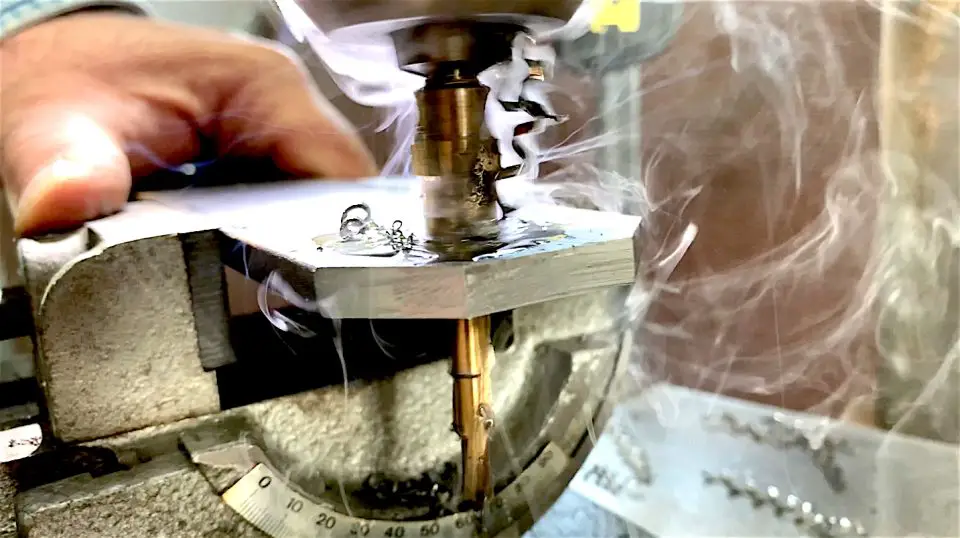
A grinder, hand files and a drill press are the tools I use most often for shaping metal. When it comes to drilling holes in metal, you also need more than just ordinary twist bits. Even those that work well on wood may dull quickly with metal. My favourite high-performance twist bits are the Irwin cobalt models. They chew through steel easily and last a long time. Invest in a small bottle of cutting oil for longest drill bit life. It’s different than lubricating oil, so don’t substitute.
The best way to drill holes in metal larger than about 3/16” is incrementally, boring with slightly larger bits until you work up to the finished hole size you need. Drilling big holes in metal all in one go is an invitation for injury because the bit is likely to catch the metal as it exits the bottom of the hole, and avoiding this problem is where step bits are so helpful. Each one is made incrementally larger along its length, allowing holes to be drilled progressively, without the need to change bits all the time. Step bits are also the only safe way to drill big holes in sheet metal. More slender, tapered step bits are ideal for drilling through thick steel with a drill press. Click here see a step bit in action boring a large hole in mild steel.
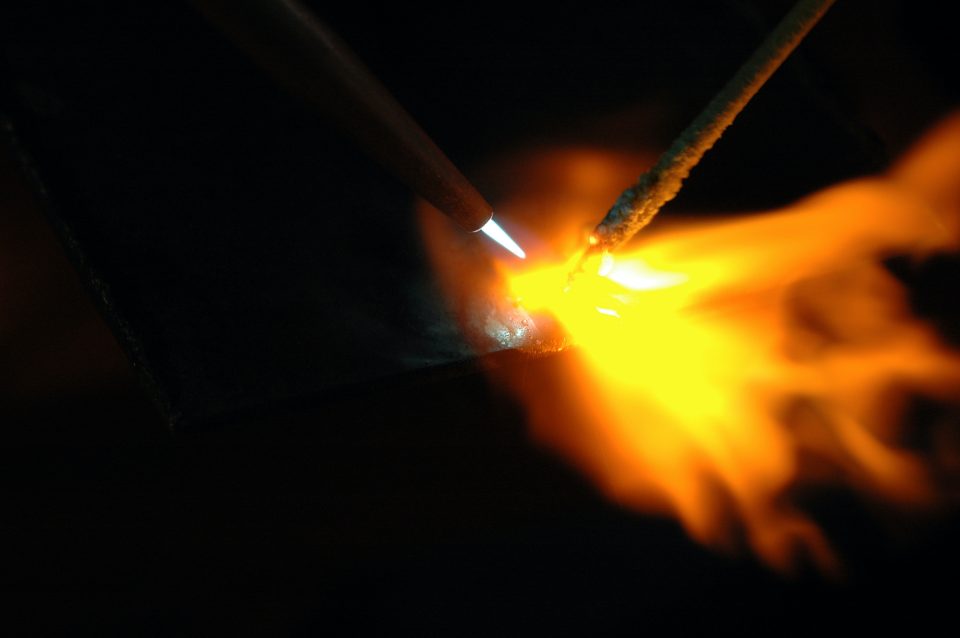
Joining Metal

I usually turn to my Lincoln Power MIG 210 wire-feed MIG welder for joining steel because it works so well. Even if you have experience with traditional arc welders, you’ll be amazed at the beauty of a good wire-feed weld. The handiest models combine an electric arc with inert gas flowing over the weld area to make a beautiful, smooth, blemish-free weld bead even if you have little or no experience. Wire feed welders can join metal ranging from 1/16” thick up to more than 1/2” thick. Machines like this come ready to weld steel, but accessories also allow easy, neat welding of aluminum.
If you’ve got a little woodworking experience, then you’re halfway to success with metal. Give this material a try and you’ll probably find it a natural, useful and satisfying little sideline like I do.
Got questions? Email me at [email protected]


I hope you found this content useful!
Your generous support helps me produce more practical, hands-on content that I hope you’ll find useful.
Steve Maxwell