Sharpen Up: A fast, simple and effective way to makes chisels, planes and pocket knives work like they should
While we’ve never had access to as many great home improvement power tools as we do today, optimal DIY results sometimes still depend on very sharp chisels and hand planes. There are no professional services that can handle this job for you, and while sharpening remains a difficult mystery for many people, it doesn’t have to stay this way. Using  the simple equipment and an unconventional technique I’ll show you here, it takes three minutes or less to hone an edge sharper than a new razor blade.
You first need to realize the difference between grinding a tool and honing it. Grinding is a coarse operation that creates the proper angle between two metal surfaces that form a cutting edge. The operation usually happens on an electric grinding wheel. If the bevel angle is too blunt, the edge won’t be able to slice, no matter how finely it’s honed. A bevel angle that’s too thin leads to a weak edge that chips and breaks quickly. Standard chisels and plane irons work well with a bevel angle of 25º to 30º. Honing is different than grinding, and it involves polishing a properly angled edge so it’s smooth enough to slice. Where you might only have to reshape a tool by grinding every few years, honing might be required half a dozen times during a day of heavy use.
My 3-Prong Sharpening Technique
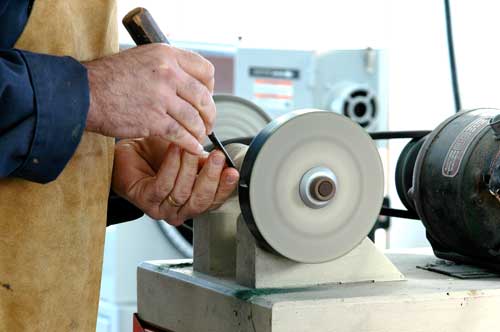
 My approach is different than traditional honing methods because it doesn’t involve sharpening stones. Instead I use a hard felt buffing wheel spinning on a bench grinder. Instead of rubbing the edge of a chisel or plane iron against a sharpening stone by hand, you hold the tool edge stationary against the spinning felt wheel after it’s been charged with a fine, waxy, abrasive polishing compound. Even though the abrasive involved is so fine it feels like a wax crayon, you’ll get sharp results very quickly because there’s so much movement of the felt wheel against the stationary tool. Buffing is a powerful technique, but there are three details you need to put into practice for success.
- Find Hard Felt: Jeweler’s supply outlets and fine woodworking tool suppliers all sell hard felt buffing wheels, and this is what you need. Choose a wheel that’s six to eight inches in diameter, and 3/4” to 1” wide. The best wheels are almost as hard as a piece of wood and slightly fuzzy when new. The best compound for sharpening looks like a rectangular block of crayon wax. It’s designed for use on hardened steel and is often green in colour.
- Direction is Key: The main thing to understand is that buffing must always occur with the edge you’re honing pointing in the same direction as wheel rotation. This is opposite to the orientation usually used for grinding, and the difference is vital. Since the edge of even the hardest felt wheel is slightly compressible, it can catch and throw the tool you’re honing unless the edge is pointing in the same direction as wheel rotation. Don’t get this detail wrong.
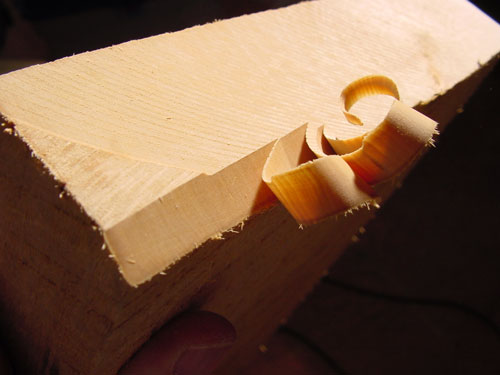
- Hone Both Sides: Next, it’s essential that you hone both surfaces that come together to form the edge, and that these surfaces be tangent to the surface of the wheel during the process. This allows the metal to get polished, without rounding over the cutting edge and making it too blunt to slice. Failing to maintain a correct honing angle is
 the mistake beginners usually make, so don’t get discouraged if your shiny chisel doesn’t cut. You’ll need to grind the edge of the tool back to the correct angle, then try again. Check out my video of buffing in action.
Sharp tools might seem unnecessary, but they’ll always be important for optimal results installing doors, trim or any kind of finish work. The fact that a little modern equipment speeds the job of keeping chisels and planes sharp is one way old things and new can work well together.


I hope you found this content useful!
Your generous support helps me produce more practical, hands-on content that I hope you’ll find useful.
Steve Maxwell