A stylish and attractive kitchen backsplash always adds a unique detail to your kitchen space and crafts a ‘complete’ look. However, if you are looking for a budget-friendly option to update your kitchen, peel and stick tiles can be a good choice.
Peel and stick tiles for flooring were introduced in the late 60s. In the current era, these tiles are gaining popularity as cost-effective and durable options for home decor. Before jumping into the ideal installation process of peel and stick tile kitchen backsplash, let’s deep dive to get an insight into this kind of tile and its benefits. They’re easy to install, for sure.
What Are Peel And Stick Tiles?
Peel and stick tile is an adequately thick sticker made of vinyl, resin, gel, glass, or stone – with a texture of porcelain, ceramic, marble, or natural stone tiles. These tiles come in sheets with an adhesive backing covered with thin plastic that can be peeled off before installation.
 |
 |
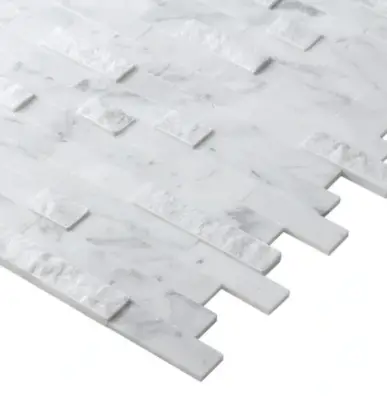
| White Gray Peel and Stick – Classic Linear – Carrara Marble Mosaic Tile – MTO0213 | |
These tiles are a budget-friendly option to restyle your kitchen backsplash. Besides, if you are a DIY-savvy homeowner with a passion for renovating your kitchen on your own, peel and stick tiles are the right fit for you. You don’t need mortar or thin-set backing and any specialized tools. All you require is careful surface preparation, making it suitable for the tile installation – and there, you have a glorious kitchen backsplash to add spice to your kitchen decor!
Benefits of Choosing Peel and Stick Tiles for Kitchen Backsplash
-
Easy to Install: These tiles are easy to install compared to ceramic tiles, porcelain tiles, glass mosaic tiles, or marble mosaic tiles. The entire installation process is convenient and time-saving. In one of the following segments of this article you’ll find the installation steps.
-
Can Be Installed On An Already Tiled Surface: If you want to renovate an already tiled surface, you can install peel and stick tiles on them; just ensure that the surface is smooth and even. This feature brings you the freedom to have a new style statement for your kitchen backsplash without taking the pain to remove existing tiles.
-
Available in A Lot of Variety: Peel and stick tiles are available in various colors, patterns, styles, and designs. You can choose the best match according to your desired decor theme, color scheming, and style elements while redesigning your kitchen.
Browse through this excellent product range of peel and stick tiles to explore diverse varieties. A renowned mosaic tile manufacturer ruling the tile market for over twenty years offers an extensive tile range.
-
Easy to Clean and Maintain: It’s simple to clean and maintain these tiles. Simply use a damp sponge or a cotton cloth to clean it, or you can use warm water and soap. Avoid using any abrasive materials and harsh chemical cleaners.
Steps to Install Peel & Stick Tile Kitchen Backsplash
Installing the peel and stick tile is hassle-free and fun. The steps mentioned below can aid you in making the installation procedure quick and long-lasting. Let’s dive into the process of installing a peel and stick tile backsplash:
-
Material and Tools Required: It is recommended to keep the following material and tools handy before you begin your installation:
- Peel and stick tiles of your choice
- Sponge or cotton cloth to clean the wall
- Cleaner/ Soap water / degreaser for wall preparation
- Sealer – Skim coat
- Sandpaper (Medium-grit) for sanding
- Suitable Primer
- Measuring Tape
- Hard Ruler
- Pencil or Marker
- Utility Knife for cutting the tiles
- Safety Gear – Mask, Eye Protection, Gloves.
- Kraft paper to make profile templates before cutting tiles
-
Preparing the Wall: Preparing the wall behind your stove is a significant task to ensure a clean, dust-free, evenly surfaced wall before installing the peel and stick tiles.
Initiate the installation process by cleaning the wall with a sponge or cotton cloth using a suitable degreaser. It will remove dust, spills of oil, water, and other stains. If you find any scratches or small pits on the surface, seal the wall with a skim coat and let it dry thoroughly. Sand the wall using medium-grit sandpaper to level any irregularities and improve the adhesion of tiles with the surface.
You can apply primer after cleaning, but this step is optional. But note that applying primer can improve the adherence between the tiles and the surface. After applying the primer, let the wall dry for an adequate time.
Remember, you can tile the kitchen backsplash:
- Up to your cabinet bottoms,
- Up to the top of the windows, if any, or . . .
- Take it to the bottom of your ceiling as per your preferences.
You need to plan out the tiling surface and determine the tile quantity before placing your tile order.
-
Rough Outline: Before starting the actual tile installation, it is advisable to create a rough outline of the tiles on the wall/surface. Measure the wall surface and draw horizontal and vertical center lines as a guide for installation.
According to the size of peel and stick tiles to be installed, draw a rough outline on the entire wall using a hard ruler and pencil. You can mark the tile dimensions measuring the width and height with the measuring tape for your convenience.
The rough outline will help you determine if you need to cut the tiles to match the corners of the wall and kitchen cabinets. Outlining the surface also helps you to gauge the tile quantity before installation.
- Cut the Tiles If Required: The rough outline you have prepared gives you an idea about the tiles you need to cut. You can design kraft paper templates tracing those profiles beforehand to have the exact shape and size of the tiles ready with you.
Now, unpack your peel and stick tiles and thoroughly check their color and quality. You may need to cut the jagged edges of the first tile with a utility knife. Ensure to check the tile quantity to have the necessary tiles to complete the installation in one go.
Peel and stick tiles are not hard as other tiles. You can keep the kraft paper template on a tile piece and mark the outlines with a marker. Then, cut the tiles smoothly by using a utility knife. Be careful so that the tile doesn’t leave chips and check not to have any irregular edges while cutting.
Always wear a mask, gloves, and eye protection to avoid injuries or mishaps while cutting tiles.
-
Removing Adhesive Backing: Once you have the surface ready, remove the thin plastic cover from the back of the tiles. Use a knife to peel an edge of the cover from the back. Then, you can peel the entire tile cover gradually. Don’t keep all the tiles peeled at first. Peel the tile backing one by one – as you go on sticking them to the backsplash wall.
-
Sticking Down the Tiles: It is recommended to start your tile installation from the center – keeping your horizontal and vertical center lines as a guide. It is similar to painting a geometric drawing. Installing from the center makes the process convenient for you. You will have the cut tiles as per profile (if any) installed by the end.
Position the tile on the outlined shape and press it smoothly with your hands to stick it evenly throughout the tile area. Likewise, go on sticking the tiles one after another till you cover the entire backsplash wall. There is no harm in beginning your installation from the lower right corner. However, starting from the center will make the installation sequence convenient for you.
Summing Up
Installing a peel-and-stick backsplash is mess-free, convenient, and time-saving. Choose appropriate peel and stick tiles for your next kitchen remodeling project, install them easily following the steps explained here, then get an exquisite kitchen area at your home.


I hope you found this content useful!
Your generous support helps me produce more practical, hands-on content that I hope you’ll find useful.
Steve Maxwell