- Video Watch Time = 9 minutes
If you’ve wondered of using rough lumber for your woodworking projects, this article is for you. It covers the two main machines you’ll need to make this happen: the jointer and thickness planer. These work together to transform rough, irregular boards into the kind of precise project parts that you need for success, though using the jointer requires more knowledge than the thickness planer. In this article and video lesson I’ll explain how to use both machines to boost the precision of your woodworking, but first a little background.
Jointer & Thickness Planer: The Dynamic Duo


These days you can now buy the best bench top thickness planers and small-scale jointers the world has ever seen, but machinery alone isn’t enough to deliver results. Even many experienced woodworkers don’t know how to use these tools together properly. There’s more to success than just pushing rough wood in one side of a machine while smooth wood comes out the other. You’ve got to understand the process of truing boards to see how a planer and jointer work together as productive partners in your quest to get the best from solid lumber. The effort is worth it.
The first thing to understand is that most pieces of wood aren’t what they seem to be. Even smooth-planed stock often has enough of a warp or cup or twist to cause problems when you’re building the best. Jointers and thickness planers work together to remedy the fact that solid wood has a mind of its own. Besides being rough and not necessarily straight as it comes off the sawmill, solid wood planks only get more wonky as they dry. And this is why the first tool you need is a jointer. Even though the tool industry markets planers much more heavily than jointers these days, you’re better off with a jointer if you can afford only one of these two tools. The reason is accuracy.
The Jointer: A Misunderstood Tool
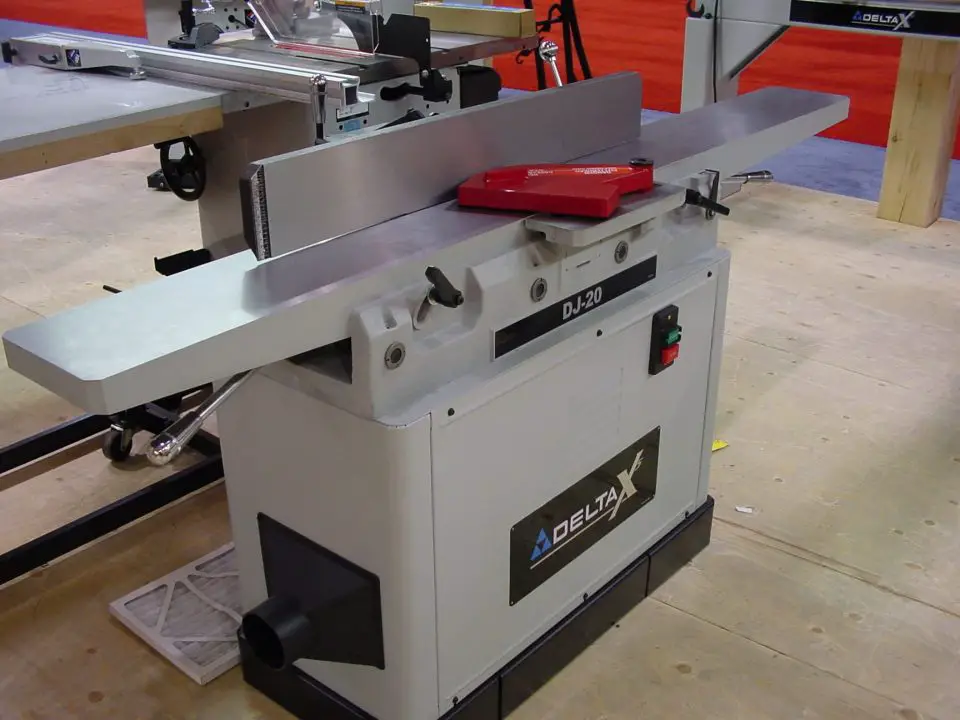
The job of a jointer is to impose flat faces and edges on boards that range from obviously warped to seemingly okay. And the first step involves machining one face of a board. The video below shows the complete process of using a jointer:
Before you go any further, you need to turn to the owner’s manual that came with your jointer if you’re not completely sure about its safe operation. Jointers in particular can pose safety hazards if you don’t know how to use them. That’s why you must become familiar with safe operating procedures before you can master the machine and become productive with it.
Jointers are rated by the width of horizontal bed they have, and most machines fall into the 6-inch class. This number refers to the maximum width of wood that can be machined on a jointer during the first step of the milling operation – jointing the face of a board. Check your manual to become familiar with the location and purpose of the infeed table, the outfeed table, the depth of cut adjustment, the fence (and its locking mechanism) and the spring-loaded safety guard. Your owner’s manual will explain all these things, but not actually how to use the machine effectively. That’s what you’ll get coming up.
Step #1: Jointing a Flat Face
Adjust the depth of cut on your jointer to take a 1/32” to 1/16”-deep bite, then place your board face down on the infeed table of the bed, with the cupped side of the board facing downward (if it has one). This is important since it’s vital that the board not rock from side to side while jointing. With safety glasses on your nose and push stick in hand, switch on the machine and move the wood straightforward across the spinning cutterhead. One pass might be enough to expose fresh wood across the entire face of the board, or it might take two or three passes if the wood is warped. Continue until fresh wood is present across the entire face of the board.
As you work, don’t worry about the fence right now. It’s irrelevant to the current operation, so steer clear of it for the time being. All you need to do is push your board over the jointer without it rocking or shifting on the bed during the process. When the bottom face of the board is completely fresh, switch off the machine and relax for a minute.
Step #2: Jointing a Square Edge
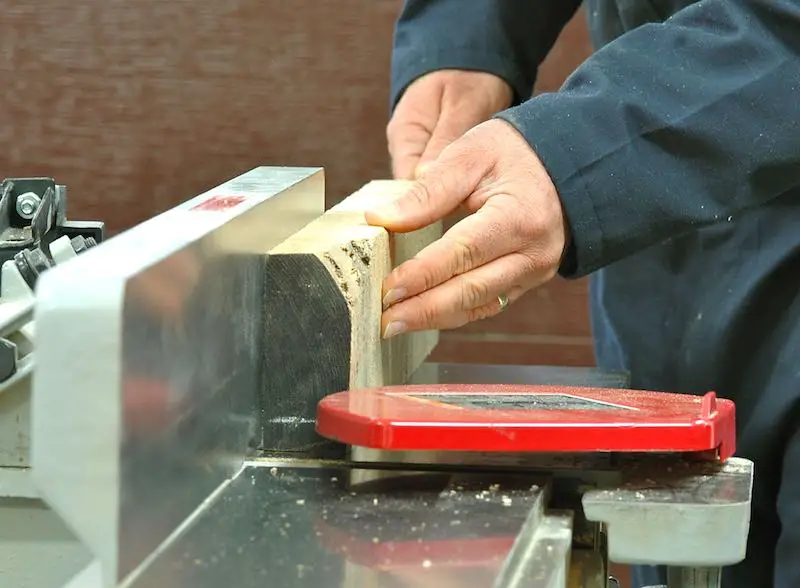
What you’ve got now is a true face on one side of your board. It’s flat and smooth and free of twists, but these qualities don’t offer much on their own. You also need to create an edge that’s precisely 90 degrees to this true face. And for this you need the fence you just ignored, and you need it adjusted properly.
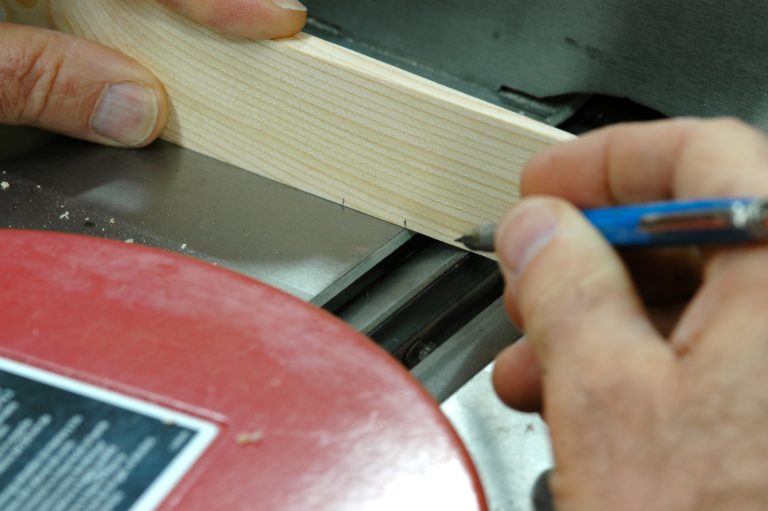
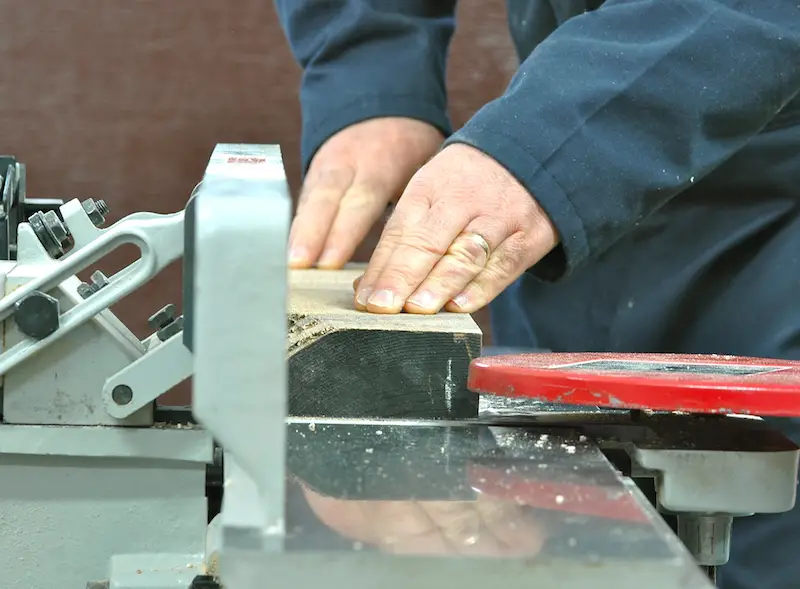
In this case “properly” means 90 degrees to the jointer bed, and for this adjustment get yourself an all-metal machinist’s square. Models that carry the BSS 939 rating are guaranteed to be accurate to within 0.0001” over the length of the blade, and that’s more than good enough. Loosen the fence locking mechanism, hold your machinist’s square on the horizontal bed, then align the fence with the square and lock it in place. Re-check the fence in several places along its length. Some jointer fences are warped a bit, so they won’t offer a consistently square setting all the way along. If you’ve got to choose, adjust the fence so it’s square to the bed nearest the cutterhead. That’s one of my machinist’s squares below, used to assess the end of a board.

Next, place your board on the jointer, but this time hold the newly milled face tight against the fence. This time around it’s the fence not the bed that the wood must rest against during operation. Take as many passes as necessary to get the edge of your board completely milled, then switch off the jointer and grab your machinist’s square again. Hold the square against the wood and check the accuracy of your edge. It’s the accuracy of this milled edge that matters, not the setting of the fence. Occasionally you’ll need to adjust your fence slightly out of square to get a spot-on square edge on your wood.
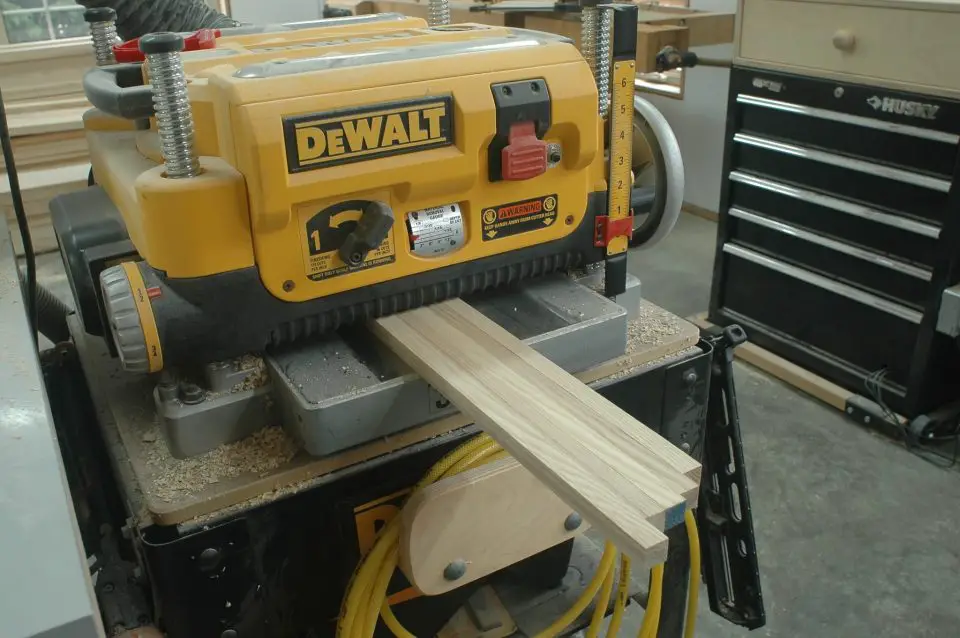
Step #3: Planing the Second Face Flat
Until now, all milling operations involved the jointer, but now it’s time to use your thickness planer. With one flat face already in place, you can now plane the second face accurately. Set your planer to take just the lightest of initial cuts on the unmilled surface, then complete repeated planing passes until your wood is the thickness you want.
Right now a question has probably popped into your mind: “Couldn’t I have just run my wood through the planer first, instead of starting on the jointer?” The answer is maybe, but only if your board was flat and true to begin with. The problem with a thickness planer is the high-pressure drive rollers inside the machine. They’re quite effective at temporarily pushing down and flattening a warped board as it passes under the planer knives. This means that the board is flat while shavings are removed, but then springs back to its warped shape as soon as it leaves the machine. You can plane a cupped or twisted board away to nothing and it will never become flat. This doesn’t happen with a jointer because the wood is moved along under very mild pressure from your hands. No flattening. Sometimes, when you’ve got a nice board that you don’t want to cut to 6”-wide, it’s okay to bend the rules and begin with the planer. Just realize that you’ll probably be sacrificing at least a little accuracy.
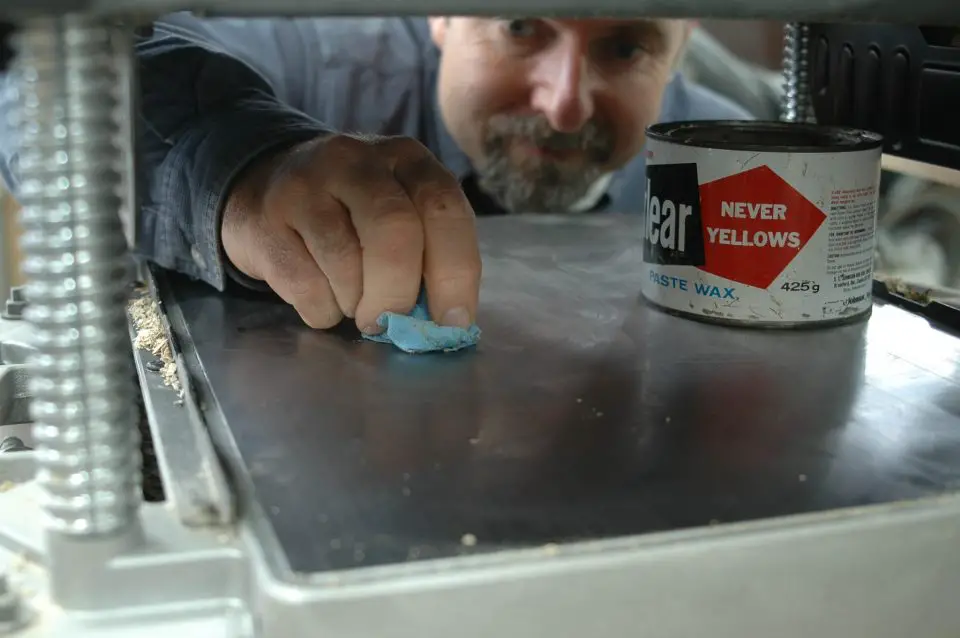
Over the last few decades I’ve used many different kinds of benchtop thickness planers, and without exception they all lose the ability to feed boards automatically sooner or later. As the surface of the support table picks up resin and gum, it increases friction that stops boards from moving through the planer as they should. They stick and stop moving. If this is happening to you, shut down, unplug the tool, crank it open as wide as possible and apply paste floor wax to the support table. It’s a small thing, but it makes a huge difference.
Step #4: Saw Your Board to Final Width
This last step involves the table saw, but for optimum results you need to carefully adjust the angle of the blade so it cuts exactly 90 degrees. This is another job for your machinist’s square. Will you be edge-gluing your milled board with others to create a tabletop or door panel? If so, test-fit all your boards together on the bench without glue, looking for any edge-to-edge mismatch and gaps. You’ll need to re-joint those edges that don’t come together tightly without lots of clamping pressure.
Once you’ve got all the boards in harmony, mark them up so you can bring them back together in the same orientation with clamps and glue. When a nice even bead of glue rises up from each joint under the first bit of clamping pressure, you’ll start to see why it’s worth taking the time to get boards flat, true and square.


I hope you found this content useful!
Your generous support helps me produce more practical, hands-on content that I hope you’ll find useful.
Steve Maxwell