- Video Watch Time = 7 1/4 minutes
Finishing outdoor wood isn’t like most things in life. When you turn the ignition key in your car, the engine almost always starts; flip the wall switch and the light goes on; turn on the TV and the picture is bright, the sound clear.
While most things around us work well, this isn’t necessarily so with finishes for decks, fences, and lawn furniture. If you’ve tried it, you probably know what I mean. I’ve wrestled with the outdoor wood challenge for more than 40 years, and I’ve come up with strategies that make a big difference. That’s what you’ll learn in this article.
The Problem With Outdoor Wood
Isn’t it true that most outdoor wood is grey and old-looking? And if it has any finish at all, it’s probably peeling, right? Beautiful outdoor wood is rare enough that it attracts attention, begging a question: Why can’t manufacturers deliver the same level of reliable satisfaction in this area as we’ve come to expect in other areas of consumer life?
It’s not that the wizards of industry ignore your plight as an owner of outdoor wood. They’re trying hard to give you products that deliver long-lasting beauty, while demanding a minimum of effort on your part. They know the pay-off will be huge. But the challenge is great. Very great. The following realities all conspire to make protecting outdoor wood the most difficult finishing application on the planet:
- Rain
- Snow
- Ice
- Wide swings in temperature and humidity
- Variations in wood chemistry
- Under-foot abrasion
- Sunshine
As challenging as all these things are, the challenges are not insurmountable. Here’s what you need to know to be among the select few who understand what to expect from various outdoor wood finishing options, and how to coax the best out of them.
Outdoor Wood Finishing Reality#1: Be Prepared
It’s easy to believe that the crucial step in creating a long-lasting outdoor finish is the choice you make at the store shelf, but this isn’t entirely true. Although product selection is important, the best outdoor wood finishes in the world will fail prematurely if you simply brush them on and hope for the best. It’s not that easy.
Beautiful outdoor wood is as much a product of effort as chemistry and there are two reasons why:
- New lumber has low absorbency: The fast rotation of the planer knives that transformed rough lumber into the gleaming boards you bought also left behind a legacy of crushed, burnished fibers and heat-sealed surface resins that prevent finishing liquids from penetrating deeply enough to gain a good hold. This is called mill-glaze and it causes more premature finish failures than any other cause. More on how to remove mill-glaze later.
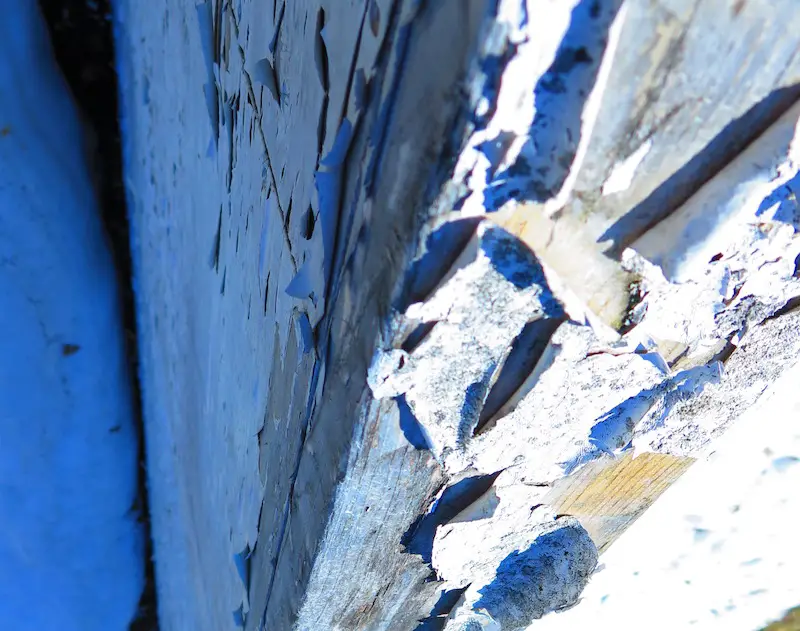
- Old wood has challenges, too: The grey colour that lumber develops as it’s exposed to the elements is surface deterioration caused by sunlight and microbes. The cellulose is breaking down under ultra-violet attack and beginning to detach from the underlying wood. That’s why it’s grey. Look closely and you’ll see how weathered wood is often fuzzy. Although this surface is certainly absorbent, it’s not physically strong. This means that even though finishing products can soak deeply into old wood, the grip they gain on loose fibers isn’t sufficient. The finish layer ends up coming off, along with the wood fibers underneath. Peeling results.
Outdoor Wood Finishing Reality#2: Prepare to Work
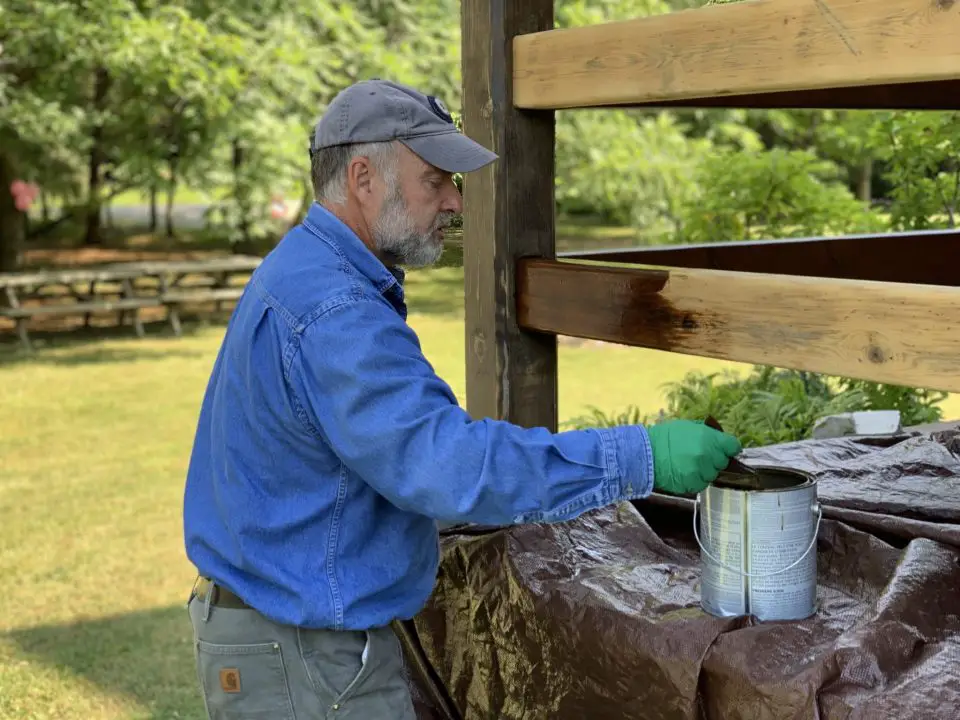
Now that you’re wise to the reasons why pre-finishing preparations are vital, I’ve got some bad news. Getting the job done is a lot of work. Yes, we’ve all seen those in-store display ads where happy people are obviously gaining tremendous pleasure hosing down their deck with “Miracle Wash”, or some such wunder-product. But the reality is that getting ready to finish outdoor wood properly takes work. Probably more work than putting on the finish itself. The trick is to do the preparations well, so you don’t have to do it again any time soon.
During a five year study, the world’s largest finishes manufacturer – Akzo Nobel Coatings – conducted field trials in Canada and the US to determine which pre-application technique maximized the absorbency of outdoor wood surfaces. Chemical deck wash products and mill glaze removers were pitted against pressure washing regimes using plain water and water-plus-cleaning agents. The results of sanding were analyzed, too.
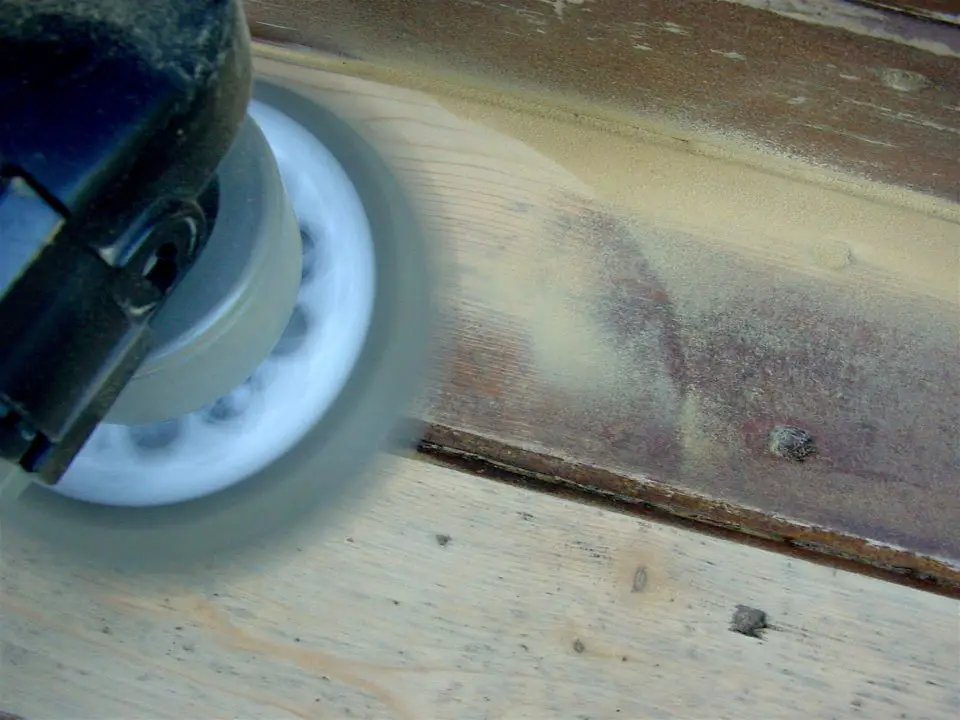
The winner? Surfaces prepared with a 60-grit abrasive powered by a walk-behind, square-buff sander yielded the greatest absorbency and subsequent best finish durability. You can get the same results in corners using a 60-grit abrasive in a random orbit sander. The 60-grit surface was nearly 1/3 thirstier than the same wood scoured with a 120-grit abrasive.
Bottom line: Sanding new wood is the best way to make your new finish last. It’s especially important with any finish that forms a film. Even expensive, brand-name film-forming products will probably peel if applied to wood that hasn’t been prepped.
Outdoor Wood Finishing Reality#3: Pressure Washing Is Useful
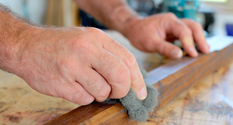
Sanding outdoor wood isn’t something most people do before finishing, because it’s seems like so much work. That’s because it is. Pre-application pressure-washing is much more common, and though there are hidden drawbacks to this process, I like pressure washing when it’s part of an easier sanding regime.
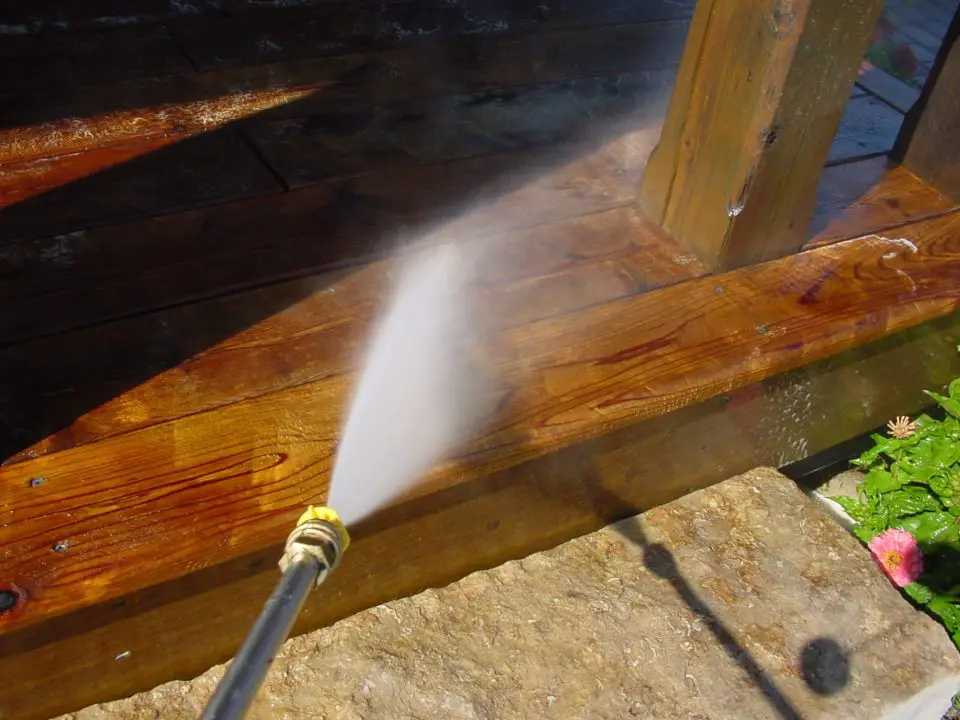
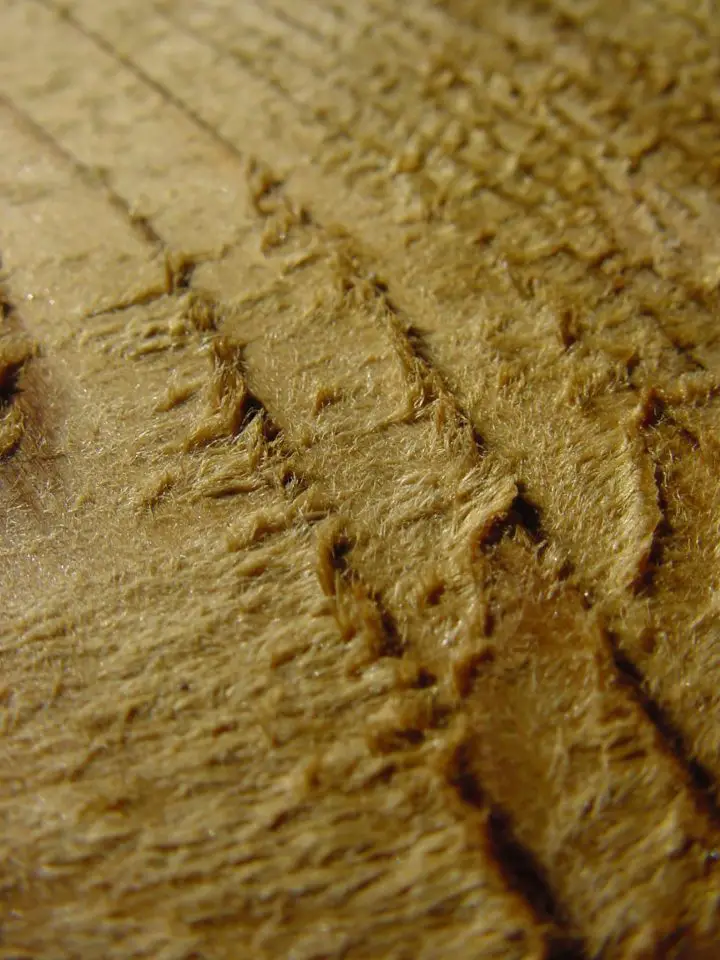
The main danger when pressure washing wood is the creation of surface fuzz on the surface. Pressure-washers typically deliver a stream of water at 1500 to 2000 psi — more than enough to loosen surface fibers, especially with soft deck woods like cedar and treated pine. Remember how I told you old, grey wood is absorbent but not strong? The same goes for fuzziness created by pressure-washing. That’s what you can see below.
All this said, there’s one situation where pressure-washing remains king, at least as an initial treatment: removing old finishes. The 3 or 4-inch wide spray swath at the end of the water wand lifts old, flaky finishes faster than anything else, especially after softening with a water soluble paint stripper. Although there will probably be some stubborn patches behind, pressure washing is still the best way to make an initial attack on an ugly, old deck or fence. But there’s still the fuzziness problem. That’s why it’s important to let pressure-washed surfaces dry thoroughly, then sand off the troublesome fuzz with a random-orbit sander. Use a machine with an angle-grinder design. They’re more powerful than palm-style sanders, so you’ll cover ground more quickly. And the good news is that sanding a pressure washed surface goes much more quickly than sanding without first pressure washing.
Outdoor Wood Finishing Reality#4: Understand the Finishing Product You Choose
Think of the array of outdoor wood finishing options as positions on a dial. You can click the dial into one of four spots, depending on your expectations of performance and your willingness to roll up shirt sleeves and get sweaty.
1) Clear, No-Film Repellents: Easiest to apply, but offers the least protection
These products soak in completely, are extremely easy to apply, and obscure the natural appearance of wood the least. This appeals to lots of us who want to preserve that new-lumber look, though there is a trade-off: minimal protection against dirt and a short re-application period. You’ll find it necessary to re-apply these products at least annually, and even still, some graying and cracking of wood will probably develop. Ongoing testing done since 1991 at the USDA’s Forest Products Lab in Madison, Wisconsin reveals that clear, no-film products based on paraffin oils and preservatives are among the most useful.
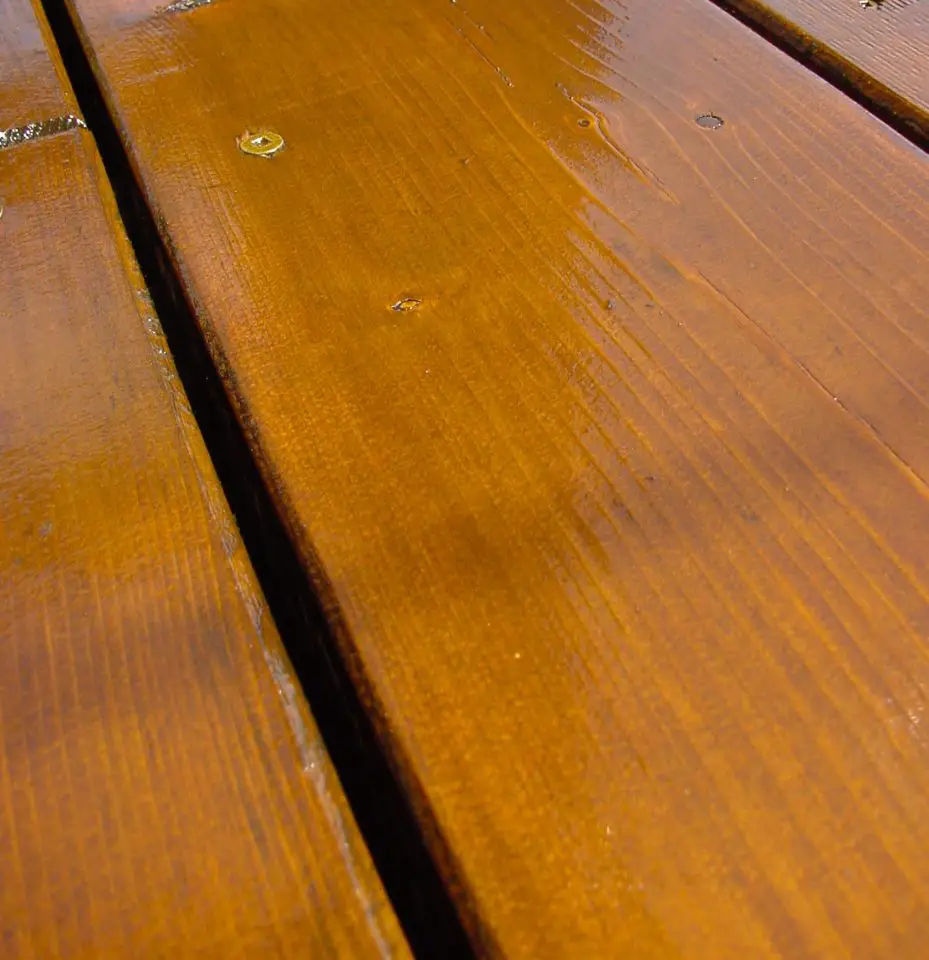
2) Transparent, Film-Forming Products: Beautiful, furniture-grade results, but requires lots of labour.
Independent consumer testing has also shown that certain brands in this category are amongst the most durable products you can buy. But that’s only true after mill-glaze has been completely removed before application. Without this step, premature peeling is almost certain. Also important is freedom from moist conditions. Oil-based, film forming products will fail prematurely if they get soaked often, say, from an in-ground sprinkler wetting a deck, or water splashing up on a dock. Some brands include warnings against use on decks closer than 2 feet to the ground, because of the moisture that wicks up from the soil. You’ll also promote peeling if you apply too many coats. Just enough to form a film is all you need. On the plus side, film-forming finishes are amongst the best at preventing surface cracking, and transparent formulations let lots of wood beauty show through, too.
3) No-Film Stains: Hide wood grain but don’t peel.
These economical products form no surface film, so they can’t peel, though some do rub off. Their opaque or semi-opaque colour means they also hide wood grain. Since they don’t shield wood under a protective layer, they can’t do a lot to prevent surface cracking, either. On the plus side, no-film stains are often the best choice for colouring old wood that has surface cracks too deep to sand out. If you just want to add some quick colour to an old, grey structure, no-film stains are often an excellent choice. Their thin consistency makes them one of the easiest things to apply to rough wood siding and cedar shingles.
4) Opaque, Film-Forming Products: Greatest durability, but completely hides wood grain.
These look like paint, but their greater resistance to abrasion means they’re better suited to high-traffic areas like decks, verandas and outdoor stairs. The same consumer testing that noted the durability of specific brands of transparent, film-forming finishes also laud some opaque, film-forming products. But be prepared to lose sight of wood grain in the bargain.
Outdoor Wood Finishing Reality#4: You Can Just Leave It Alone
Most people are surprised to learn that outdoor wood finishing is mostly about aesthetics, not structural durability. Your deck, fence or picnic table is going to last just as long whether you keep it coated or not. The difference (and it’s a big one for some people, including me ) is how wood looks over its working life. Natural weathering is often uneven and less than attractive, and this is why I regularly use a one-time wood finishing product called Ecowood Treatment at my place. I’ve written about it before, and you can see it in action in one of my videos below.
Outdoor Wood Reality#5: Design Has Biggest Impact on Rot Resistance
Rot is the real enemy of wood, and no finishing product will make outdoor resist rot longer. Rot springs from construction designs that create moisture-trapping areas on decks, fences and outdoor furniture. The fewer and smaller the wood-to-wood contact surfaces you have, the more rot-resistant your deck, gazebo or kids’ play centre will be. A consistent regime of surface finishing may prevent surface cracking of wood, but it can’t prevent rot where conditions exist to promote it. Just look at barns. Even where outer boards have never been painted (which is usually the case), the wood lasts for many decades because it’s allowed to dry quickly. Rot isn’t an issue.


I hope you found this content useful!
Your generous support helps me produce more practical, hands-on content that I hope you’ll find useful.
Steve Maxwell