DIY Installation An Option
What’s involved in installing a wood pellet stove as a heating appliance? If you’re wondering if you can do this job yourself, my short answer is “yes”, if you’re a handy person you certainly can. There’s a trick to it, though, and it comes down to one important detail that’s different than with wood stove installations.
We heated with a pellet stove at our house for many years before I installed an outdoor wood boiler and I can recommend pellet technology to anyone. Pellet stoves automatically feed compressed wood pellets into a combustion chamber where they’re burned along with a jet of fan-driven air. Except for a small puff of smoke that comes out of the flue pipe on start up outside, pellet stoves burn smokelessly.
Using a Pellet Stove
Before I installed an outdoor wood boiler at our place, we used a KOZI brand pellet stove at our place and it worked very well. I sold that stove to someone else and it worked perfected for them for years, too. My only complaint with pellet stoves is the fan noise. When you’re selecting a stove, be sure to ask about fan noise and listen for it on display models in the store. The constant sound can be annoying to some people, and top brands include design features that reduce the background whir of the internal fans in the stove. Enviro is one brand that has made special effort to reduce fan noise considerably. Friends of ours have enjoyed excellent results with their Harman pellet stove, too.
Chimney-Free Installation
One of the best things about pellet stoves is that they don’t need a chimney. Just extend the 3- or 4-inch, double-walled exhaust pipe outside through an exterior wall and you’re done. There are special technical restrictions depending on where you live (pipe mustn’t exhaust closer than 4-feet to a window, it mustn’t come out underneath a porch, among other things) so check out these local details before you decide on a location for your stove.
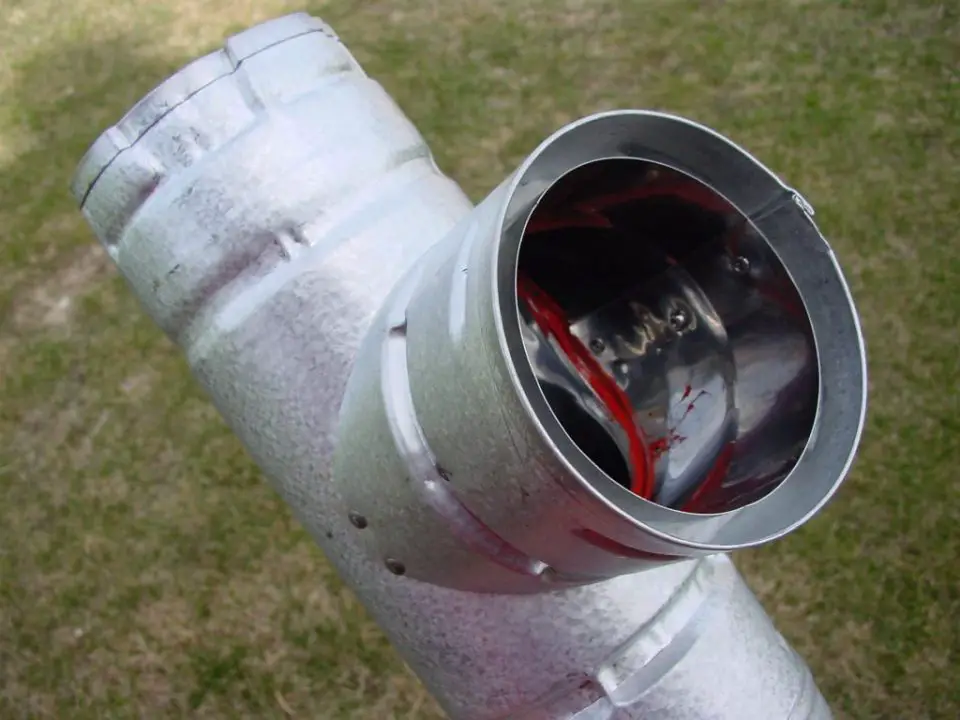
Unique Vent Pipe
During use the double-walled pellet stove flue pipe gets slightly too hot to touch near the stove, but not nearly as hot as the pipe on a conventional woodstove. But since the flue pipe can be put through a wall, you rarely need to have a long run. Your pipe probably won’t need to go through a second-storey living area, but if it does enclosing it would be best. You’re not required to have a specialist install a pellet stove, but it is slightly more complicated than installing a regular stove because of the kind of pipe involved and the way it goes together. Hire a licensed pro if you’re not experienced working with pipe and sheet metal.
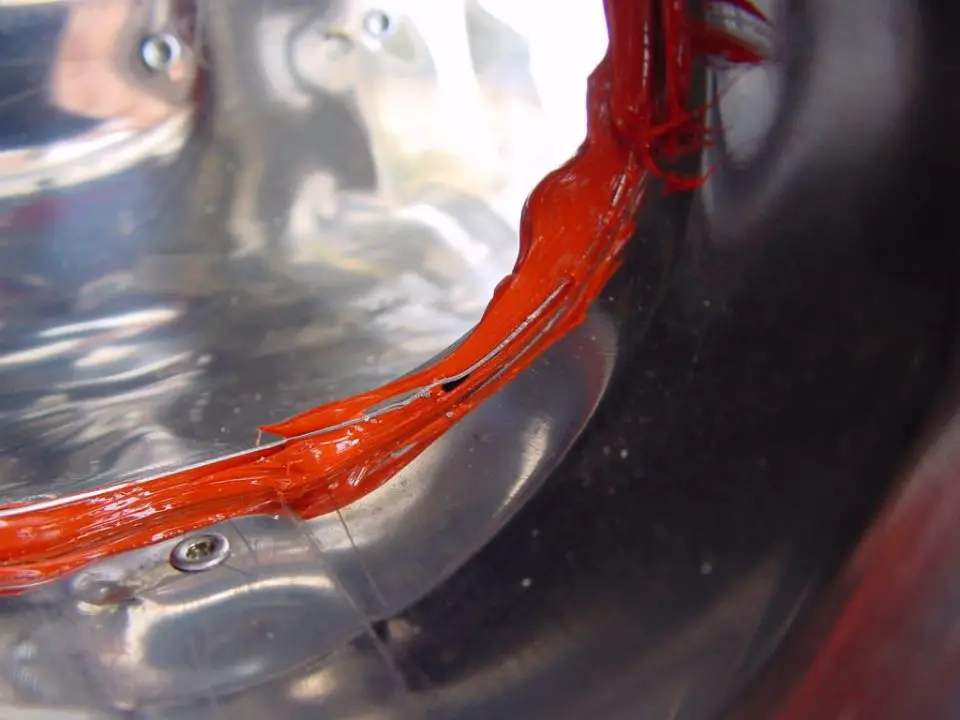
Positive Pressure Issue
The main thing to understand about installing a pellet stove is that the exhaust gases are expelled from the stove by being pushed out with a fan, not drawn out by the natural negative pressure draw of a chimney. Why does this matter? With positive pressure inside the pellet stove exhaust pipe, all joints must be sealed with high temperature silicone caulking as they go together. If there’s any break or gap in the seal, smoke will be pushed into your room instead of going outdoors. Sealing pipes sounds daunting, but it’s not really. Just buy the kind of pipe meant for use with wood pellet stoves, then put a generous bead of high-temperature silicone on the joints as they go together. You should also contact your insurance company to talk about your plans before hand. They may require an inspection after the stove is in place.


I hope you found this content useful!
Your generous support helps me produce more practical, hands-on content that I hope you’ll find useful.
Steve Maxwell