If glue could create a perfect bond between pieces of wood in all situations, there would be no need for anything other than simple butt joints. But since adhesives will probably never get that good, woodworkers everywhere have developed ways of using interlocking connections to help glue do a better job. And by far the most popular of these are something called rabbet and dado joints. This article explains options for making both these, with downloadable plans for my “dado engine” router jig further down.
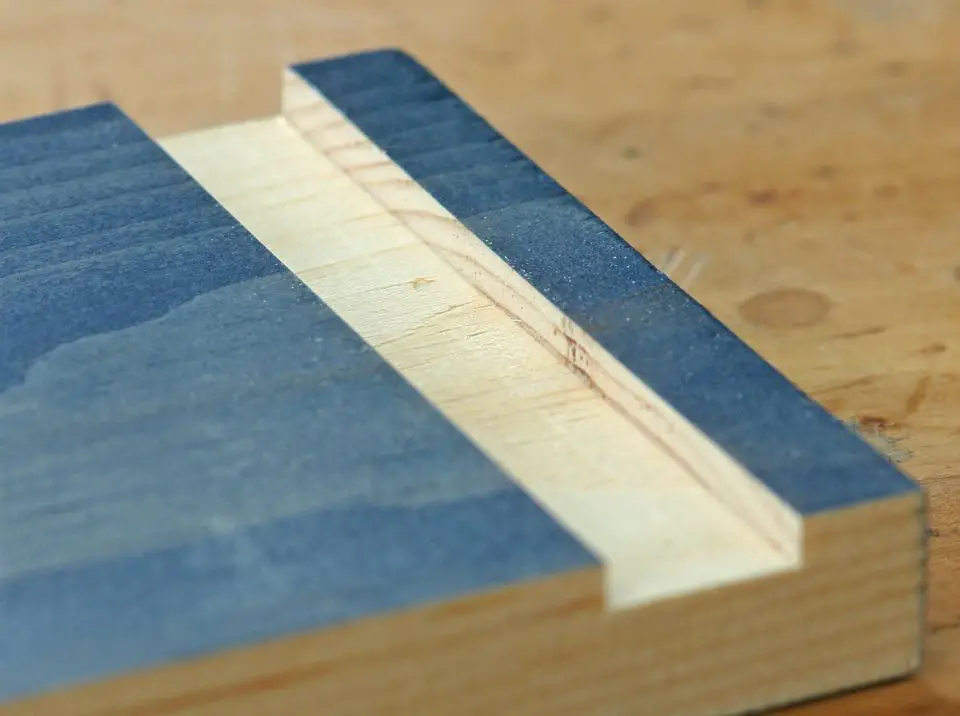
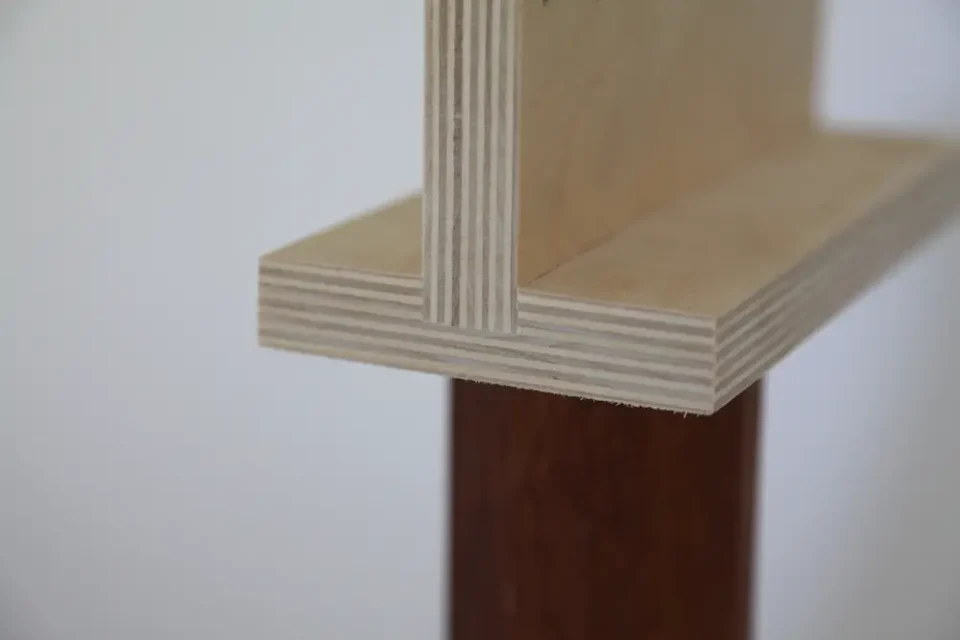
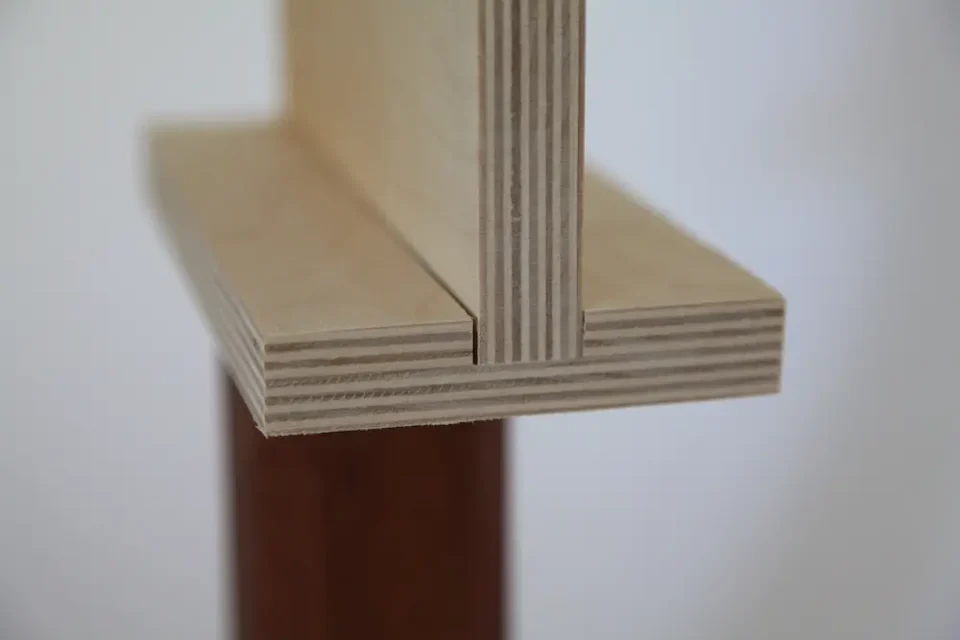
Behind these weird names you’ll find nothing more than simple grooves and interlocking parts. The dado has three sides, and the rabbet has two. Adjoining pieces of wood interlock with these grooves, substantially boosting the surface area of the joint and its load-bearing capacity. See both below.

The dado groove (top) has three sides and is being cut with a hand-held router following a guide. The rabbet groove (bottom), can be cut with a table-mounted router or a table saw.
Cutting Dados and Rabbets
But as simple as dados and rabbets seem to be, there are tricks to producing them accurately and efficiently. And the best approach depends on whether or not it makes sense to move the work piece over the tool or the other way around. Both the router and table saw are ideal for winning the dado-and-rabbet challenge. A hand-held router is best for cutting dados across the sides of a bookcase, cabinet or in any other situation where the work piece is too big or awkward to push over a table saw or router table.
On the other hand, a dado blade in a table saw is one of the best options for cutting dados and rabbets along the length of project parts, or across the width of wide ones. Stacked dado blades produce the most accurate results, as opposed to wobble blades, which are more versatile, but not as precise. That said, there is a danger you need to know about.
Safety Alert
One of the riskiest table saw situations arises when you try to cut a dado or rabbet groove on a table saw, and your work piece is too narrow to be properly supported by the fence. Don’t use a dado blade in any table saw operation where less than 12” of material is in contact with the fence; 18” of contact is best for parts longer than 24”. Ignore this advice and you invite a nasty kickback event. For narrower work, install your dado blade in a radial arm saw if possible. This saw is considered fairly dangerous, but for this operation it’s actually quite safe.
Solving the “Little Gap” Problem
One of the perennial problems with any dado groove is getting their width to match so-called standard thicknesses of plywood. Cut a dado groove with a 3/4” diameter router bit and you’ll almost certainly have a too-loose joint when you try to plug some 3/4” plywood in place. Under the guise of conversion to the Metric system, sheet material thicknesses have all shrank enough to cause problems with joinery if you rely on the old, Imperial thickness designations. And besides, material thickness varies enough from sheet to sheet that it can make a difference when it comes to prominent joinery. This is even true in the USA that still uses Imperial more or less exclusively. Sheet goods remain thinner than their name specifies in every case I’ve seen.
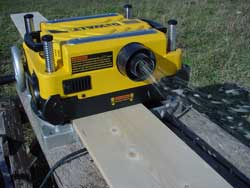
The Dado/Rabbet Engine
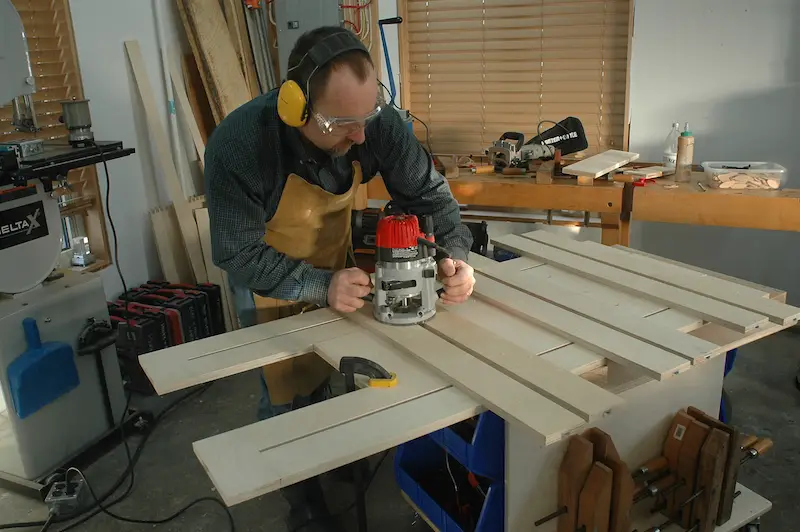
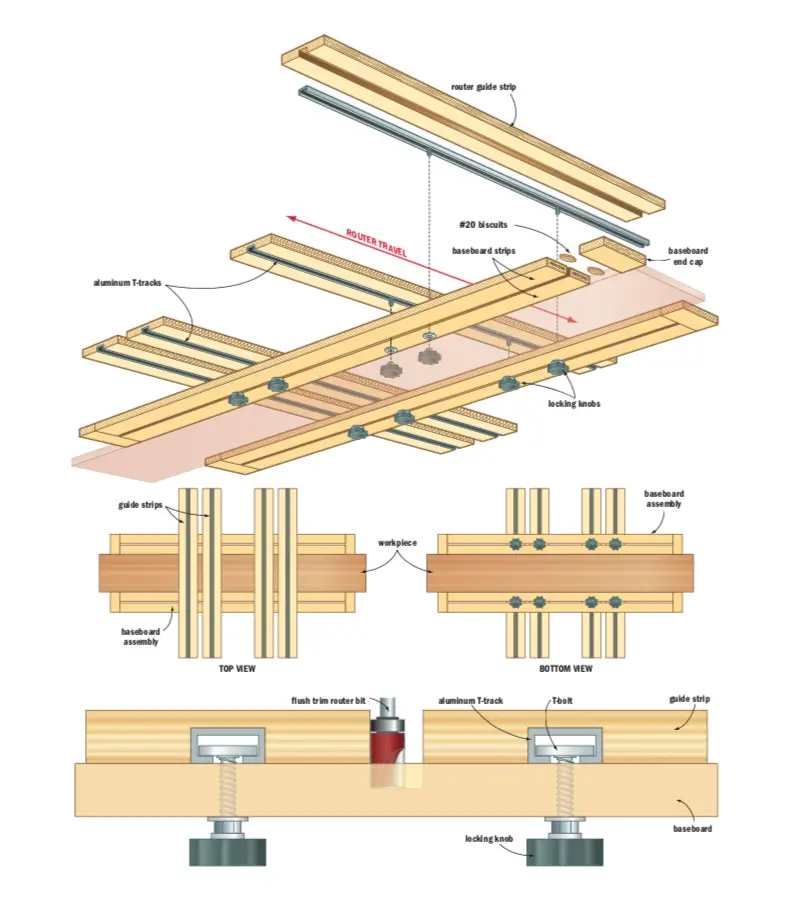
One excellent way to custom-cut accurate dados is in two passes is by using a hand-held router that runs inside a plywood jig clamped to your work piece. This is especially effective when making bookcases or cabinet sides and it’s what my dado engine does. You can see me using it above.
Do you see the strips with a narrow gap that the router is running between? Those strips can be locked any distance apart from each other. Set the “shelf” material you’re making dados for between the strips, then lock the strips the correct distance apart to guide the router. In this way the thickness of the shelf material determines the width of groove cut.
Like most things in the shop, even simple jobs like preparing rabbets and dados can be done with elegance, ease and safety. The trick is to take the right approach. And the instincts to make the right call are largely what skills are all about, and seeing them grow in yourself is at least as rewarding as the projects you build with them.
Click below to download free plans for building my Dado Engine jig. It lets you safely (and accurately!) rout dado grooves for cabinets and shelves with the perfect width of groove to match your sheet material.


I hope you found this content useful!
Your generous support helps me produce more practical, hands-on content that I hope you’ll find useful.
Steve Maxwell