Video Watch Time = 11 minutes
Table of Contents
- Video Tutorial
- Raised Grain Problems
- When to Sand
- Sandpaper to Use
- Power Sanding Between Coats
- Sanding Well
- Cleaning After Sanding
Sanding lightly between coats is the single most important step you need to take to achieve a smooth, interior wood finish. Watch my 11-minute video lesson below for all the details. Transcript after the video window for detailed study. Want more tips for creating a glass-smooth finish? Visit the most popular page on my website for a video lesson on buffing wood finishes to perfection. It even works with brush-applied finishes in a home work space.
Video Tutorial
VIDEO TRANSCRIPT: In this video, I want to explain to you the single most important step in successful interior wood finishing. Lots of the steps are important, of course, but if you miss this, you will never achieve an excellent finish.
Raised Grain Problems
Now, this is a piece of cherry that I showed you in a previous video. We coated this with water based urethane. Both sides were sanded. This side is uncoated. It’s very, very smooth, feels great, very inviting to the touch. This side used to feel that way, but it definitely does not feel that way now. That really doesn’t come across too much in the video but I wonder if you take a close look, maybe we can get in with the camera, take a close look. You can see some light shining off here. You can see that this is no longer smooth. That’s no surprise to you. I told you it wouldn’t be smooth because the wood fibers that were laying down soaked up some of the urethane and they stood up and then they hardened in the upright position. All microscopically of course, but that’s why it doesn’t feel so smooth and that’s why we need to do this vital step of sanding between coats.
When to Sand
The most important time you sand between coats is after the first coat has dried thoroughly, but you still should do it after every coat except the last coat. Even in that case, if you’re going to go on to buff the surface, then you’re going to want to sand that last coat too. But normally if you’re not buffing, we’re going to get to all that later. If you’re just going to apply a urethane finish, you’re going to brush a coat on. You’re going to sand between coats. You’re going to brush another coat on. You’re going to sand after that coat is dry and then probably put on a third coat and then just call it a day. That’s a very serviceable finish, nothing to be ashamed of there. It’s not as good as it can get, but it’s very good.
So the sanding between coats is a very light sanding and its job is definitely not to go through the finish that you’ve applied, but just to knock off those bumps. If you’ve chosen your urethane well, and if you’ve allowed that urethane to dry fully, then it’s a very quick job. Just one or two quick passes over any given spot and you’re done. You know you’re doing a good job when this sanding creates kind of a white powder, which I’ll show you in a second.
Sandpaper to Use
As far as sandpaper goes, it’s got to be fine. So this is P 220, so that’s 220 grit sandpaper, which means on any given square inch on here, there should be about 220 particles. So the bigger the number, the smaller the particles, because it’s all fitting into one square inch. So that’s what that means and 220 is as coarse as you’d want to use. Sometimes you’ll see 240, pretty much the same as 220. You can’t really tell the difference. You’ll also find 320, which works pretty well. It gets a little bit… It wears out a little bit too fast for my liking. So I go with 220 or 240.
There’s two ways you can actually sand the wood. First of all, you can take a quarter sheet of sandpaper like this and you can fold it in thirds along its length. That makes for a really nice handy piece of sandpaper to sand with, because we’ve got the surface here that we’re going to sand with. The other surface is also rough. So my hand’s not going to slip on the paper like it might if I was trying to sand this way with my hand against the actual paper. So I get traction, I get a nice shape and I can flip it. I can refold it to expose fresh surfaces. So I’m going to use this whole quarter sheet of sandpaper. Before I throw it out it’s going to be completely used up.
Power Sanding Between Coats
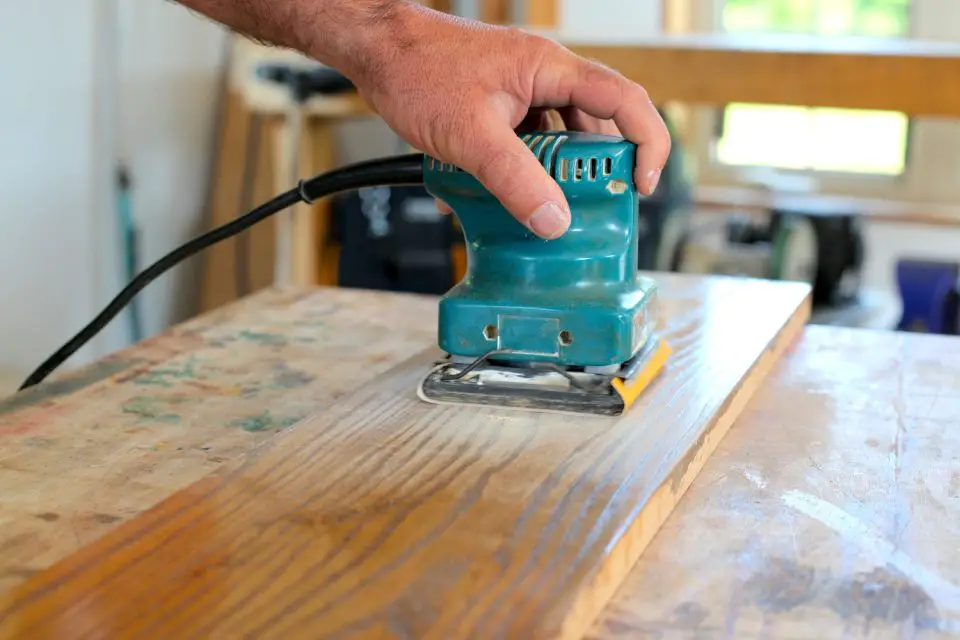
This is a small piece of wood, so there’s really no need to use a power tool, but a finishing sander like this is very useful for most real world projects. I mean, this is just a sample, but if you’re building a cabinet or a table or anything like that, then a quarter sheet finishing sander is going to save you a lot of time and it’s going to help you to do a better job. Do not use a random orbit sander or anything like that. Way, way too aggressive. You’re going to go right through your finish and you’re basically going to go back to square one again, because you would’ve removed pretty much all the urethane you put on. This is much gentler. It just vibrates a little bit. That’s all it does. So it is one of the mildest power sanders you can use.
In both cases though, so whether I’m sanding by hand with a quarter of a sheet of paper or I take this quarter sheet and I put it on this sander, in both cases, I need to have a quarter sheet. This is a full sheet of sandpaper. This is the way it comes when you buy it eight and a half by 11 in size, just like a regular sheet of paper. But you shouldn’t use scissors to cut this into quarters. I mean, it’s unnecessary. You got to find the scissors, you got to use the scissors and it also dulls the scissors. But if you just fold it in half like I’ve shown you here and then you take a sharp edge, any kind of a sharp edge. It doesn’t matter, a table or machine or just a scrap of wood like this, and you just put it over. That sharp edge is going to do a really nice job of tearing that for you. It’s good. You can double up. When you have the two halves you can… There you go. You’re all set for a while.
The actual sanding, it’s not difficult to do this well, but there are a few pitfalls that I want to warn you about. So unlike when I was coating this where I really benefited from light coming in at a shallow angle so I could see where I coated and where I hadn’t coated, that’s not so important for sanding between coats. Because well, as you’ll see, you can really see where you sanded. That’s it. All of a sudden that’s gone from quite rough to amazingly smooth. Really, really smooth, and look at how that’s powdered up. That’s exactly what you want to see.
Sanding Well
Bad quality urethane never gets dry enough so that it will form powder like this. It’ll get kind of gummy and it’ll leave little streaks of gumminess on the sandpaper. You don’t want to see that. That can be caused if urethane hasn’t been allowed to dry long enough. But more often than not it’s because the urethane it isn’t that good quality. The urethanes that I’m recommending here never do that. So you don’t have to worry.
I’m going to use this next and really there’s no need for me to use it here, but I’m just going to show you how it works. Just to mention again how useful it is on larger surfaces. Oh, that’s it. If this was a piece of furniture and say I had finished an edge somewhere, I wouldn’t use the quarter sheet finishing sander on the edge even if I had a lot of edges to do, just because it’s so easy for the sander to tip to one side maybe, go right through the finish. Round over the corner that shouldn’t be rounded for instance. So whenever I have edges or any narrow surfaces, I’m going to do it by hand.
Now this is not a sanded surface. It’s not a finished surface, but this is the way I would do it. Just holding it like this with my thumb, applying some pressure and that’s just about all it’s going to take. Now, the next major step here is to put on another coat of urethane and I’ll show you about that later. But before we do that, I think you can imagine that we need to make this perfectly clean. I could go at this with a tack rag. A tack rag is just kind of a sticky rag that’s sold for preparing surfaces before finishing. It’s often used in the auto industry. I don’t really like tack rags though when I have vacuum at my disposal.
Cleaning After Sanding
So here in my workshop, I have a central vac. Use it mostly for preparing for finishes actually, but you can use a regular household vac, a ShopVac. It doesn’t matter. You just want to put a bristle brush on it and watch what happens here when I suck up all this dust. Now that is ready to go. That’s ready to go for our second coat. Beautifully smooth and inviting to the touch. That’s going to get even better once we get the second coat on and we start to work that down a little bit too.
But sanding between coats, absolutely vital for any kind of a film forming urethane finish. I also happen to use it on wipe on poly finishes, which don’t really form a film to the same extent, but they do cause the surface fibers to rise up and get kind of fuzzy and hardened. So sanding between coats, it’s the wood finisher’s best friend. I almost forgot one thing. When you’re sanding small things like this between coats, it’s always a good idea to do it on some sort of a resilient surface. So that’s why I have this piece of foam here. You can see it’s kind of high mileage foam. I’ve used it for a lot of jobs where I don’t want the surface I’m working on to mar my wood. If we were working on a free standing cabinet or something like that, sanding between coats there, well, this wouldn’t make any sense because the thing’s standing in midair and we’re working it that way.
But it’s not unusual if you’re making a shelf, finishing a shelf, say, or some smaller wooded item that both sides of something need to be smooth and presentable. Just the sanding I had done just now, if I had done it on this wood surface here, well, I guarantee you that the underside of the wood would’ve been marred because there’s just glue bumps here and all kinds of things. But the foam side steps all that because it’s got a little bit of give to it. You don’t necessarily need to use a piece of foam. Three or four layers of a blanket folded on itself, an old shop blanket something that you don’t mind getting dirty and dusty that works too. But just remember that when you’re sanding, and this applies to sanding between coats or even standing wood for the first time before you even get to the finishing process, you want some sort of resilient surface that’s clean and smooth with no bumps on it. It’s not going to cause any damage to the wood.
Taking this precaution is especially important when I’m sanding with an electric sander, that’s imparting a kind of a vibration to the wood. If that vibration is coupled with something hard underneath a little bump or nub or something, then that’s definitely going to mar the wood. An old piece of carpet, that’s another great idea. Just anything soft to keep this protected, especially if you’re using electric sanders.


