If you’re planning to build a deck, gazebo, swing set or any other outdoor wooden project this spring, you may be headed for grief without even realizing it. I know because I’ve experienced plenty of heartache learning how to avoid deterioration the hard way. Finishes that don’t last, joints that fall apart, and corrosion-stained surfaces are all common and disappointing fates that afflict many outdoor wood projects. Common, yes, but not inevitable – at least not if you follow my field-proven design and construction tips.
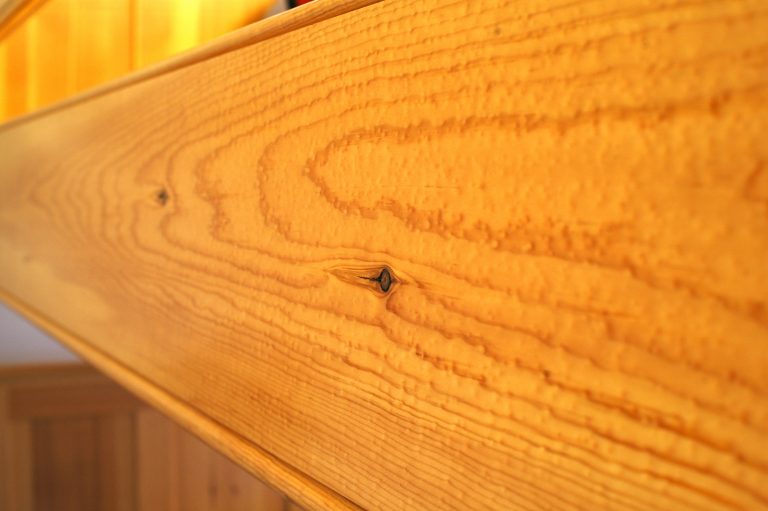
- Tip #1: Stay Dark and Dry: Moisture and sunlight are enemies of wood, and dealing with them successfully begins at the beginning. This is why cedar is a premium choice for outdoor projects. It’s rot resistant and long-lasting, but cedar also has weaknesses. It’s particularly soft and this has implications for how you build.
- Tip #2: Remain Round: Cedar dents easily, and that’s one reason it makes sense to round corners with a router. Square edges also don’t hold a finish as well as rounded or angled ones, and a failing finish on corners will spread deterioration to surrounding areas.
- Tip #3: Wide Wood Screws: Large diameter wood screws – I prefer #10 – work best with cedar because the wood’s so soft. But even these should always be supplemented with a weatherproof glue, and not just for strength.
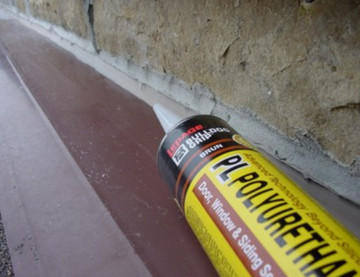
- Tip #4: Get the Good Glue: Ordinary wood glues – even those rated as water-resistant – go mushy during damp, outdoor weather. That’s why glue manufacturers offer type II and type III wood glues. These are third-party designations set out by the American National Standards Institute (ANSI) and ensure that glue joints remain strong, even after weeks of wet weather. Use only glue with either of these designation on outdoor projects. Adding glue to all screwed, nailed and bolted joints on your outdoor furniture makes the overall project much more rigid. But glue also makes it longer-lasting because of its effect sealing out water.
- Tip #5: Glue to Keep Bugs at Bay: All this has an influence on how glue should be applied to outdoor projects. Aim for full coverage of the joint area – not just a few dabs here and there. Also, as you design outdoor furniture, eliminate as many small gaps between parts as you can. In many areas of Canada these spaces offer an open invitation to insect pests that leave behind mounds of tiny, hard, black droppings that hold water and promote rapid rotting because of the nutrients they contain. Besides, who wants to sit on a lawn chair loaded with bug manure?
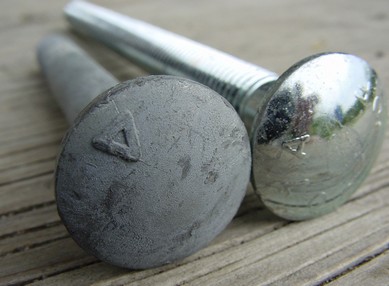 Tip #6: First Choice Fasteners: Fastener choice is another key issue. Although most screws and nails are coated with some kind of silver, golden or green material that implies corrosion resistance, few metal fasteners successfully resists both corrosion and staining long-term. This fact is why I’m a big fan of stainless steel screws and nails. These used to be almost impossible to find, but not now. Screws, finishing nails and even framing nails are all widely available in corrosion proof stainless. For outdoor furniture joints that require larger fasteners, choose hot dipped galvanized carriage bolts. These have a mottled, dull gray surface that performs almost as well as stainless steel. Whatever you do, be sure to avoid shiny silver electroplated bolts, nuts and washers. These are more common than hot dipped galvanized, and they cost less, though they also corrode and stain wood with surprising speed. Attention to fastener composition is especially important if you’re using pressure-treated lumber. The preservative chemicals make this material many times more corrosive than untreated wood.
Do all these details seem like overkill? I used to think so. Now I know better and all my outdoor projects age more gracefully. Are you planning a deck? Check out my video tutorial on deck design features that can double the life of your new deck.


I hope you found this content useful!
Your generous support helps me produce more practical, hands-on content that I hope you’ll find useful.
Steve Maxwell