Despite the fact that caulking formulations have never been better, real-world caulking performance hasn’t kept pace with this increased potential. Caulking still has a well-deserved reputation for being a goopy, stop-gap product that never lasts as long as lifespan ratings promise. This is especially true of caulking used in exterior situations, though it doesn’t have to be this way. The challenge with caulking is understanding crucial details that are not obvious. That’s what you’ll get here.
Caulking can be counted upon for the long haul if it’s chosen well and applied correctly. But success depends on more than just snipping the end of a tube and squeezing the caulking gun trigger until your hand hurts. You’ve got to understand a few things that aren’t obvious, and make allowances for what this understanding reveals.
Although there is a technical distinction between the words caulking and sealant, the terms are used almost interchangeably in the trade. So, to keep things simple, I’ll use the word “caulking” exclusively for all gunnable sealing products that come from a caulking tube and are designed to fill building gaps and cracks. No point in getting unnecessarily complicated.
Why Caulking Fails
Think about the exterior caulking jobs you’ve seen over the years. How many are still keeping water out 5, 3 or even 2 years after application? Probably no more than half do what they’re supposed to do for the long haul, and this means premature failure of building envelopes as water seeps into places where it shouldn’t be. Regardless of the product involved, the cause of exterior caulking failure is almost always the same: poorly managed expansion/contraction issues. Caulking manufacturers have remained almost completely silent on this at the retail level, though you have to wonder why since lack of understanding makes so many caulking installations fail. Maybe they think the public isn’t prepared to sit still long enough to appreciate the subtleties involved. Maybe caulking performance doesn’t have enough to do with sales. Whatever the reason, it’s the same old story. If you want top-notch results, you have to educate yourself beyond common knowledge and see that things are done correctly.
If every caulkable joint were completely stable all the time, then successful exterior caulking installation really would be as simple as it seems. But that’s not the case. Caulkable joints, especially exterior ones, almost always expand and contract substantially with changes in temperature (and sometimes humidity), especially where different materials flank the joint. And unless you make allowances for this inevitable movement, even the most flexible caulking products on the market will fail.
The first thing to understand in your quest for reliable caulking performance is also the strangest. The narrower the caulkable gap, the more difficult it is to get a long-lasting seal. Wider really is better, up to a point. Here’s why.
Let’s say you fill a 3/32-inch-wide gap between a wooden door frame and the surrounding bricks with polyurethane caulking. Even though this is one of the most flexible products on the market — able to expand and contract as much as 50% from its cured size without cracking apart — the joint will almost certainly fail in short order. The reason is that this 3/32-inch gap could easily get as large as 3/16-inch wide as the wood and brick move away from each other. The gap could also shrink to less than 1/16-inch during hot, humid weather when both the brick and wood expand. This amounts to a percentage change in joint width approaching 100% — way beyond what even great caulkings can handle. But the picture changes substantially if you start with, say, a 3/8-inch wide gap between brick and wood. In this case, the amount of absolute movement of materials on each side of the joint stays the same — about 3/32-inch either way. But as a percentage of the total width of the larger, 3/8-inch caulking bead, 3/32-inch now represents only 25% — well within specs for premium formulations like polyurethane and silicone. Crazy as it sounds, the wider the gap the easier it is for caulking to last as long as its supposed to (within reason, of course).
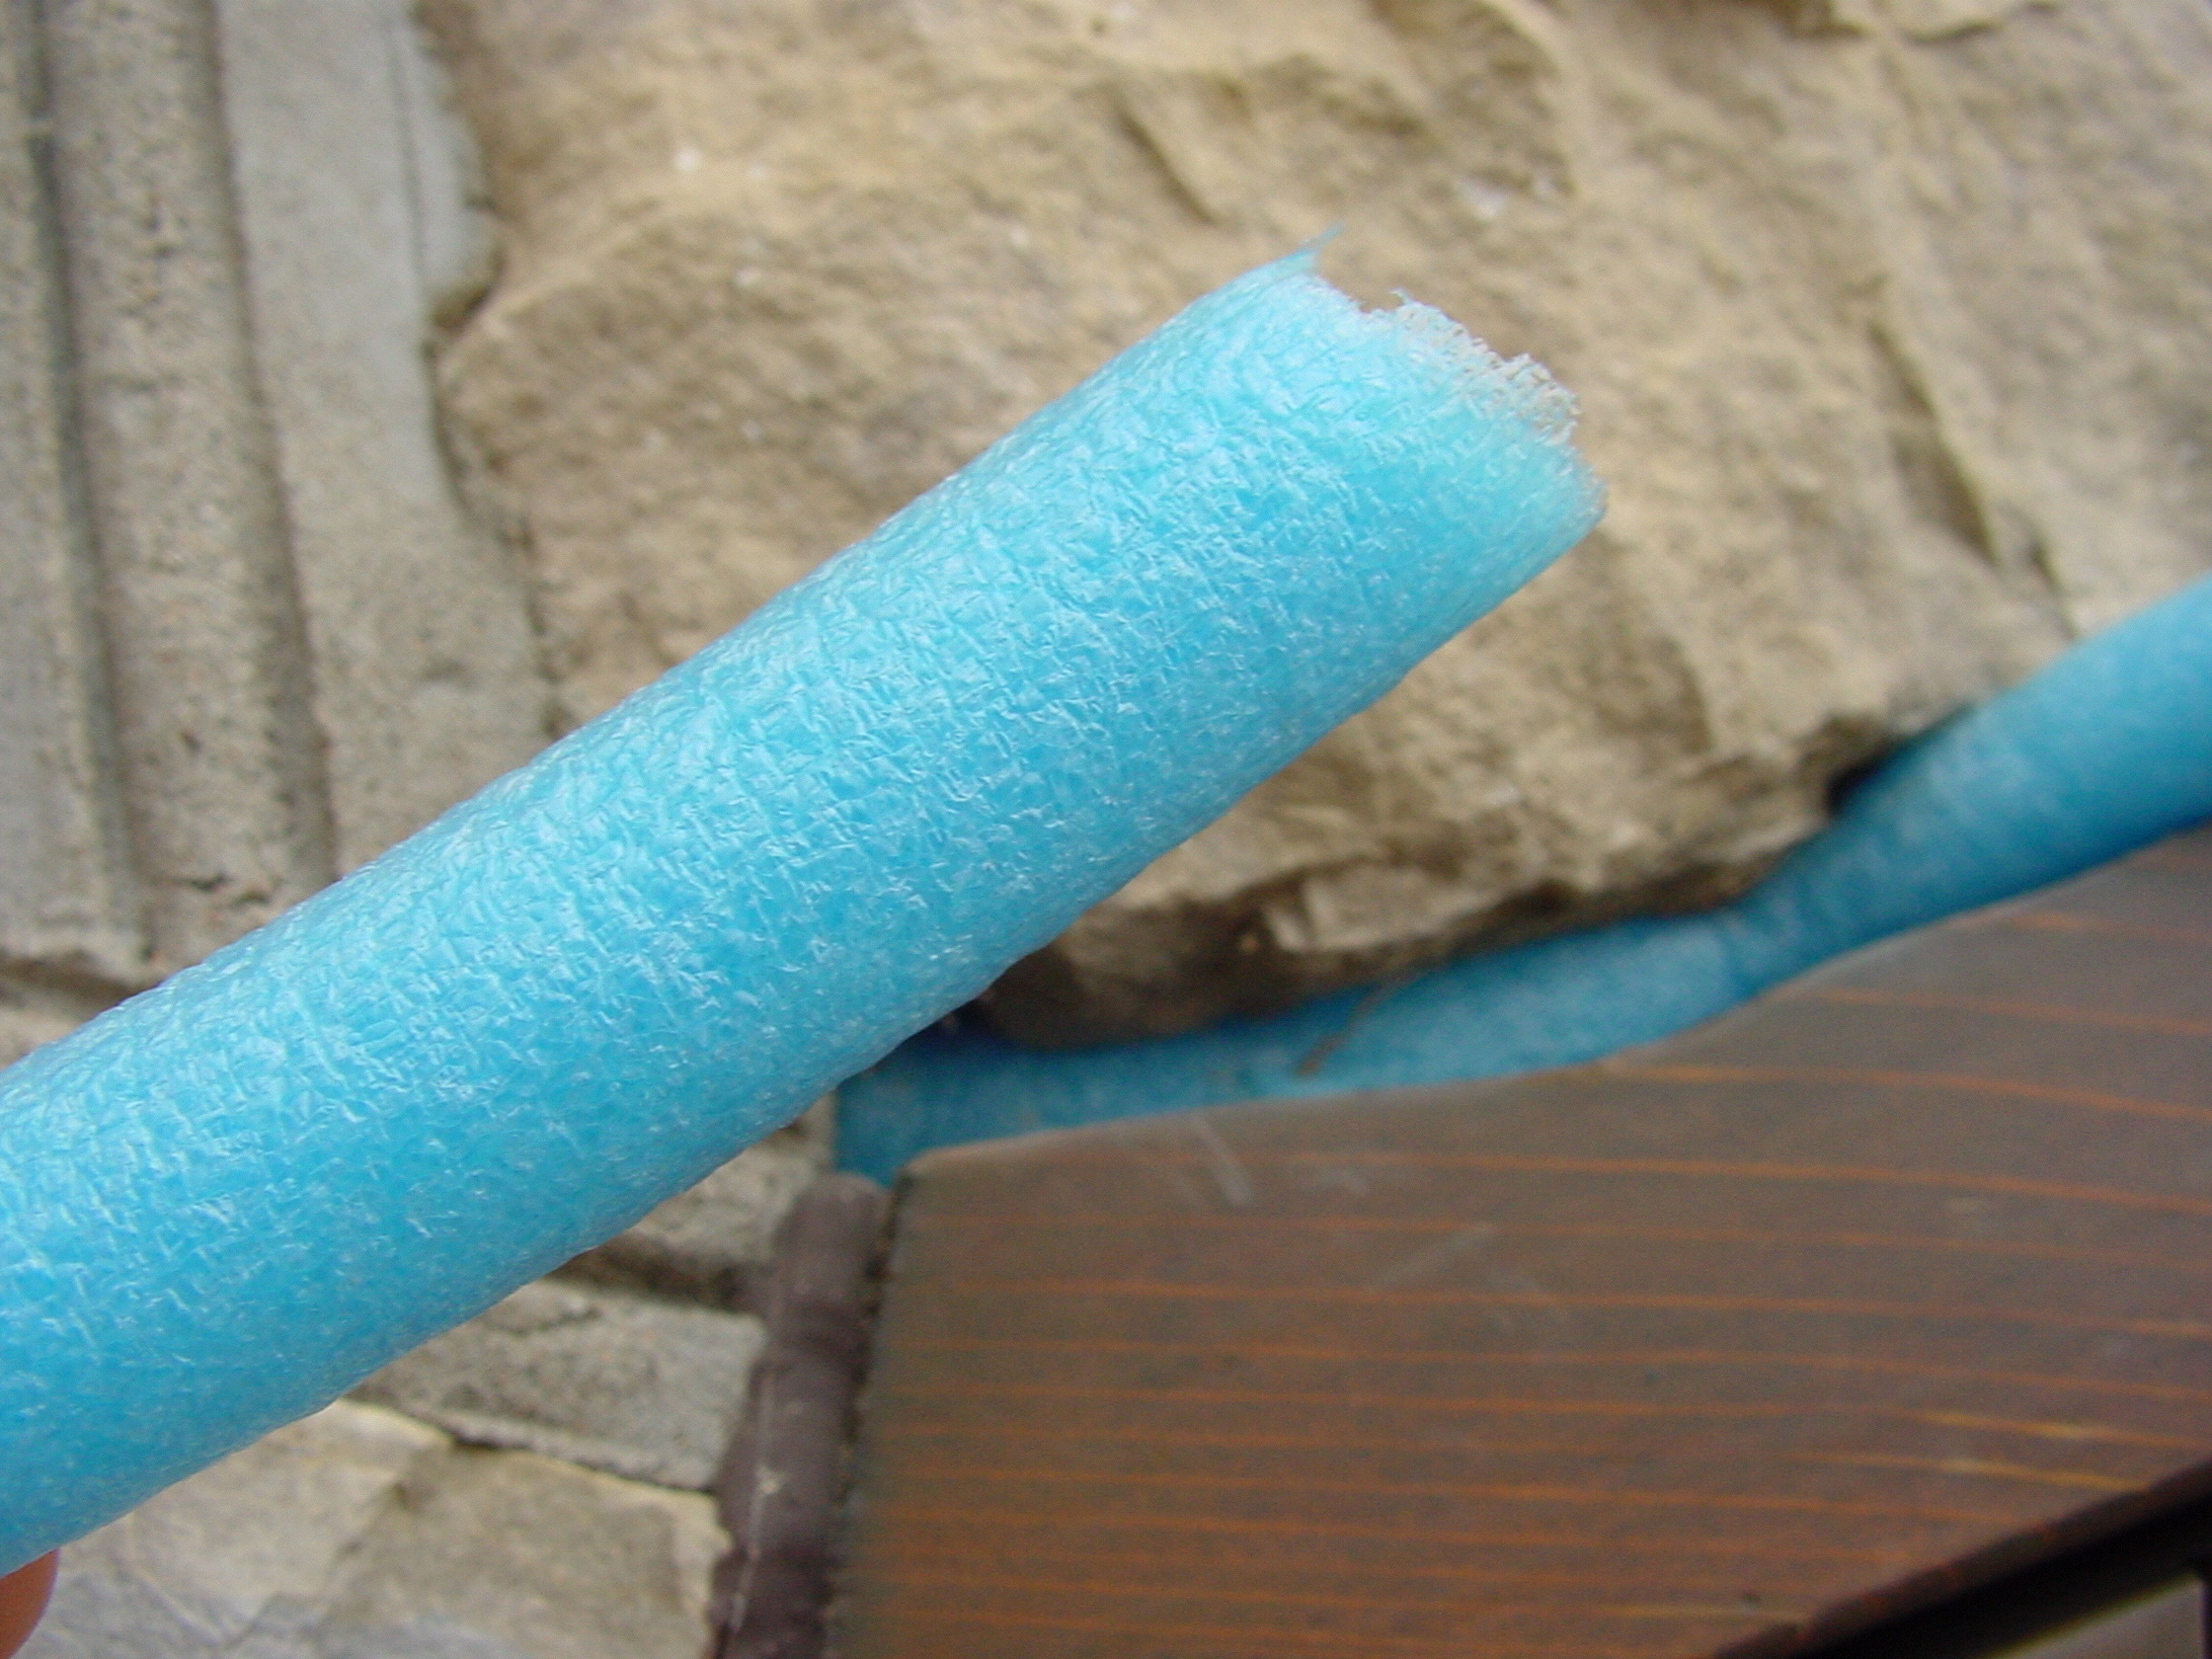
Backer Rod is Key
Although wide joints are good because they don’t overload the elasticity of caulking, they can also gobble up caulking way too fast if they’re too deep, as they often are. That’s why there’s something called backer rod. That’s what you see above. These lengths of flexible foam — usually cylindrical in cross-section — are designed to be stuffed into gaps before caulking is applied. You’ll typically find backer rod in diameters ranging from 1/4-inch to 7/8-inch, though it does get as large as 4 inches in diameter. Uncompressed backer rod should be 25% larger than the gap it fills (or the next size up), and stuffed far enough in so the depth of the gap is half of its width, down to a minimum of 1/4-inch deep and a maximum of 1/2-inch deep. Why the depth limitations? Besides reducing the amount of caulking you’ll use, limiting caulking depth with backer rod has to do with flexibility again. When the depth of a bead of caulking exceeds its width, it becomes more difficult for the product to stretch as much as it’s rated to without pulling away from the sides of the joint area. Too deep is not good.
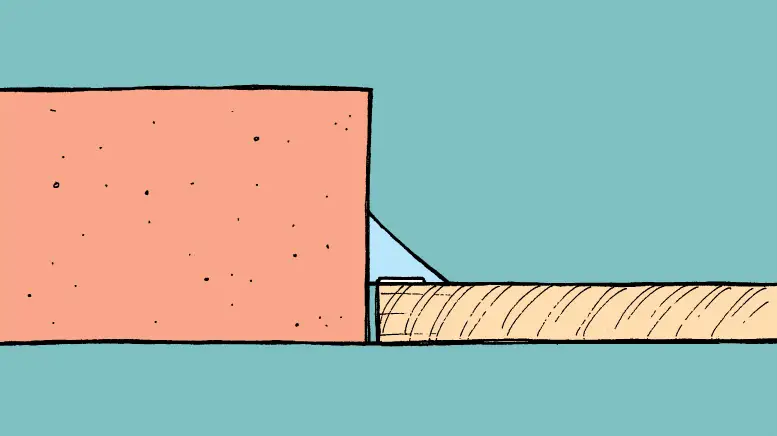
This is all fine, as far as it goes, but how often do you have the luxury of determining the width of joint you need to caulk? Not often enough. That’s why the people wearing white lab coats invented something called bond breaker tape. This self-sticking tape, often made of polyethylene, is applied over or across under-width joints. The purpose of a bond breaker is to prevent adhesion of caulking in a specific area. In the case shown in the illustration below, this spreads the joint movement over a wider area of caulking, resulting in a less crack-prone joint. Electrical tape is a pretty good substitute for proper bond breaker tape. You can see bond breaker tape in action in the illustration below.
Beware the Three-Way Bond
This is another thing that can short-circuit the ability of caulking to ride out expansion and contraction cycles. When caulking is installed so it sticks to both sides of a groove and to the bottom — called a three-way bond — the resiliency of the caulking is greatly reduced. Adhesion at the bottom of the groove prevents full elasticity by impeding the ability of the cured caulking to get thinner as it stretches with increased gap width. When this happens, something has to give, and it’s usually the bond between the caulking and the side of the gap being filled.
Using backer rod or bond breaker tape is the best way to prevent a three-way bond. The main thing is that the bottom of a caulkable gap should never be touched by caulking. If the gap is deeper than 1/4-inch, or half the width of the gap, then backer rod should be stuffed into place before caulking application. This both breaks any potential bond, and fills excess gap depth. But if the gap is no deeper than necessary, bond breaker tape should be installed along the bottom. It takes up almost no space, yet prevents bond formation where it would be detrimental. You can see backer rod in action below.

All this sounds like a lot of trouble doesn’t it? There’s only one thing worse than the hassle of caulking well, and that’s the hassle of having to caulk and re-caulk with futile blobs of ineffectual goop. Why bother with that when you don’t have to?
Caulking Choices
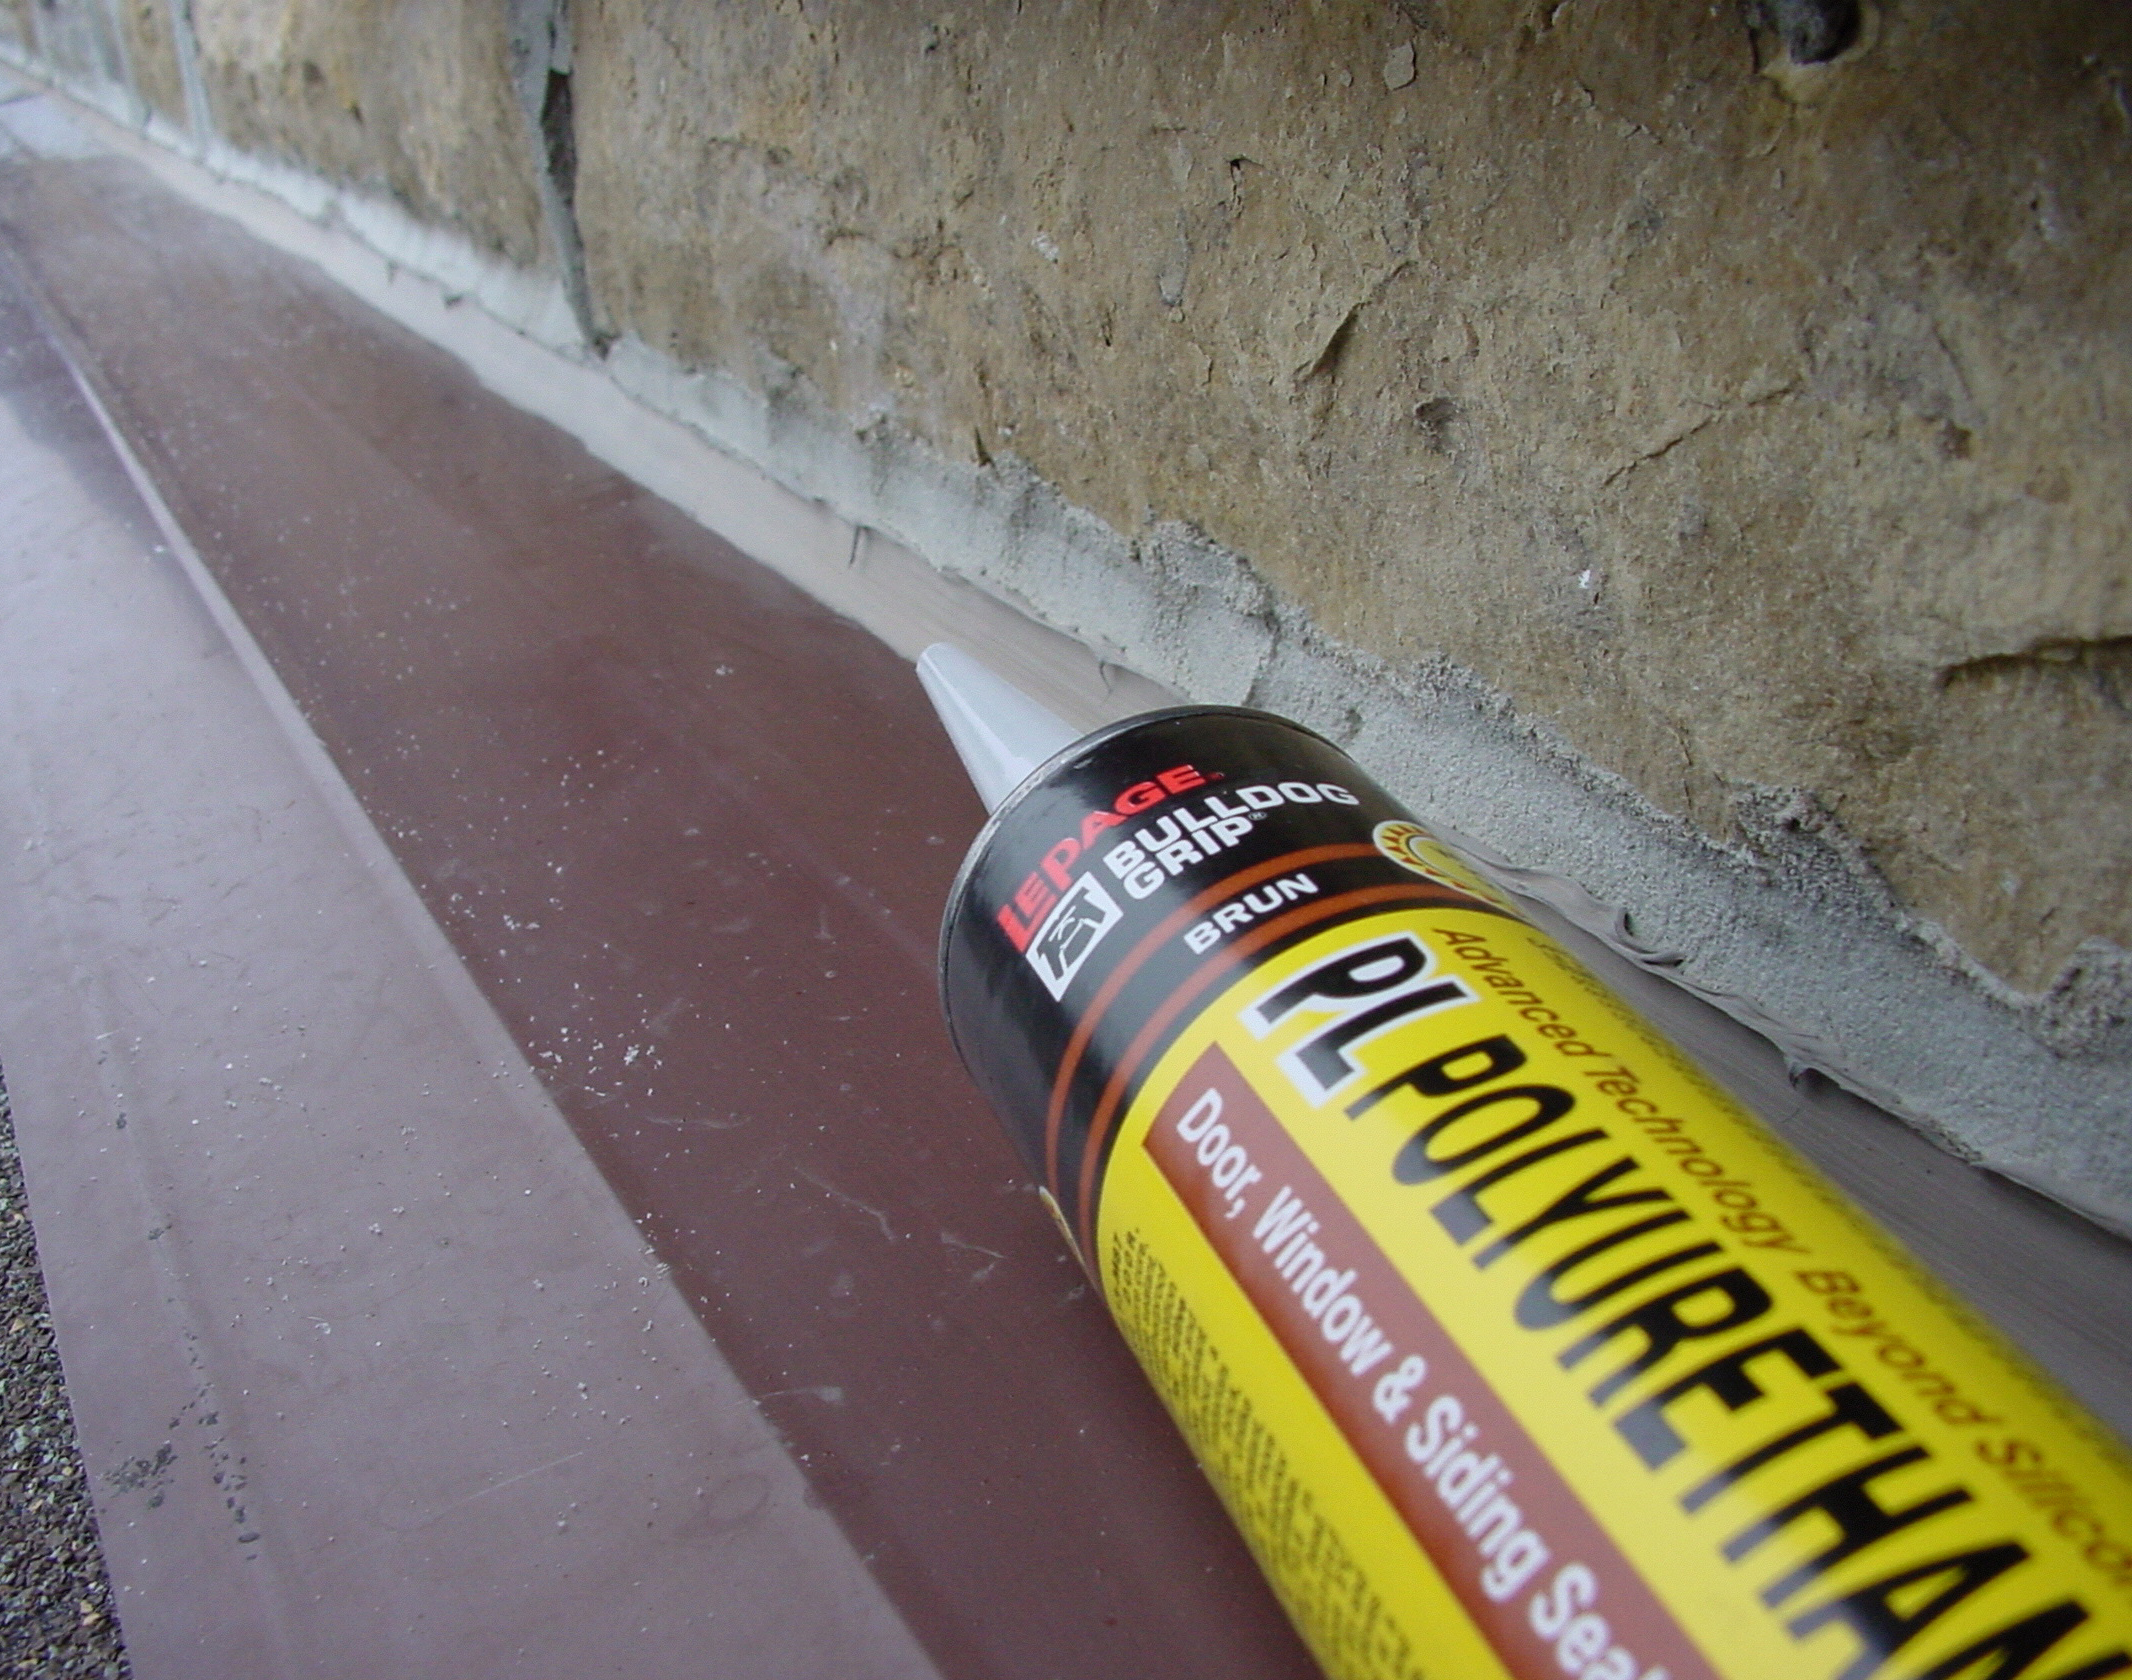
If you’re interested in quality, there are two main choices to consider when it comes to exterior caulking: polyurethane and silicone. And of these two, polyurethane is my favourite because it does many things well. Besides retaining a high degree of permanent flexibility, polyurethane caulking sticks to everything, and is completely paintable with both latex and alkyd coatings. It’s not as UV resistant as silicone, and it doesn’t retain its flexibility over as wide a temperature range, but these are minor concerns, all things considered. Although there are other exterior caulking products on the market (such as acrylic latex, butyl and mastics), low cost is their only advantage over silicone and polyurethane. And when you consider the time and trouble of applying caulking properly, cost-per-tube is pretty insignificant.
For reasons that make no sense, polyurethane caulking is harder to find now then when I first discovered more than 25 years ago. Your local building supplier might carry it, but I usually buy mine online. Sikaflex is currently the leading name in polyurethane caulkings as far as I’ve discovered.

Caulking Tools and Techniques
To be fully successful, caulked joints need to be both durable and good looking. You’re marked on neatness in this class. Although you’ll find all kinds of tools for applying caulking well, it’s hard to beat the cheapest and simplest: a roll of masking tape and a plastic spoon or length of PVC pipe. Lay down a strip of tape on each side of the joint, inject a bead of caulking into the gap, then tool the bead within 5 minutes. Peel the tape up (taking excess caulking with it) and everyone will think you’re a pro. Tooling makes the joint look neater, and improves adhesion by forcing caulking into the surrounding surfaces. If a spoon proves to wide for some applications, try a short length of dowel or piece of pipe.

The video below shows how to use masking tape to make very neat caulking joints. This video comes from my online course Patching Walls Like a Pro – the definitive guide to preparing interior walls for painting. The caulking section appears partway through the video.


I hope you found this content useful!
Your generous support helps me produce more practical, hands-on content that I hope you’ll find useful.
Steve Maxwell